
Coinbase is where many people take their first steps into crypto. It’s simple, familiar, and gets the job done when it comes to basic trading. But here’s the thing—Coinbase is just the beginning.
Connecting your Coinbase account to Jellydator opens up a world of powerful tools that take your trading to the next level. You can analyze advanced indicators, track real-time social sentiment, and tap into unique data sources—all in a platform built for everyday users. Jellydator gives you the edge you need, without any extra hassle.
In this guide, we’ll show you how to connect your Coinbase account to Jellydator in just a few simple steps.
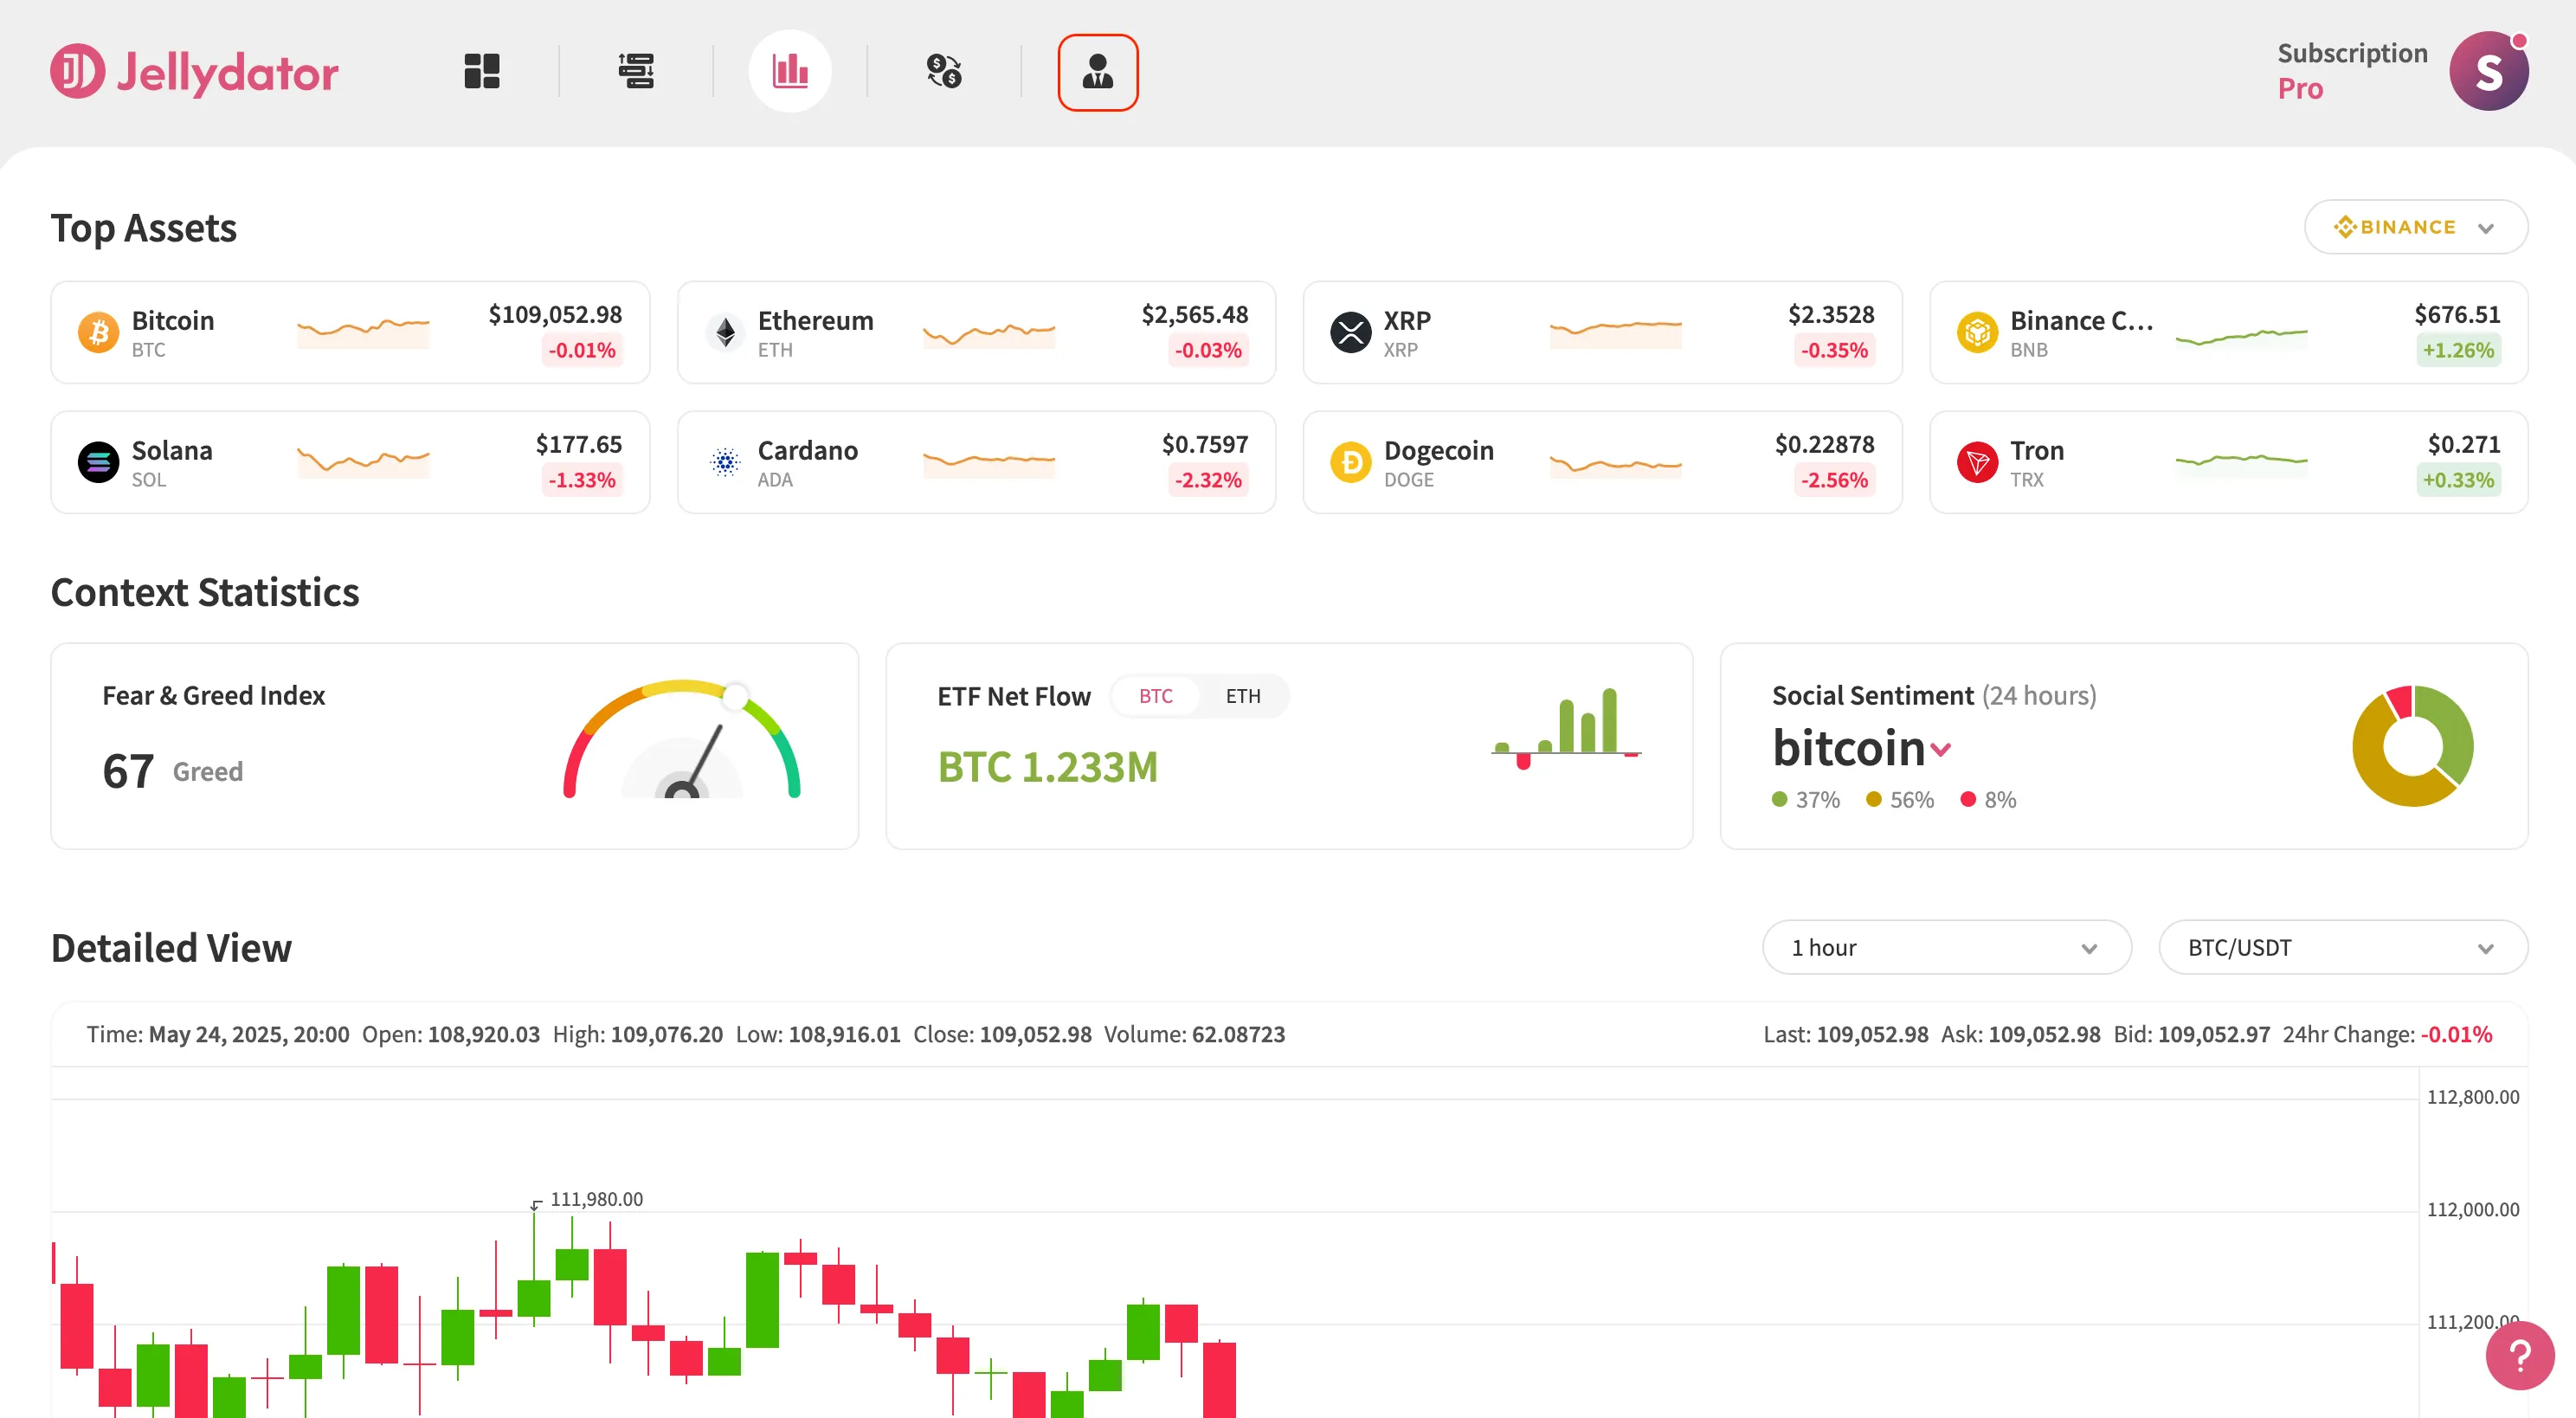
Step 1: Navigate to the Jellydator Account Page
Start by heading to your Jellydator account page. This is where you’ll manage all your exchange connections.
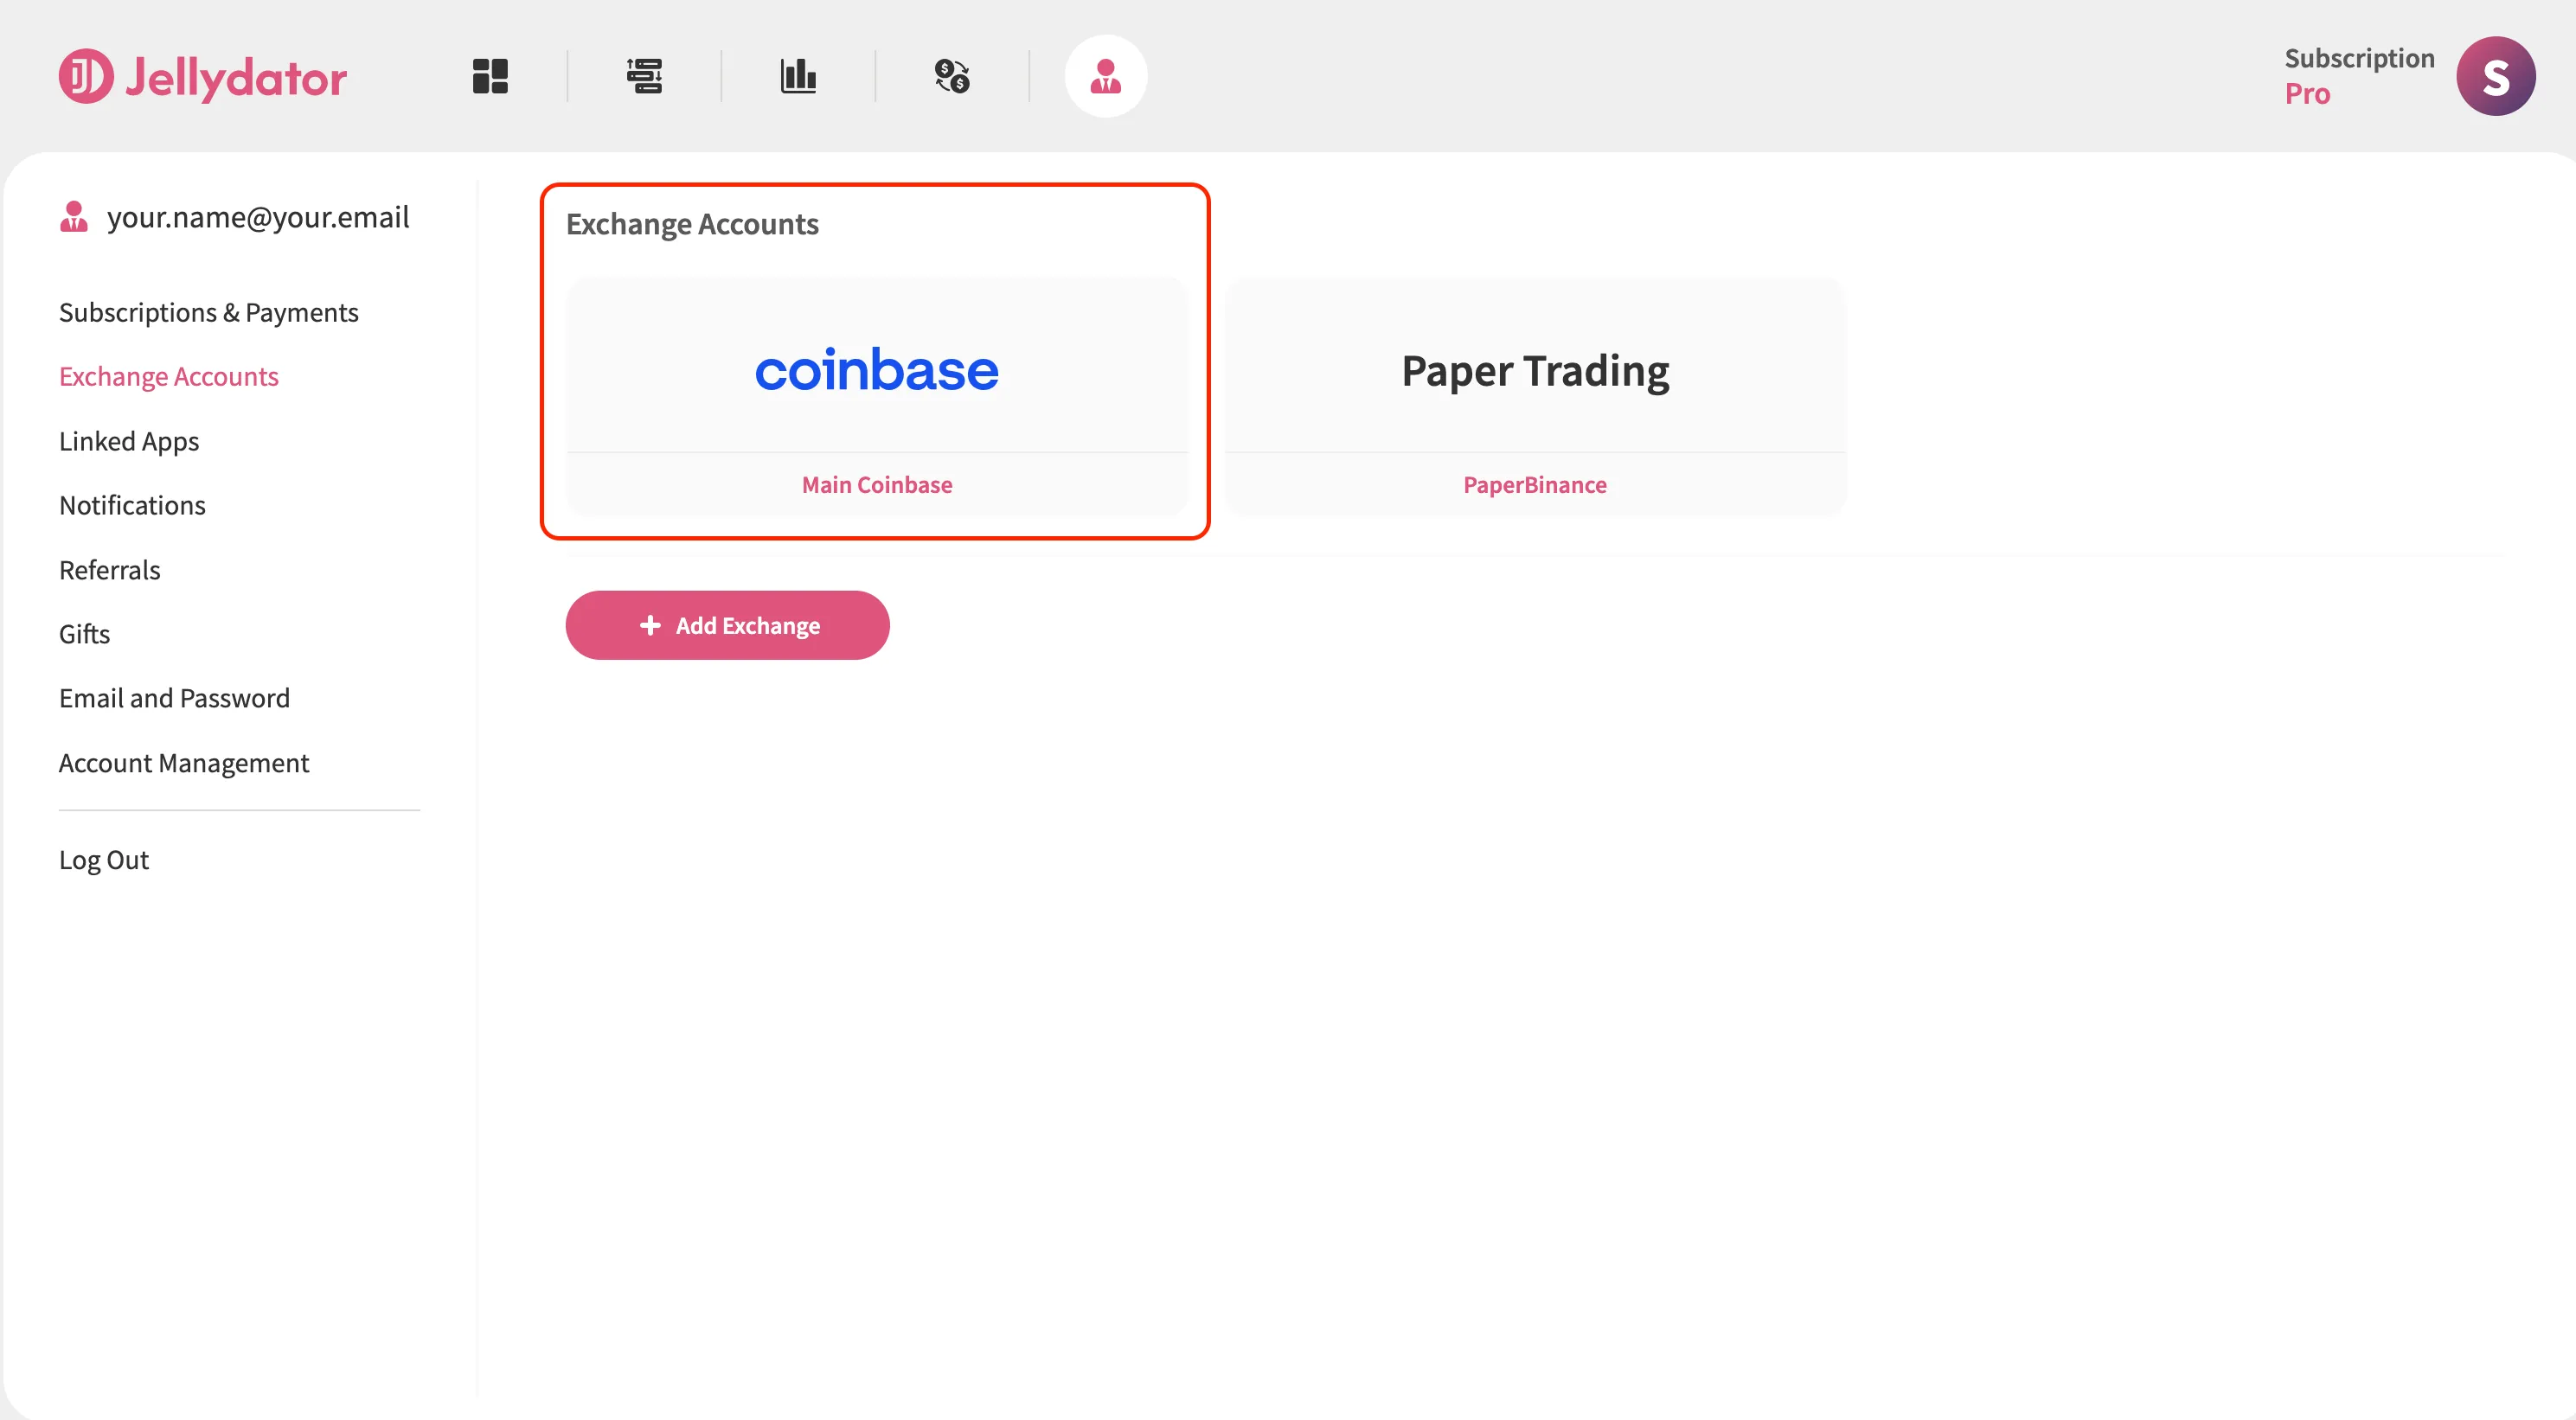
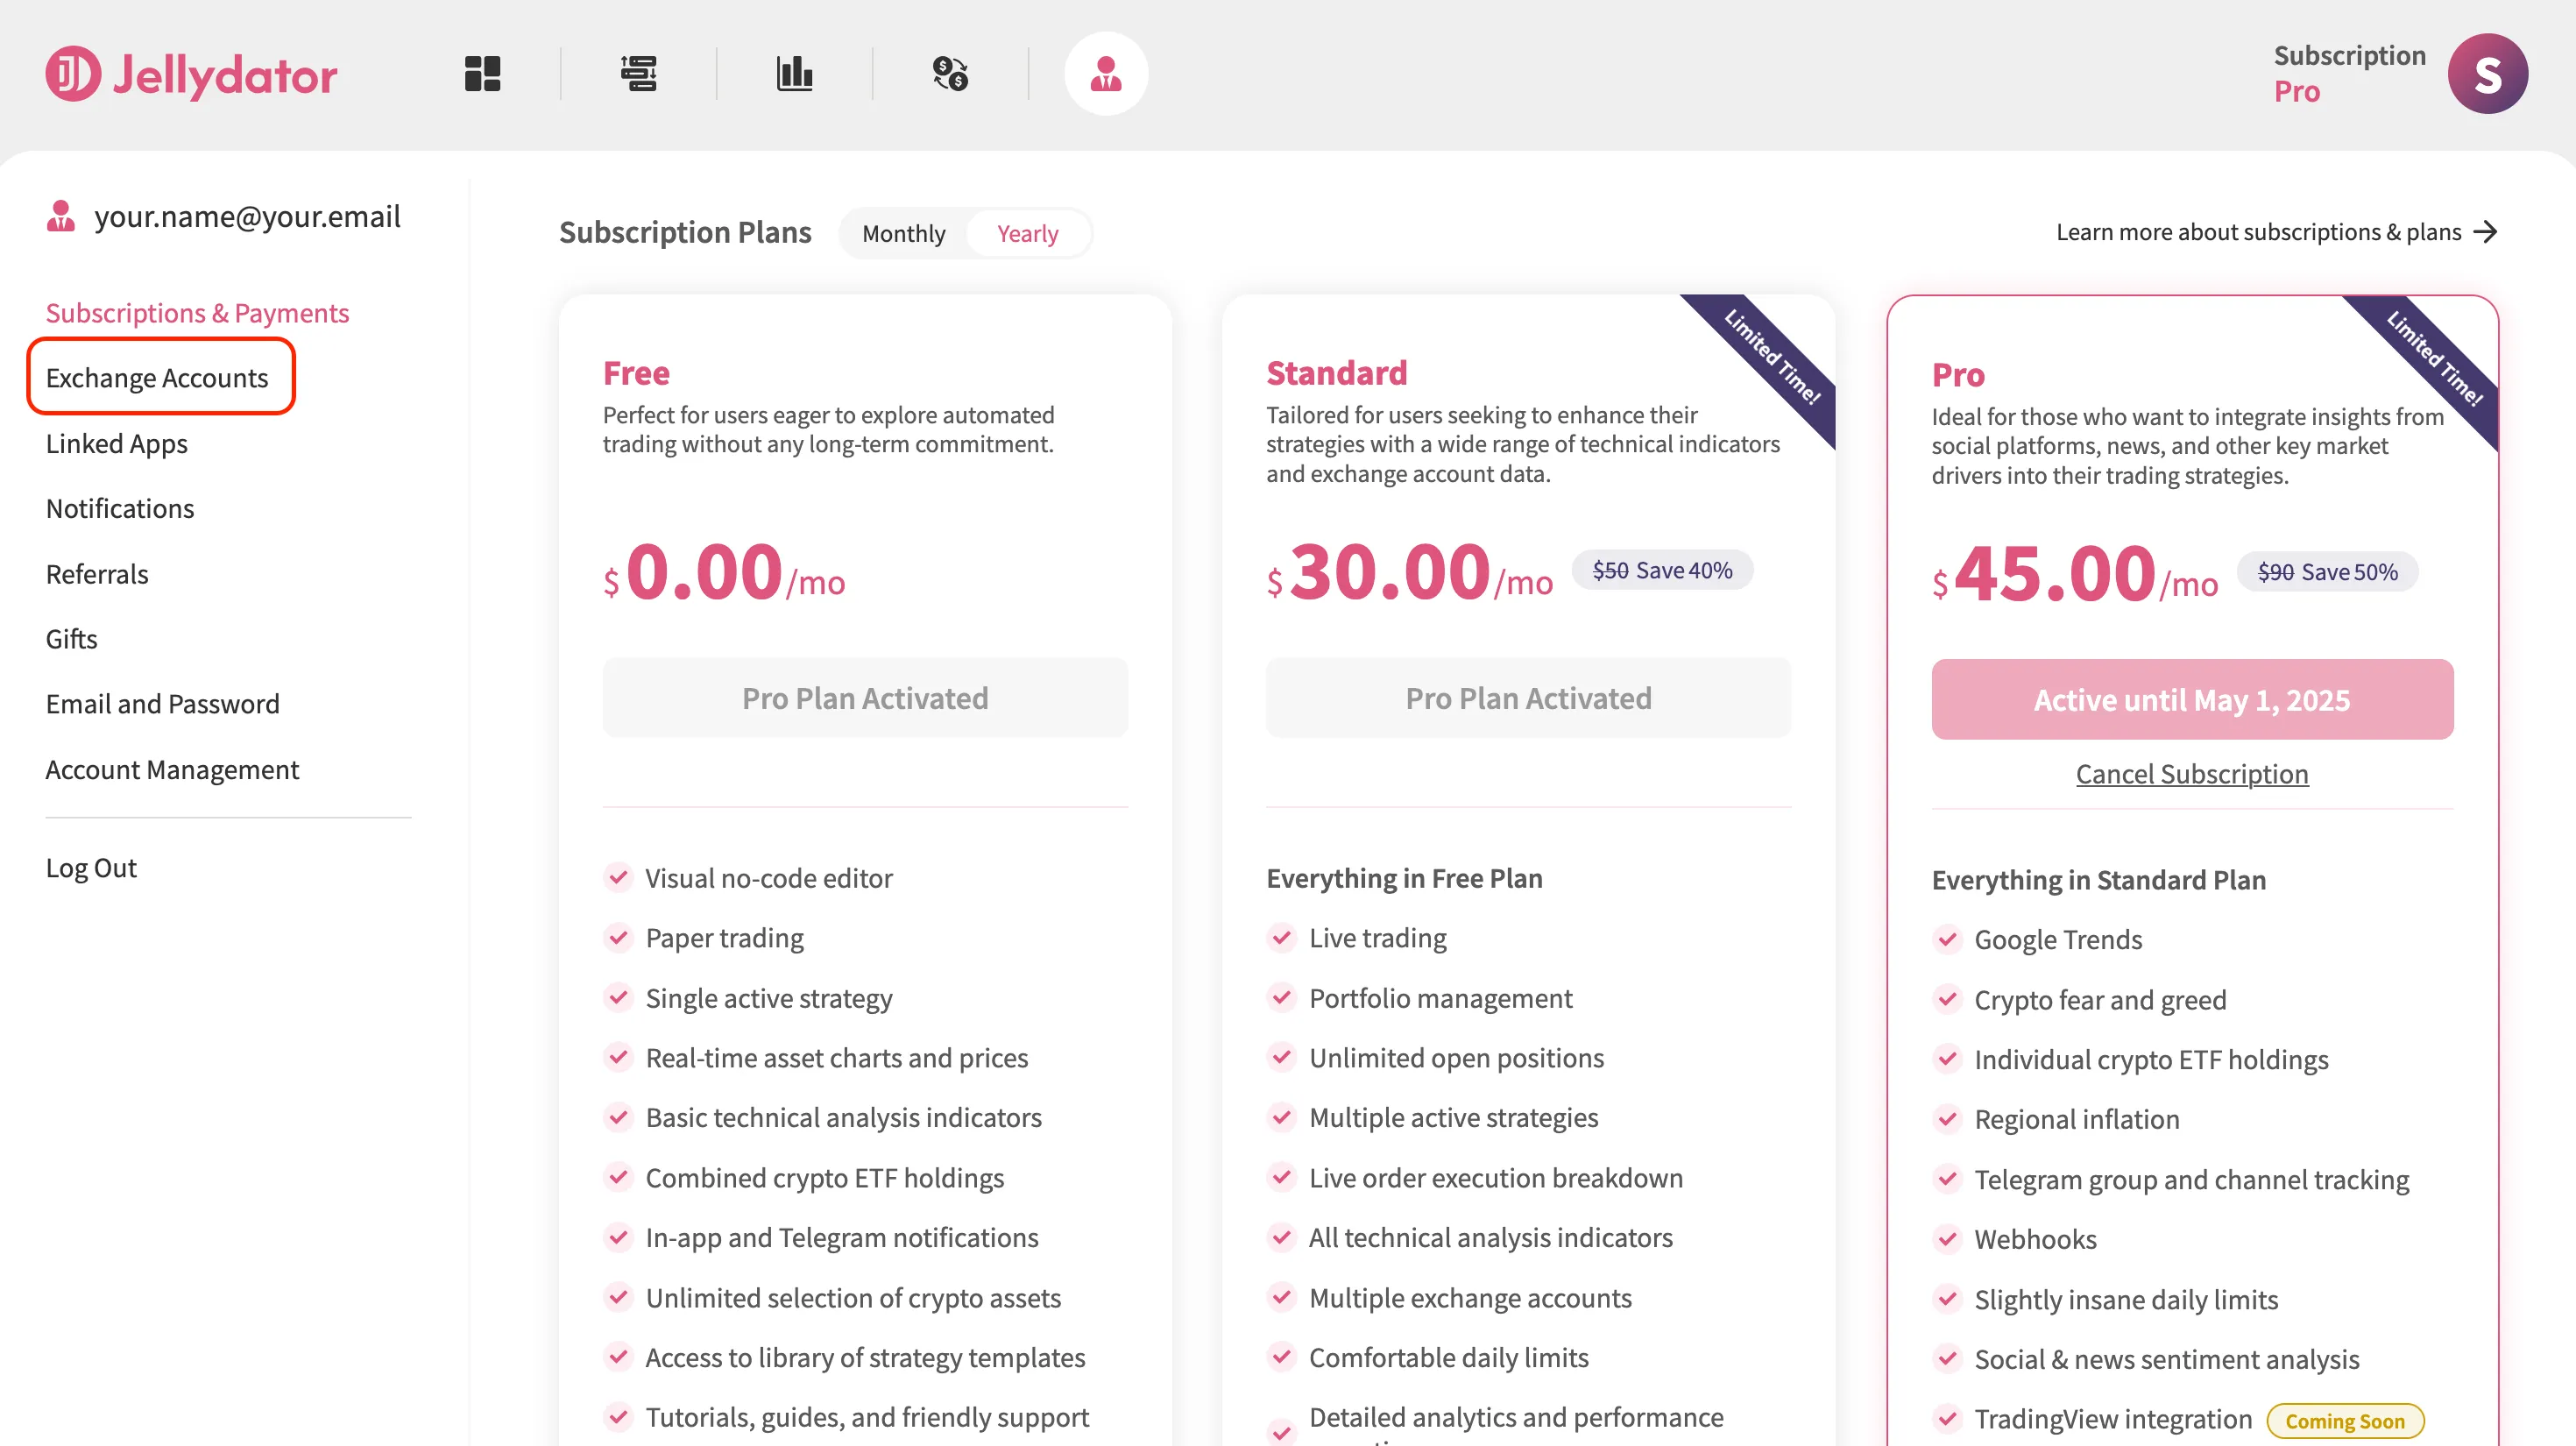
Step 2: Open Exchange Accounts Sub-Page
Next, go to the “Exchange Accounts” sub-page. This section is dedicated to connecting and managing your exchange accounts.
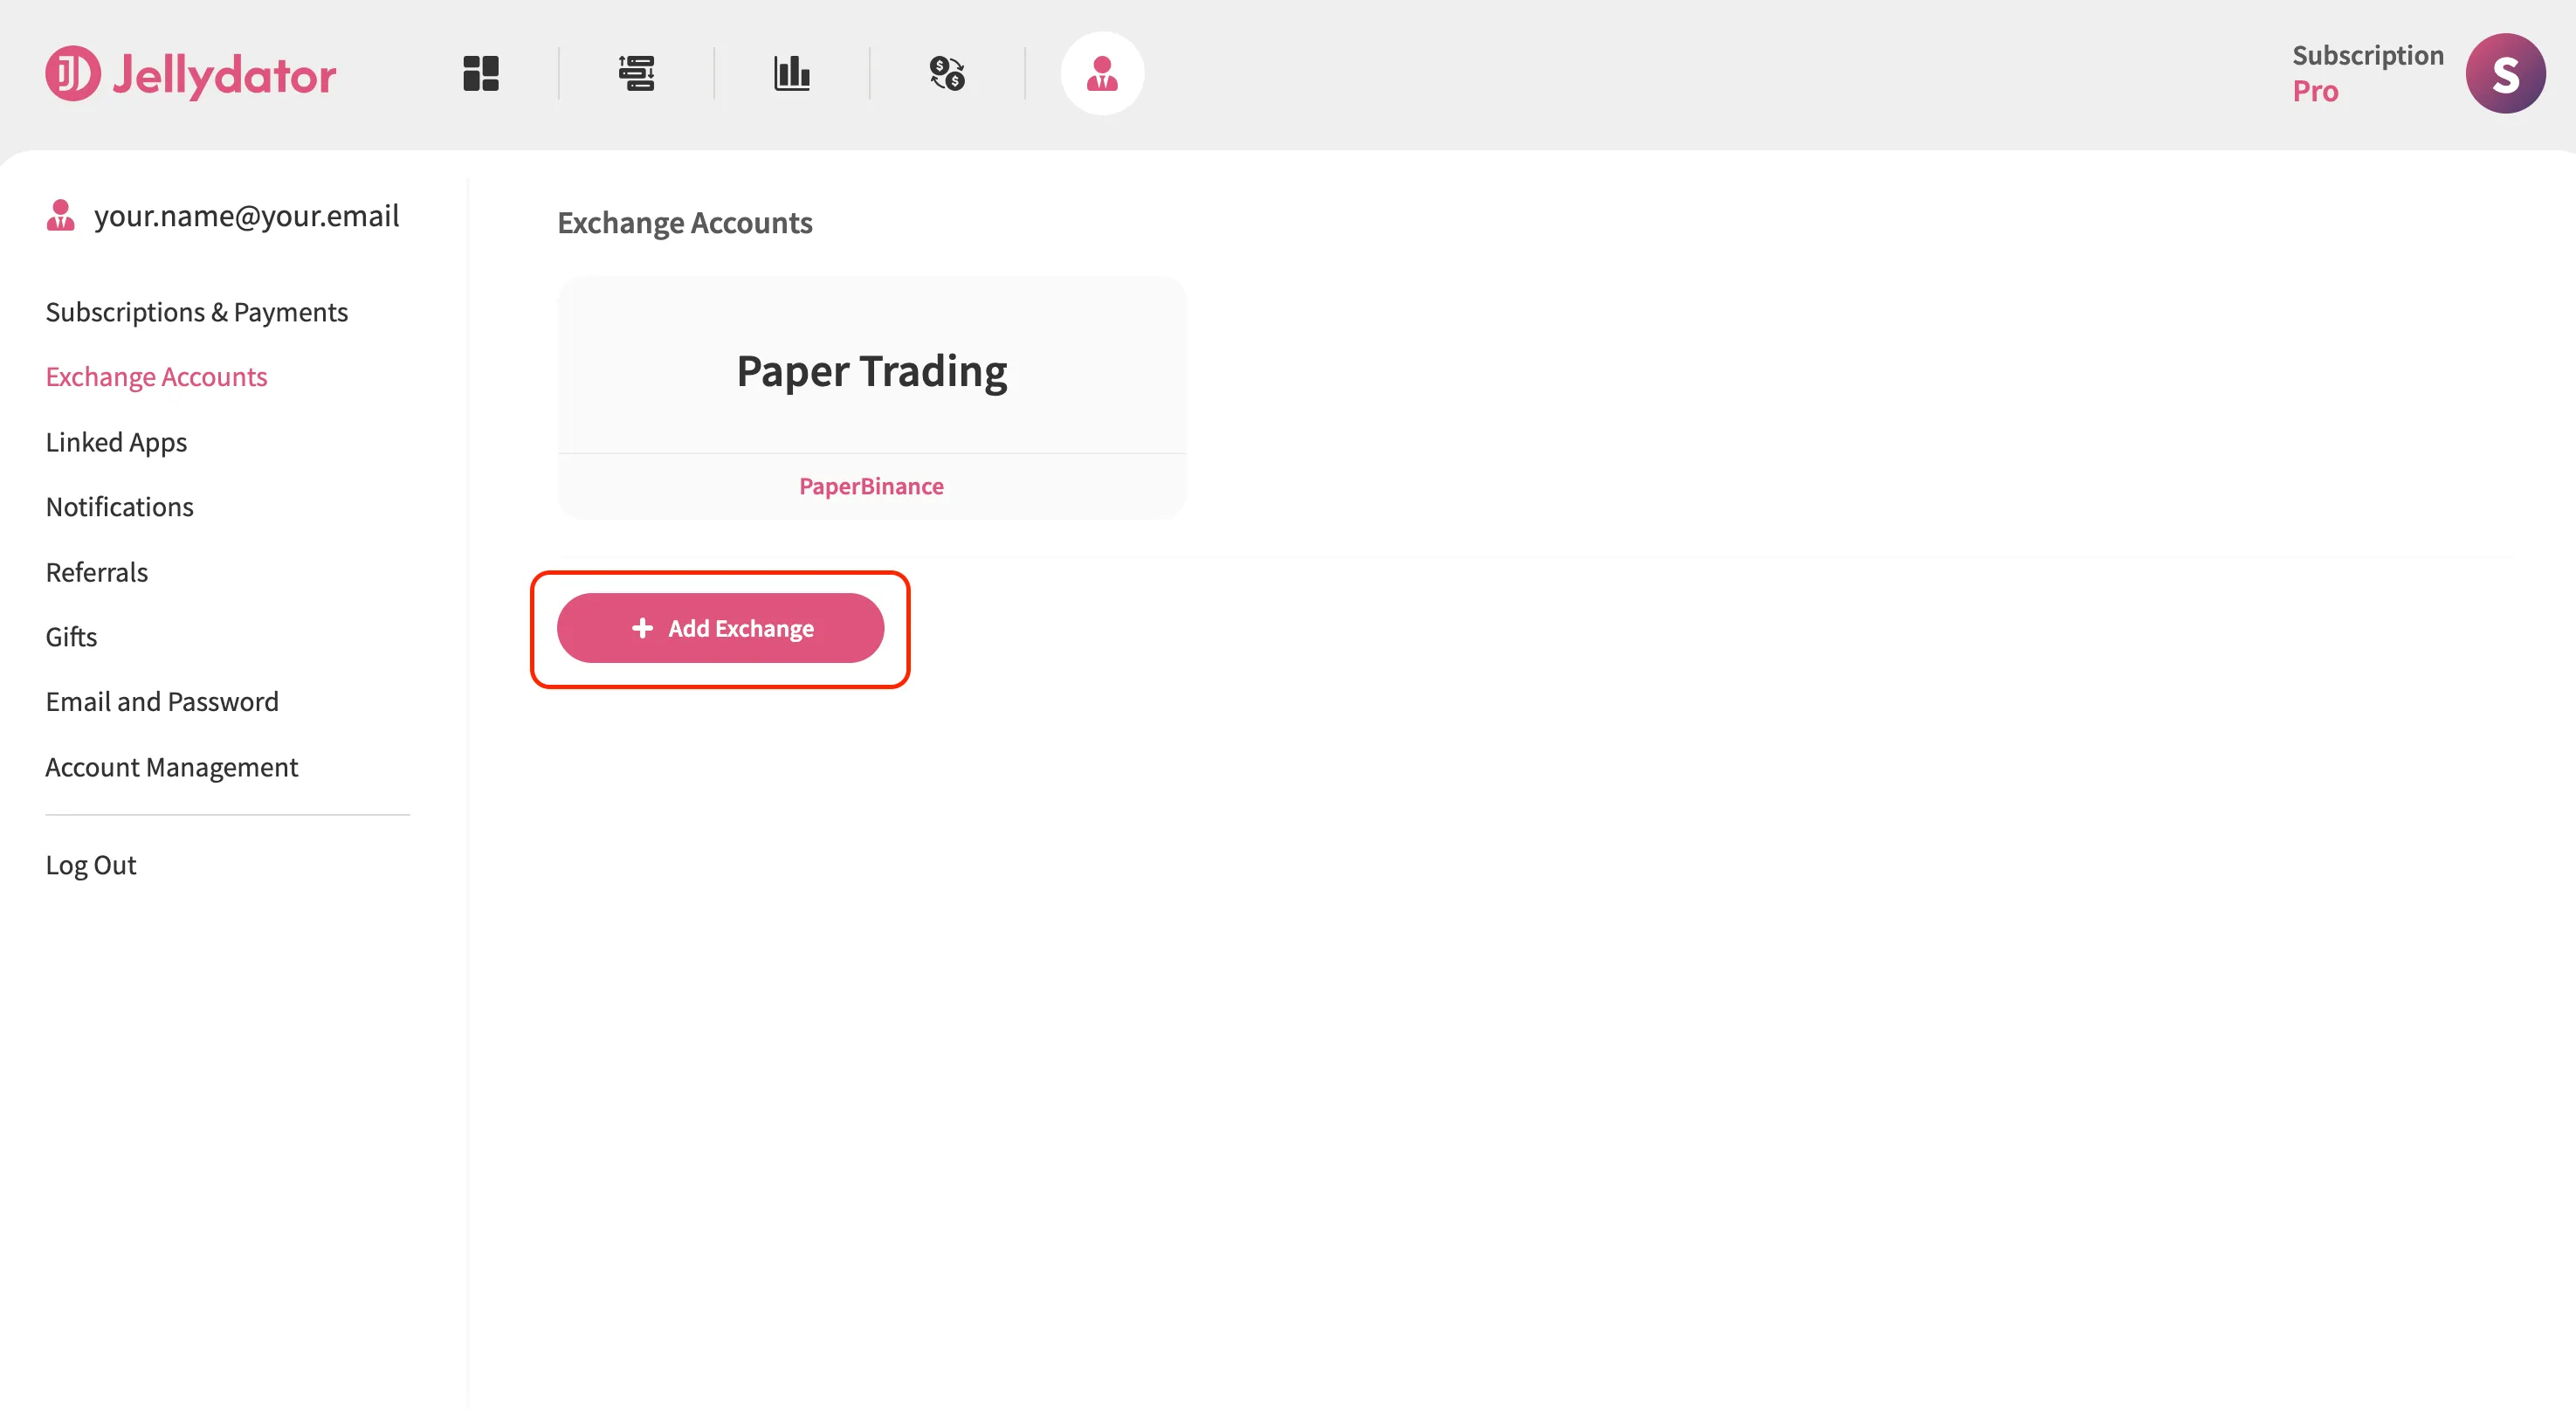
Step 3: Create a New Exchange Account Connection
If you already have other exchange accounts connected, click “Add Exchange” to start the process of connecting a new one. If this is your first connection, skip this step and continue to the next one.
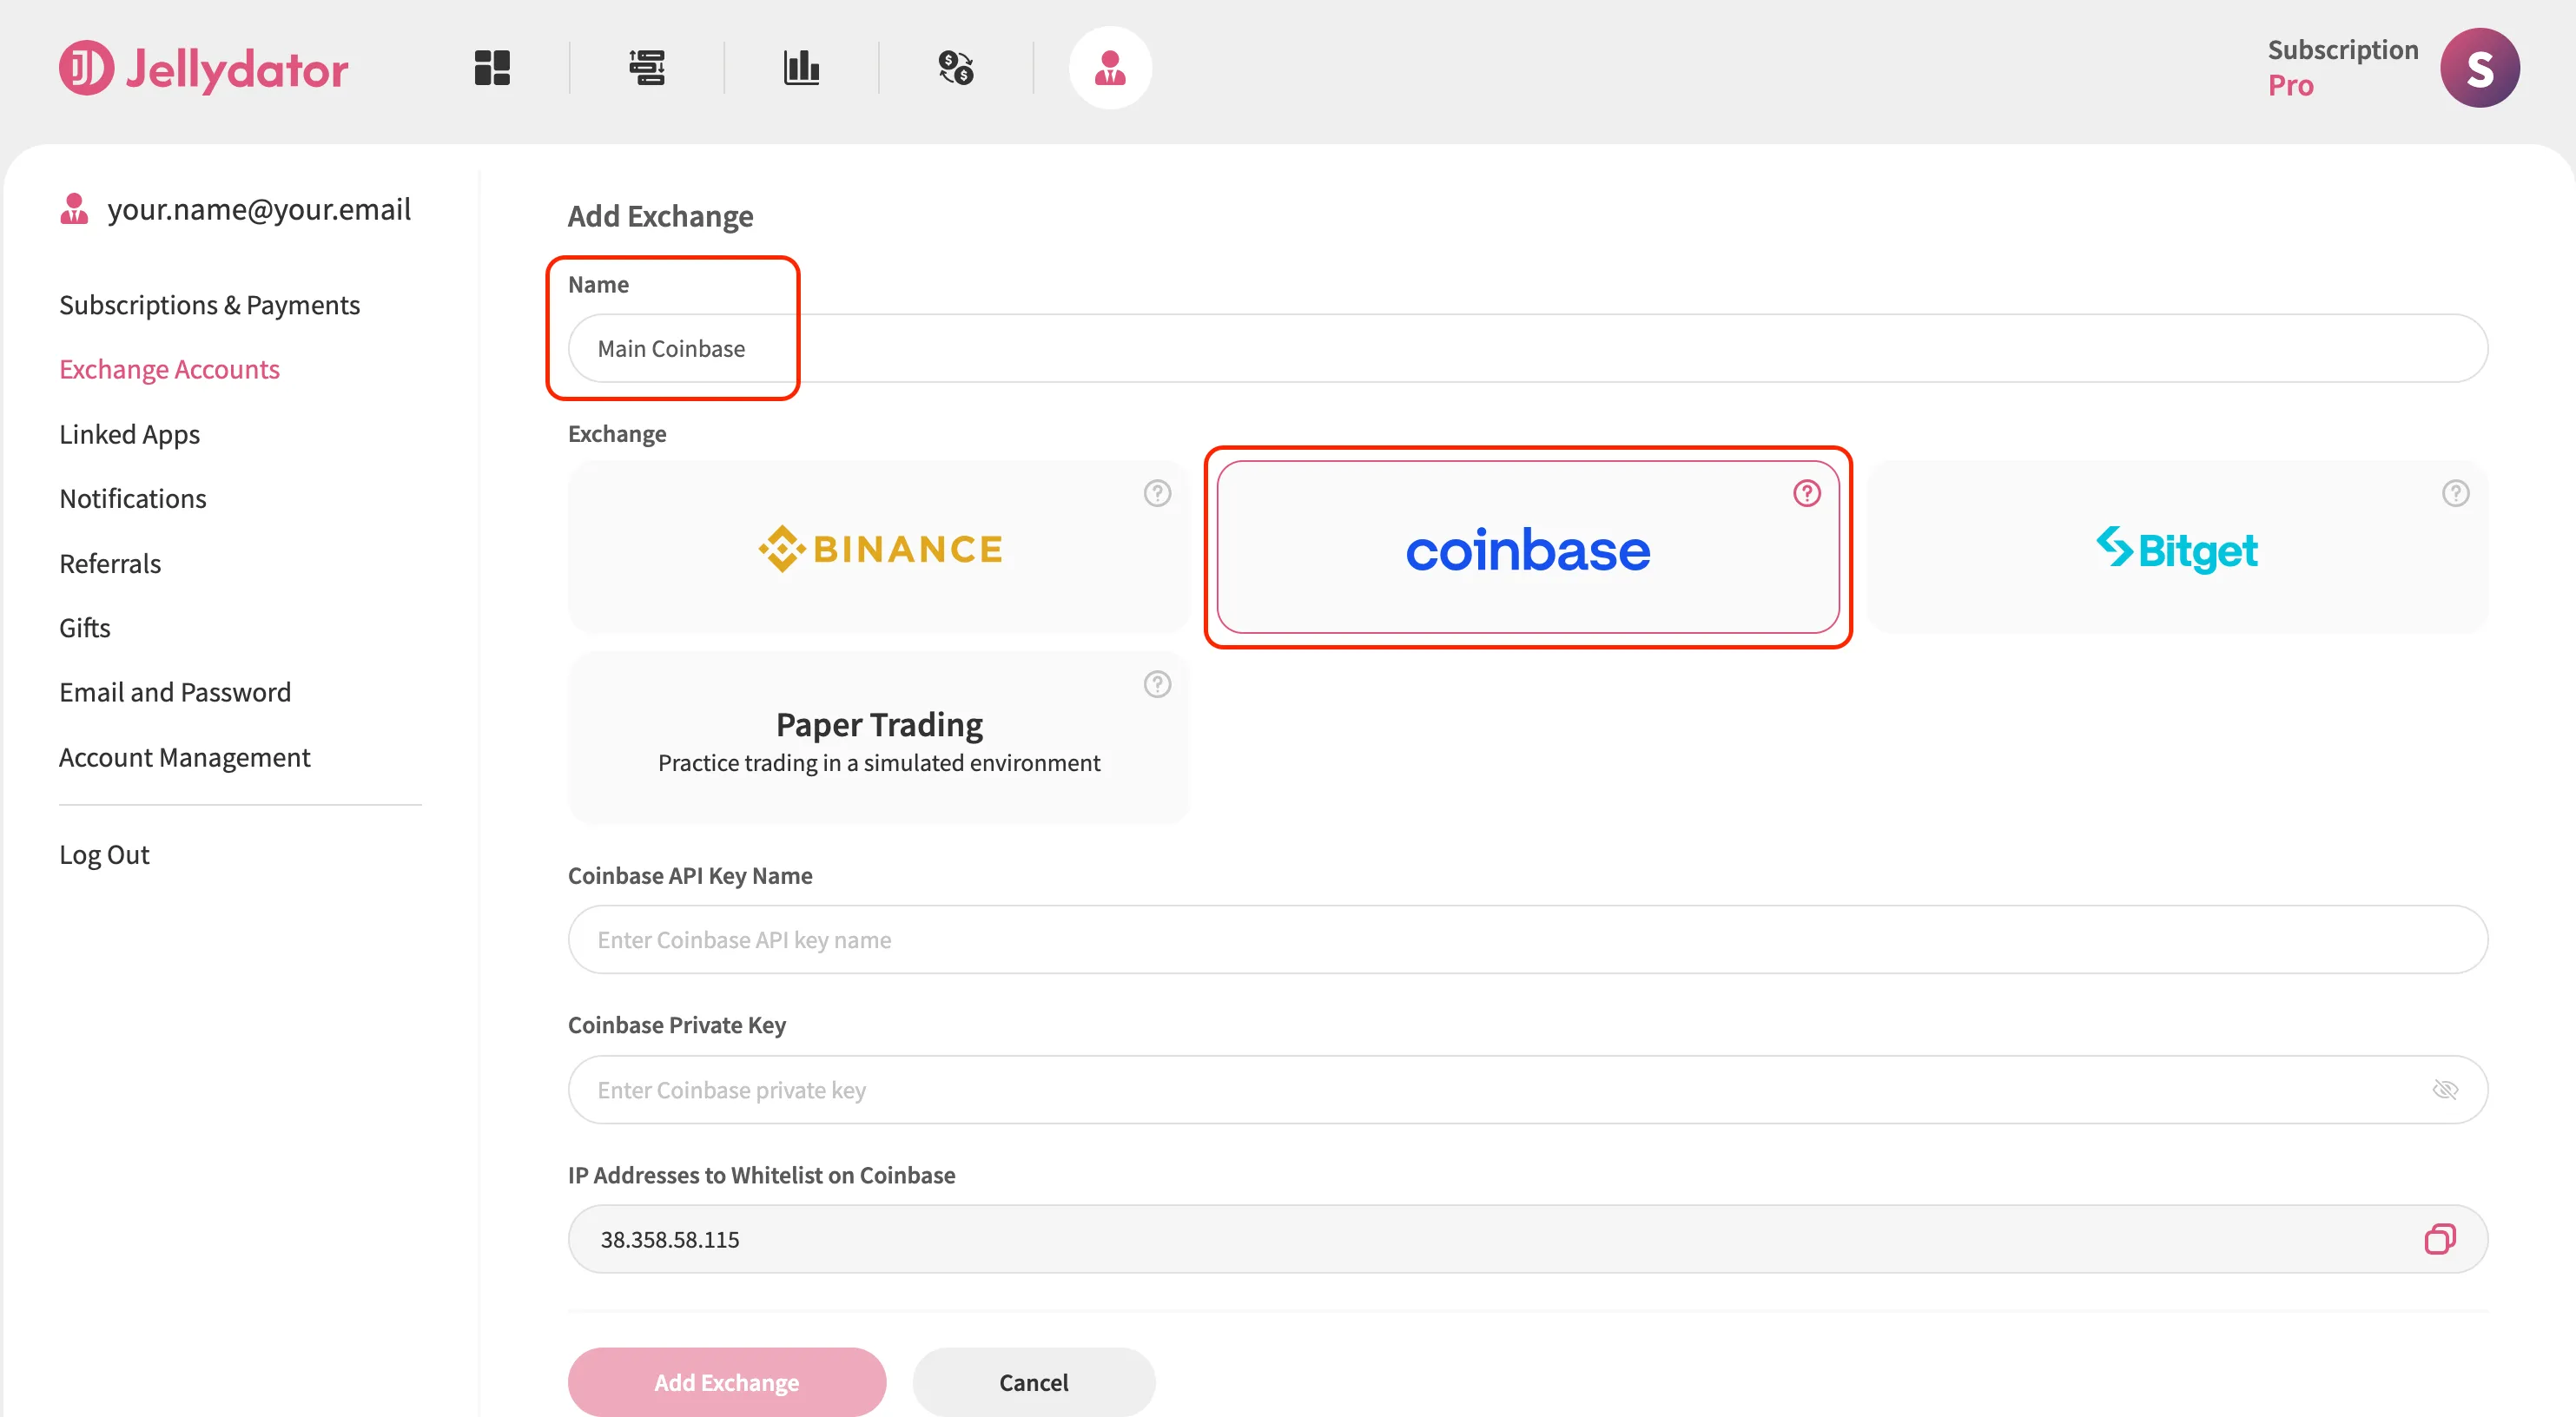
Step 4: Create an Exchange Connection Name and Select an Exchange Type
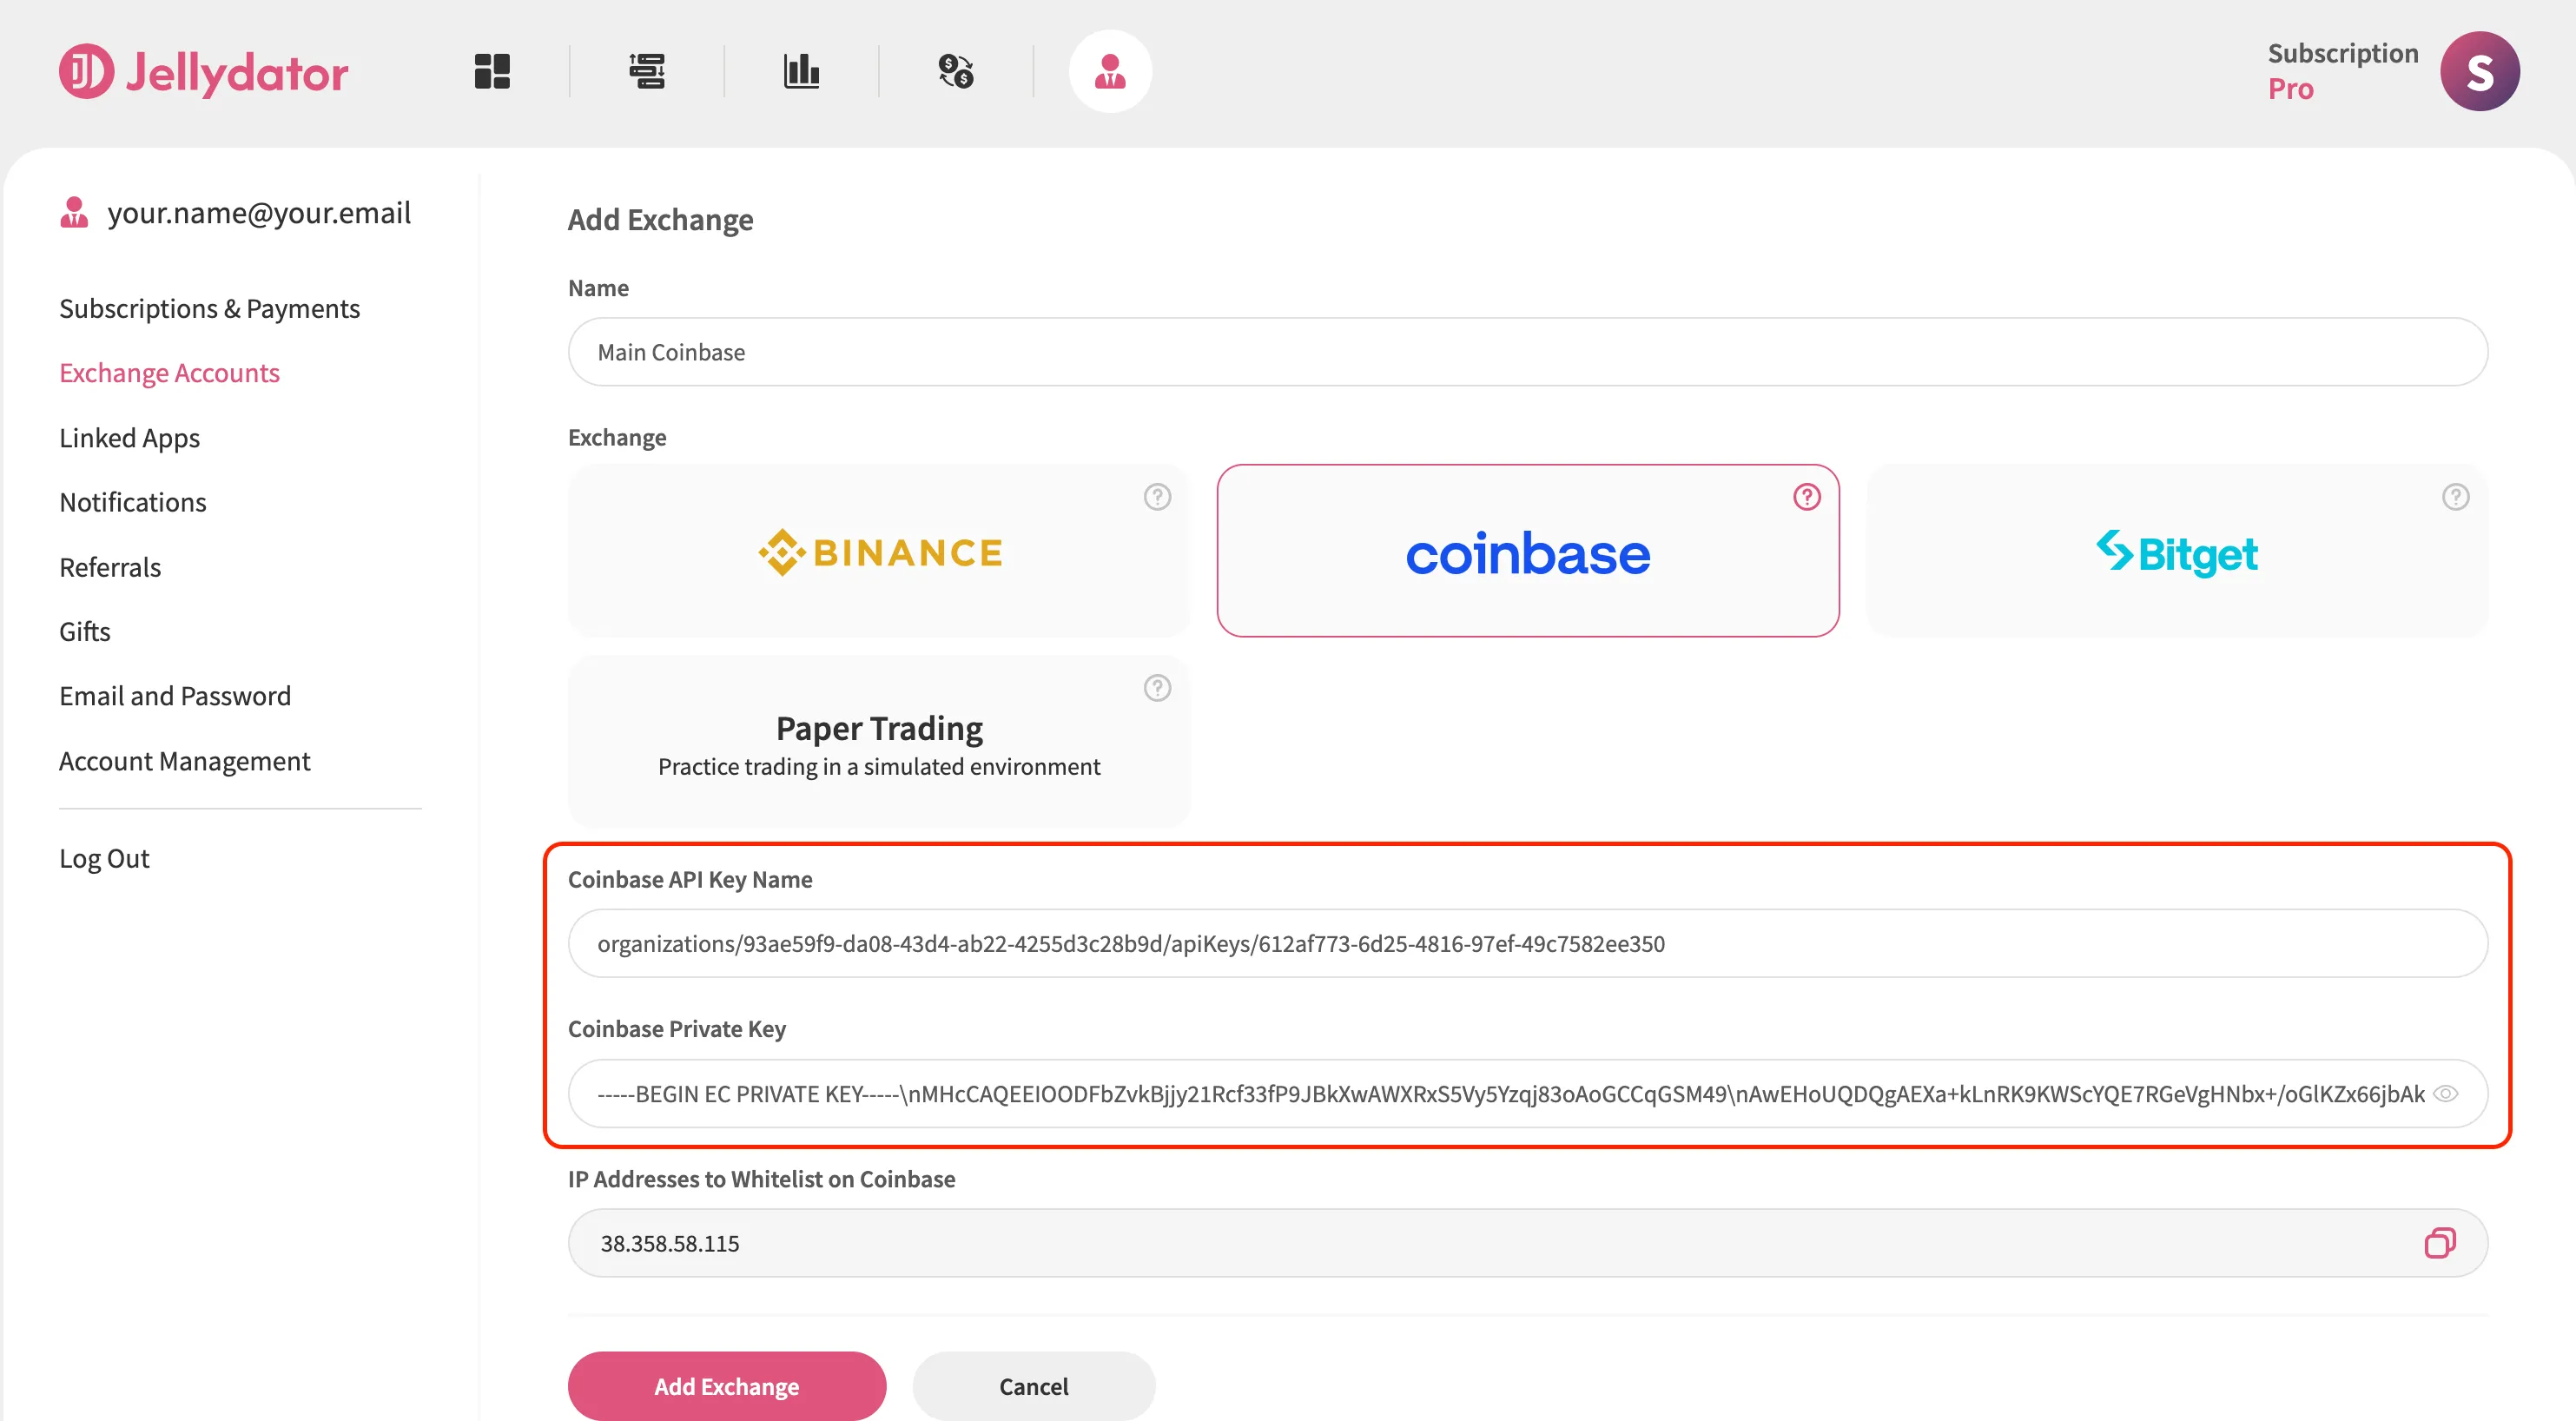
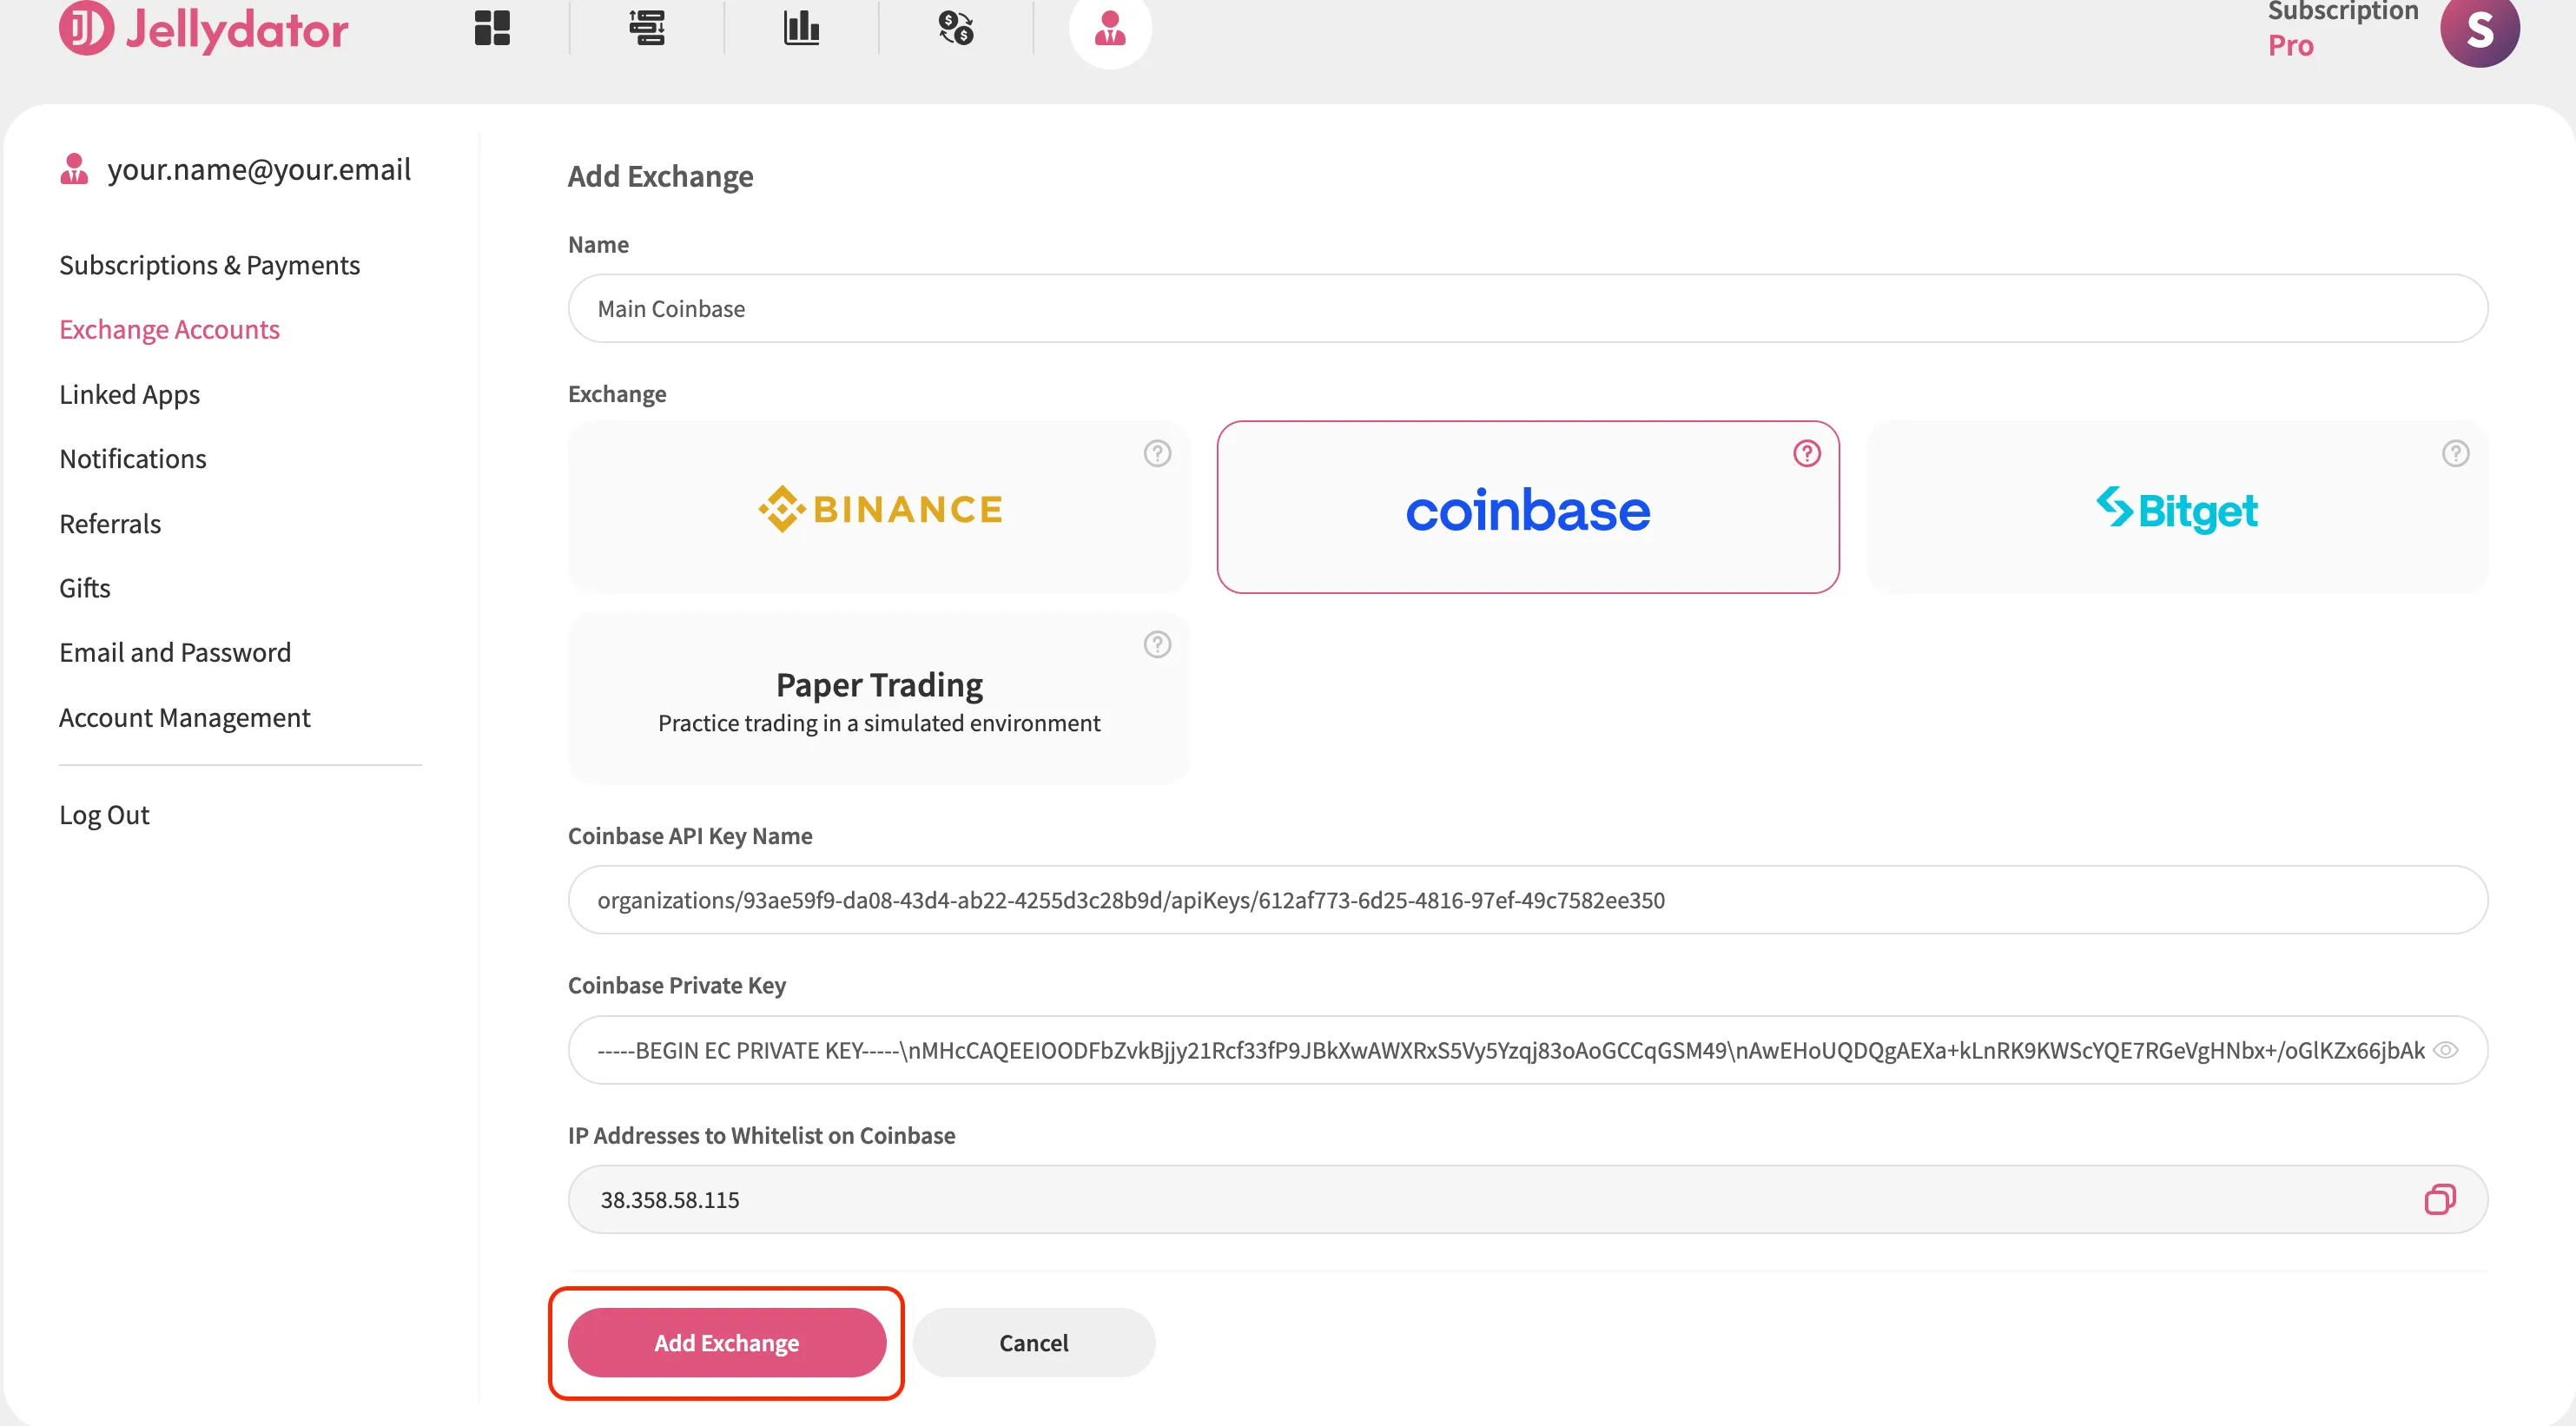
Give your connection a descriptive name that you’ll easily recognize later, especially if you plan to connect multiple accounts. Then, select “Coinbase” as the exchange type.
Step 5: Navigate to Advanced API on Coinbase
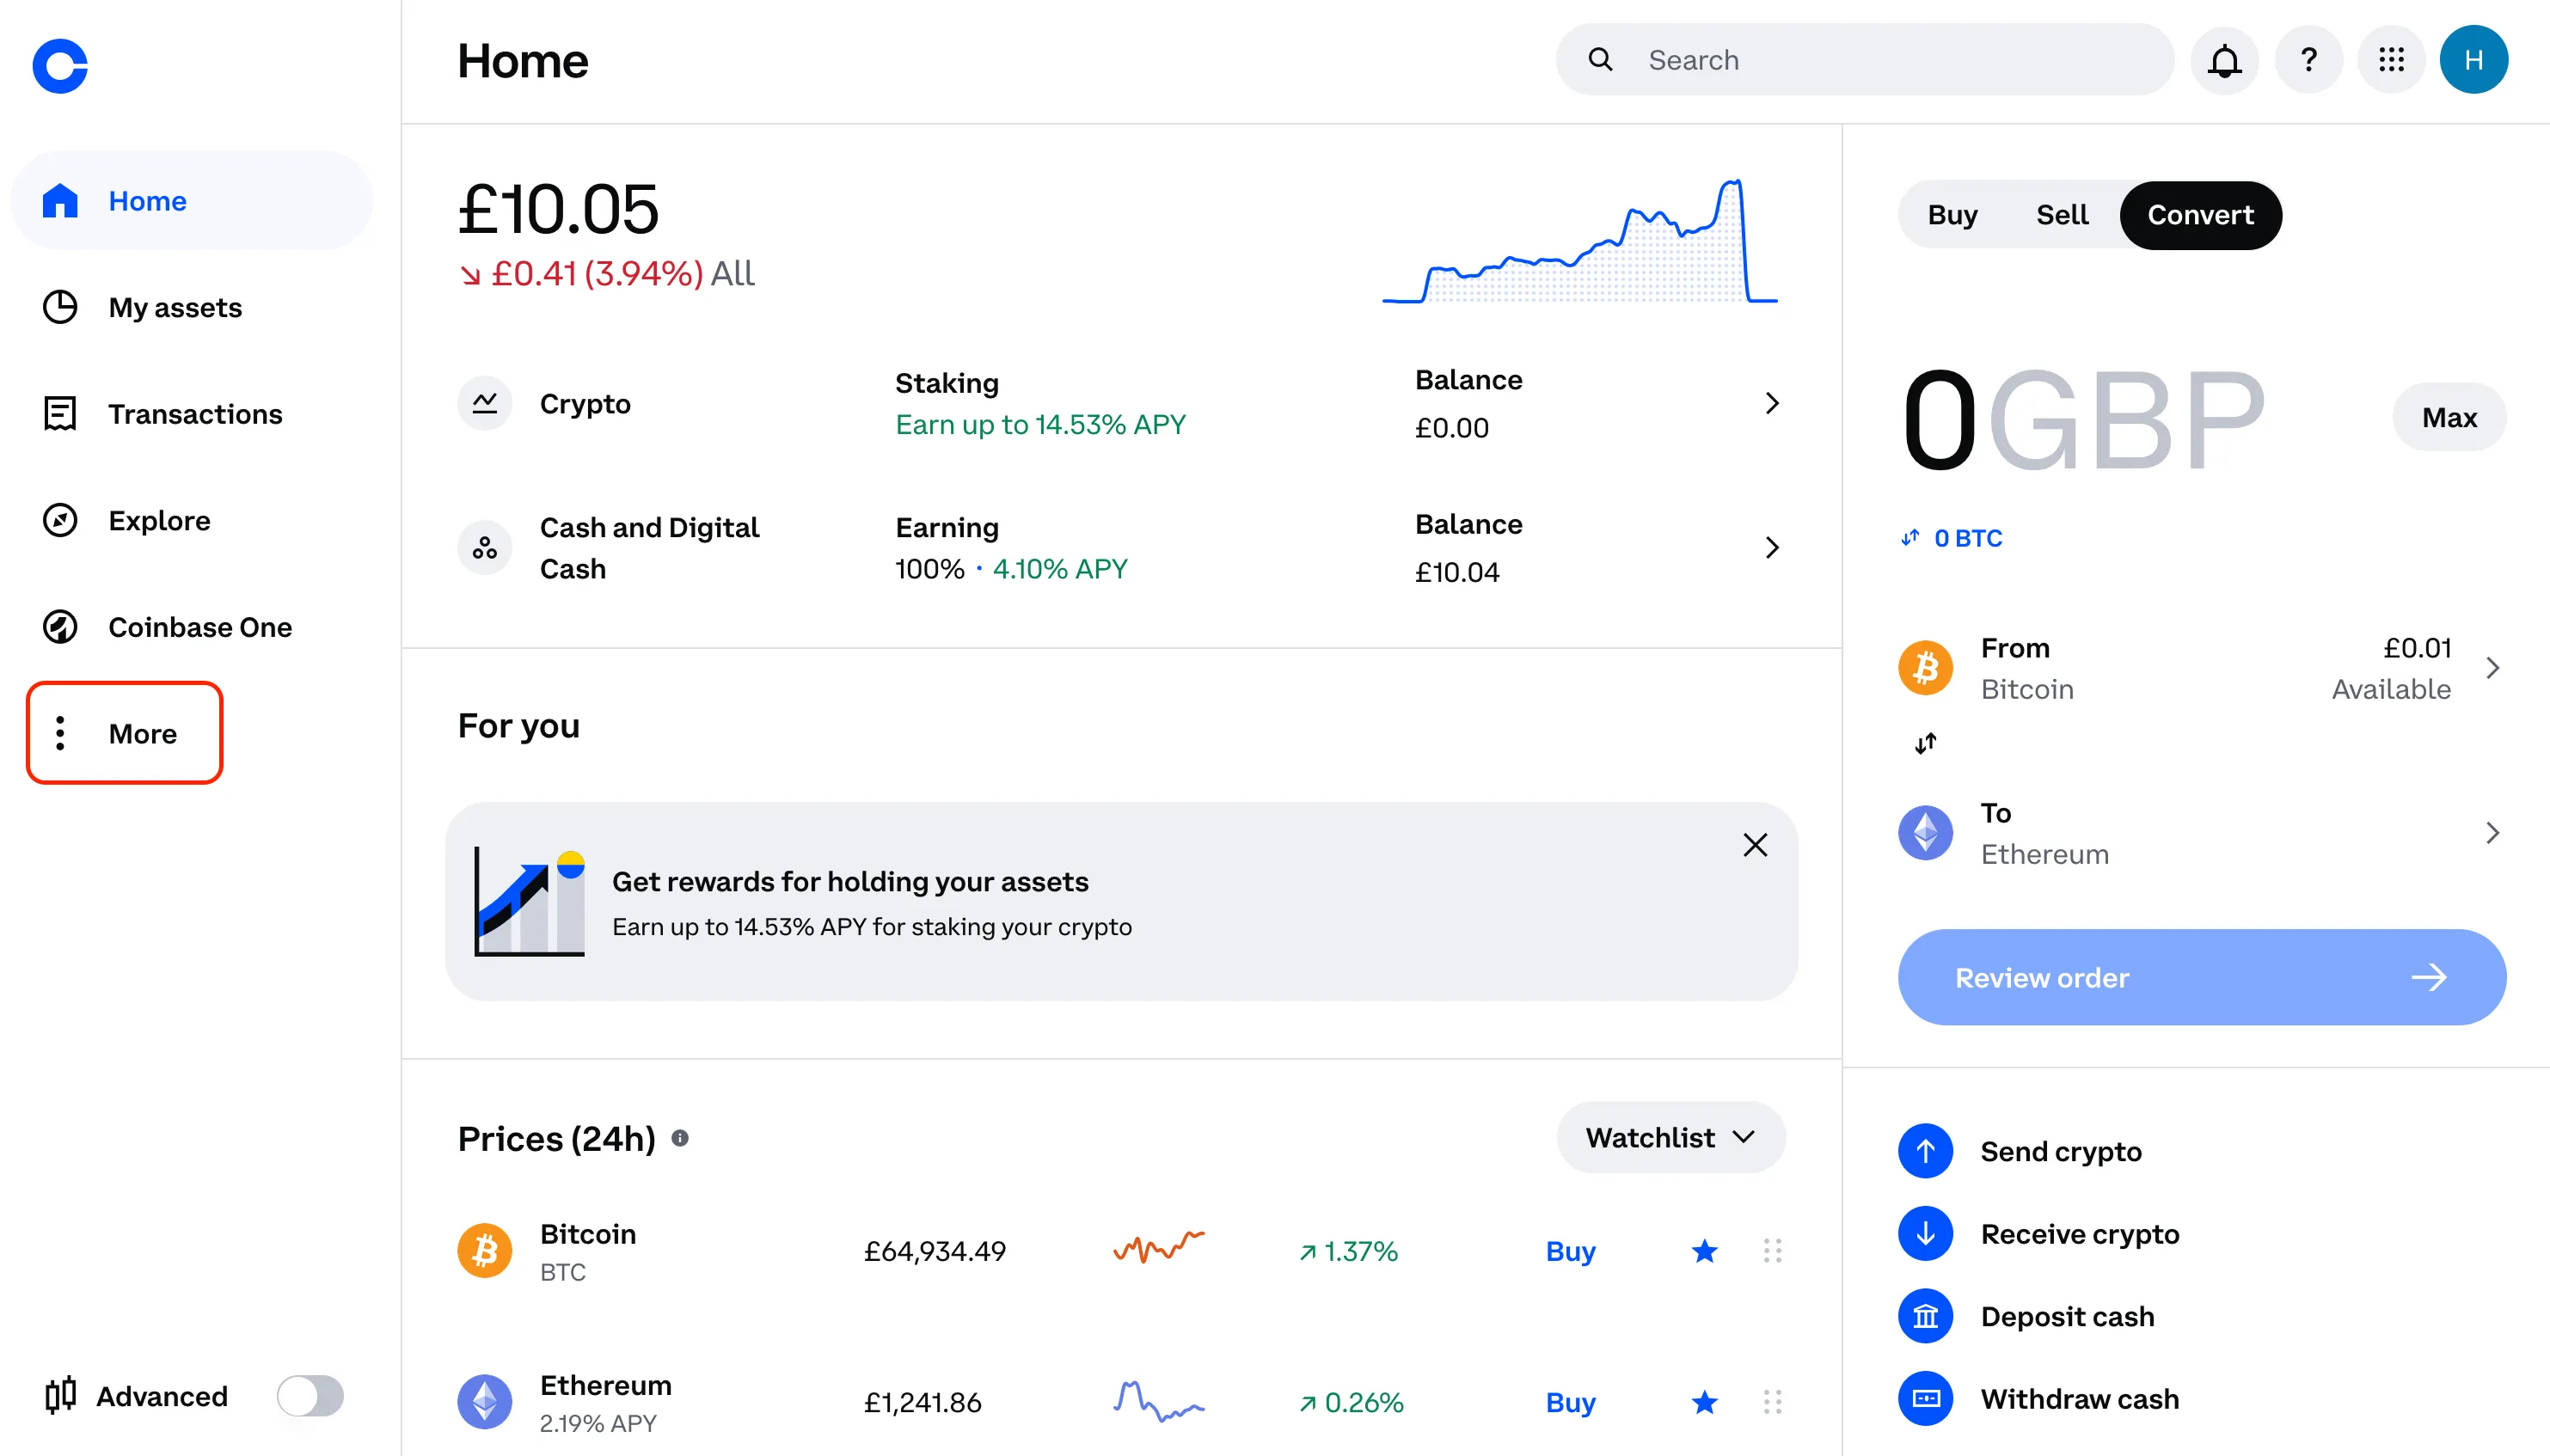
Open a new browser tab and log in to your Coinbase account (https://login.coinbase.com/signin). Once logged in, locate the left sidebar and click on “More.”
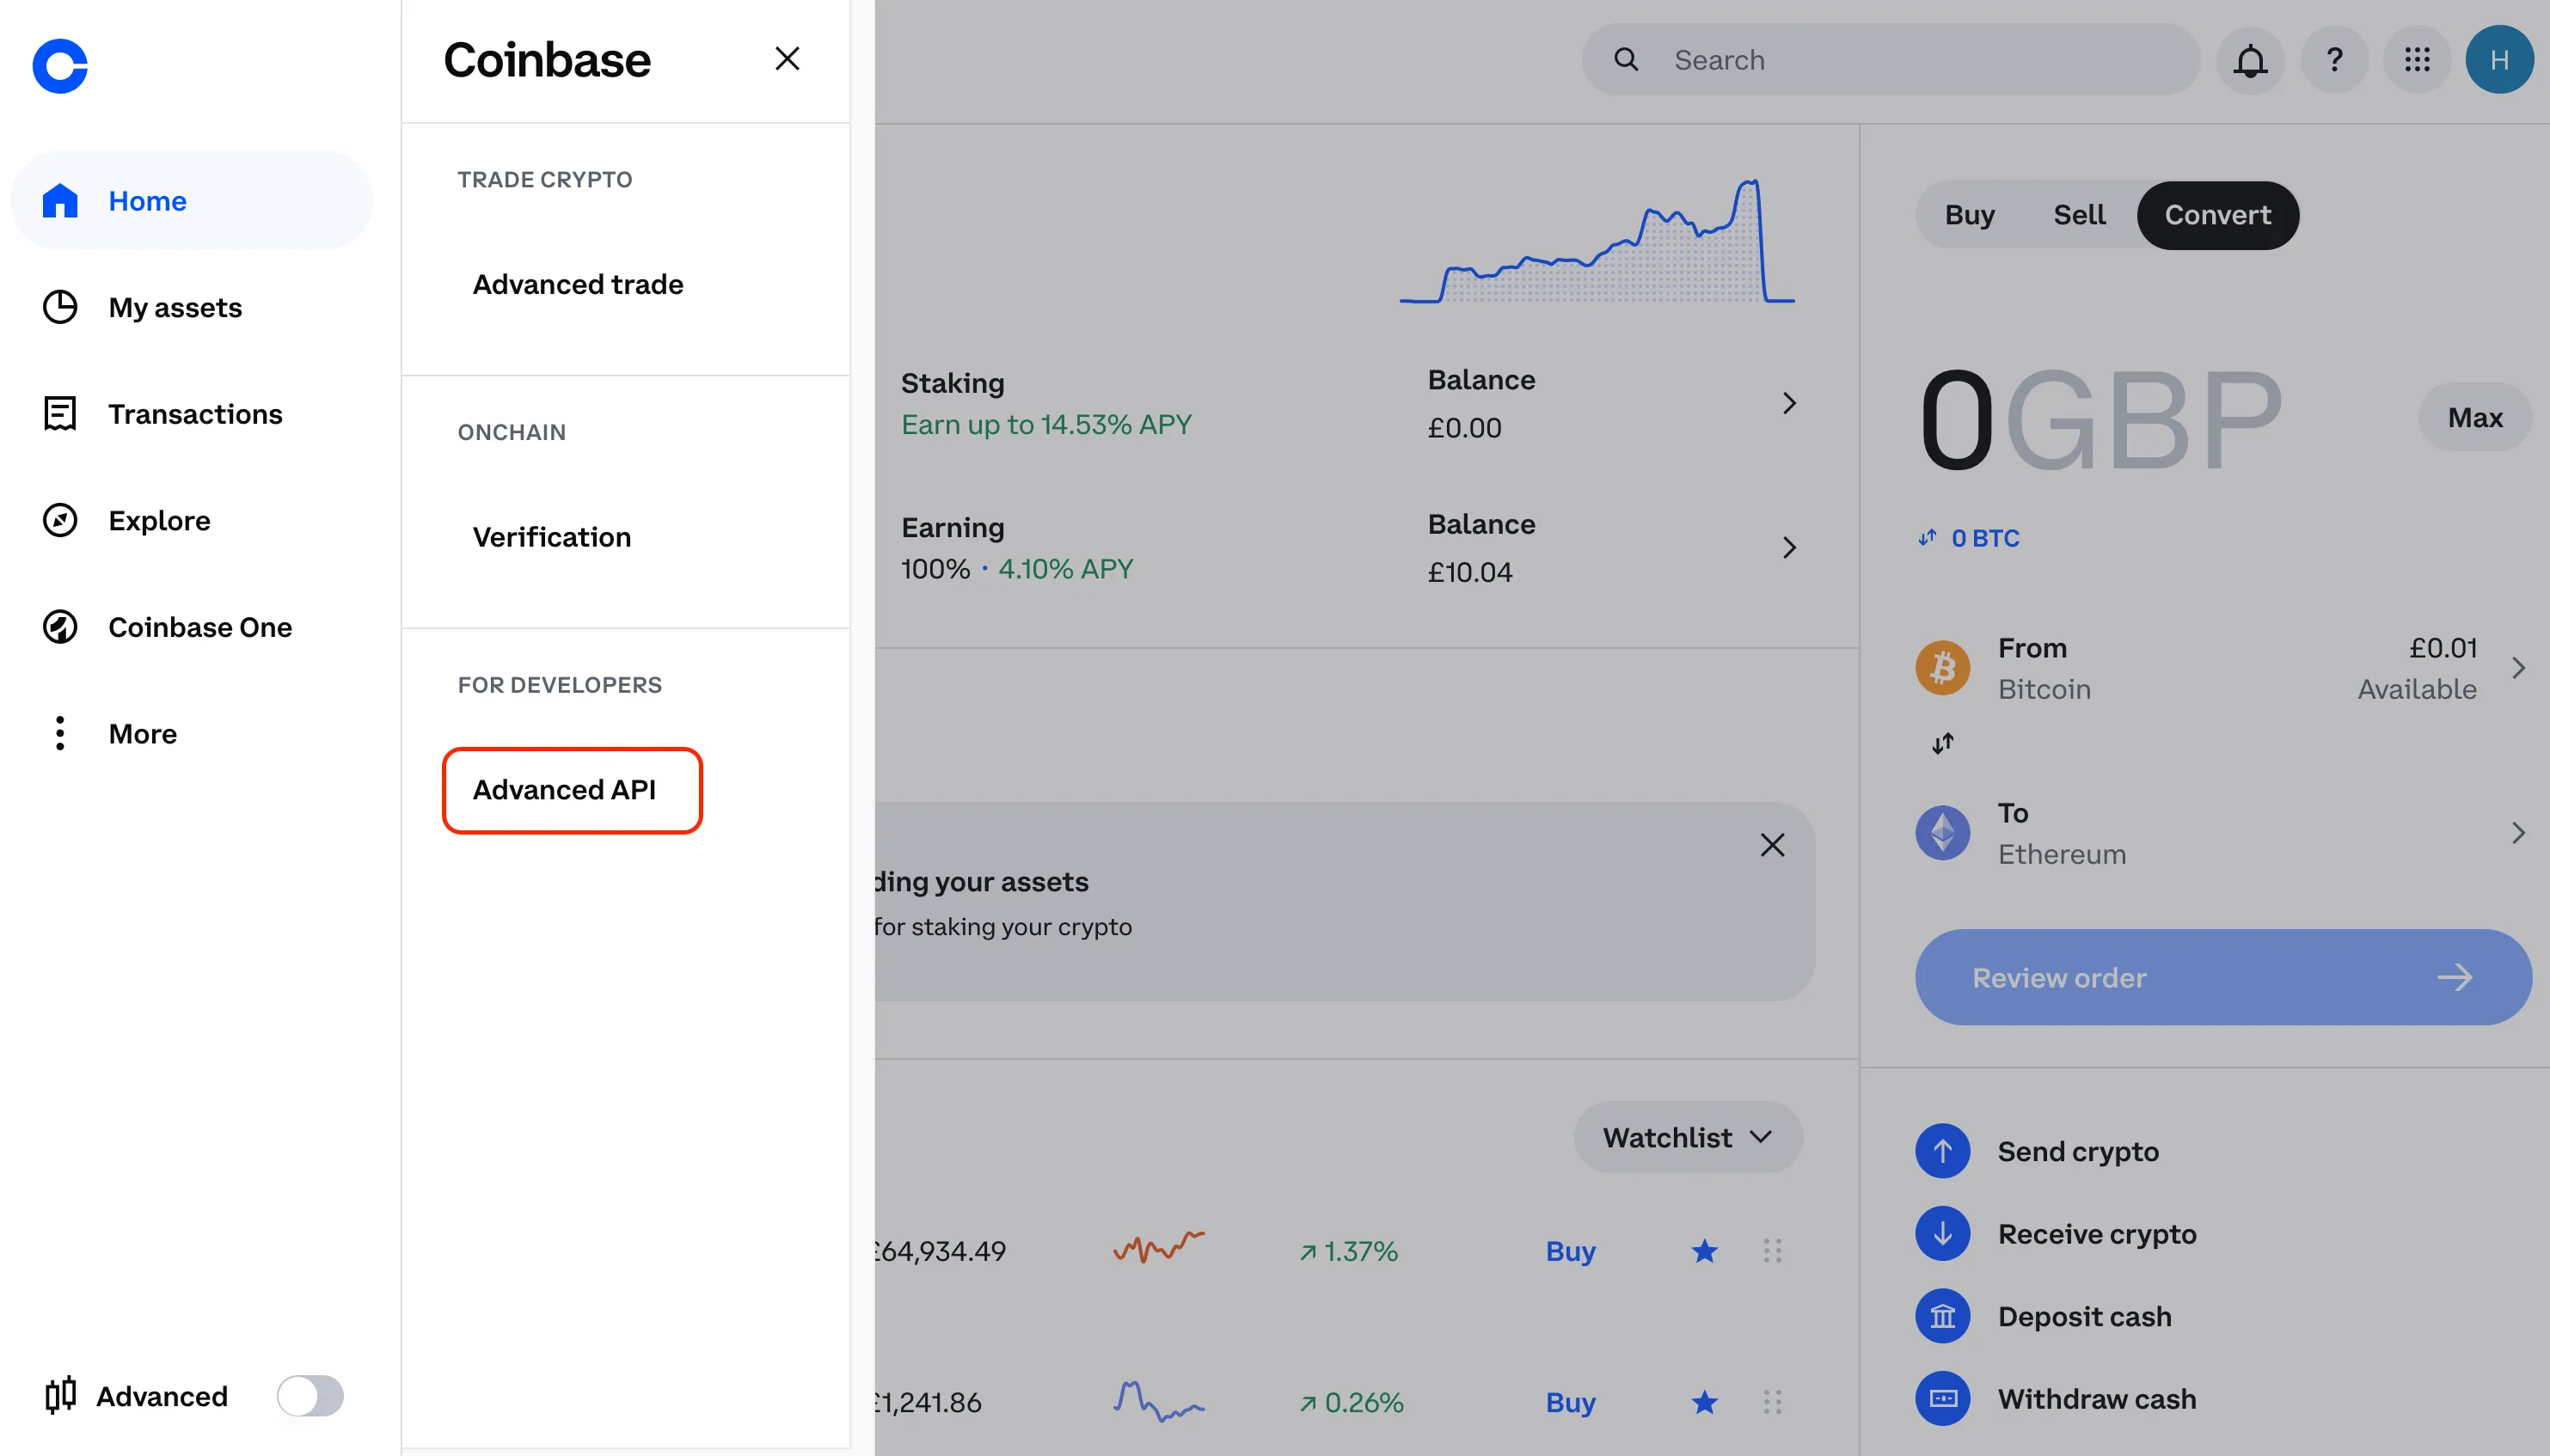
Then, select “Advanced API” to proceed.
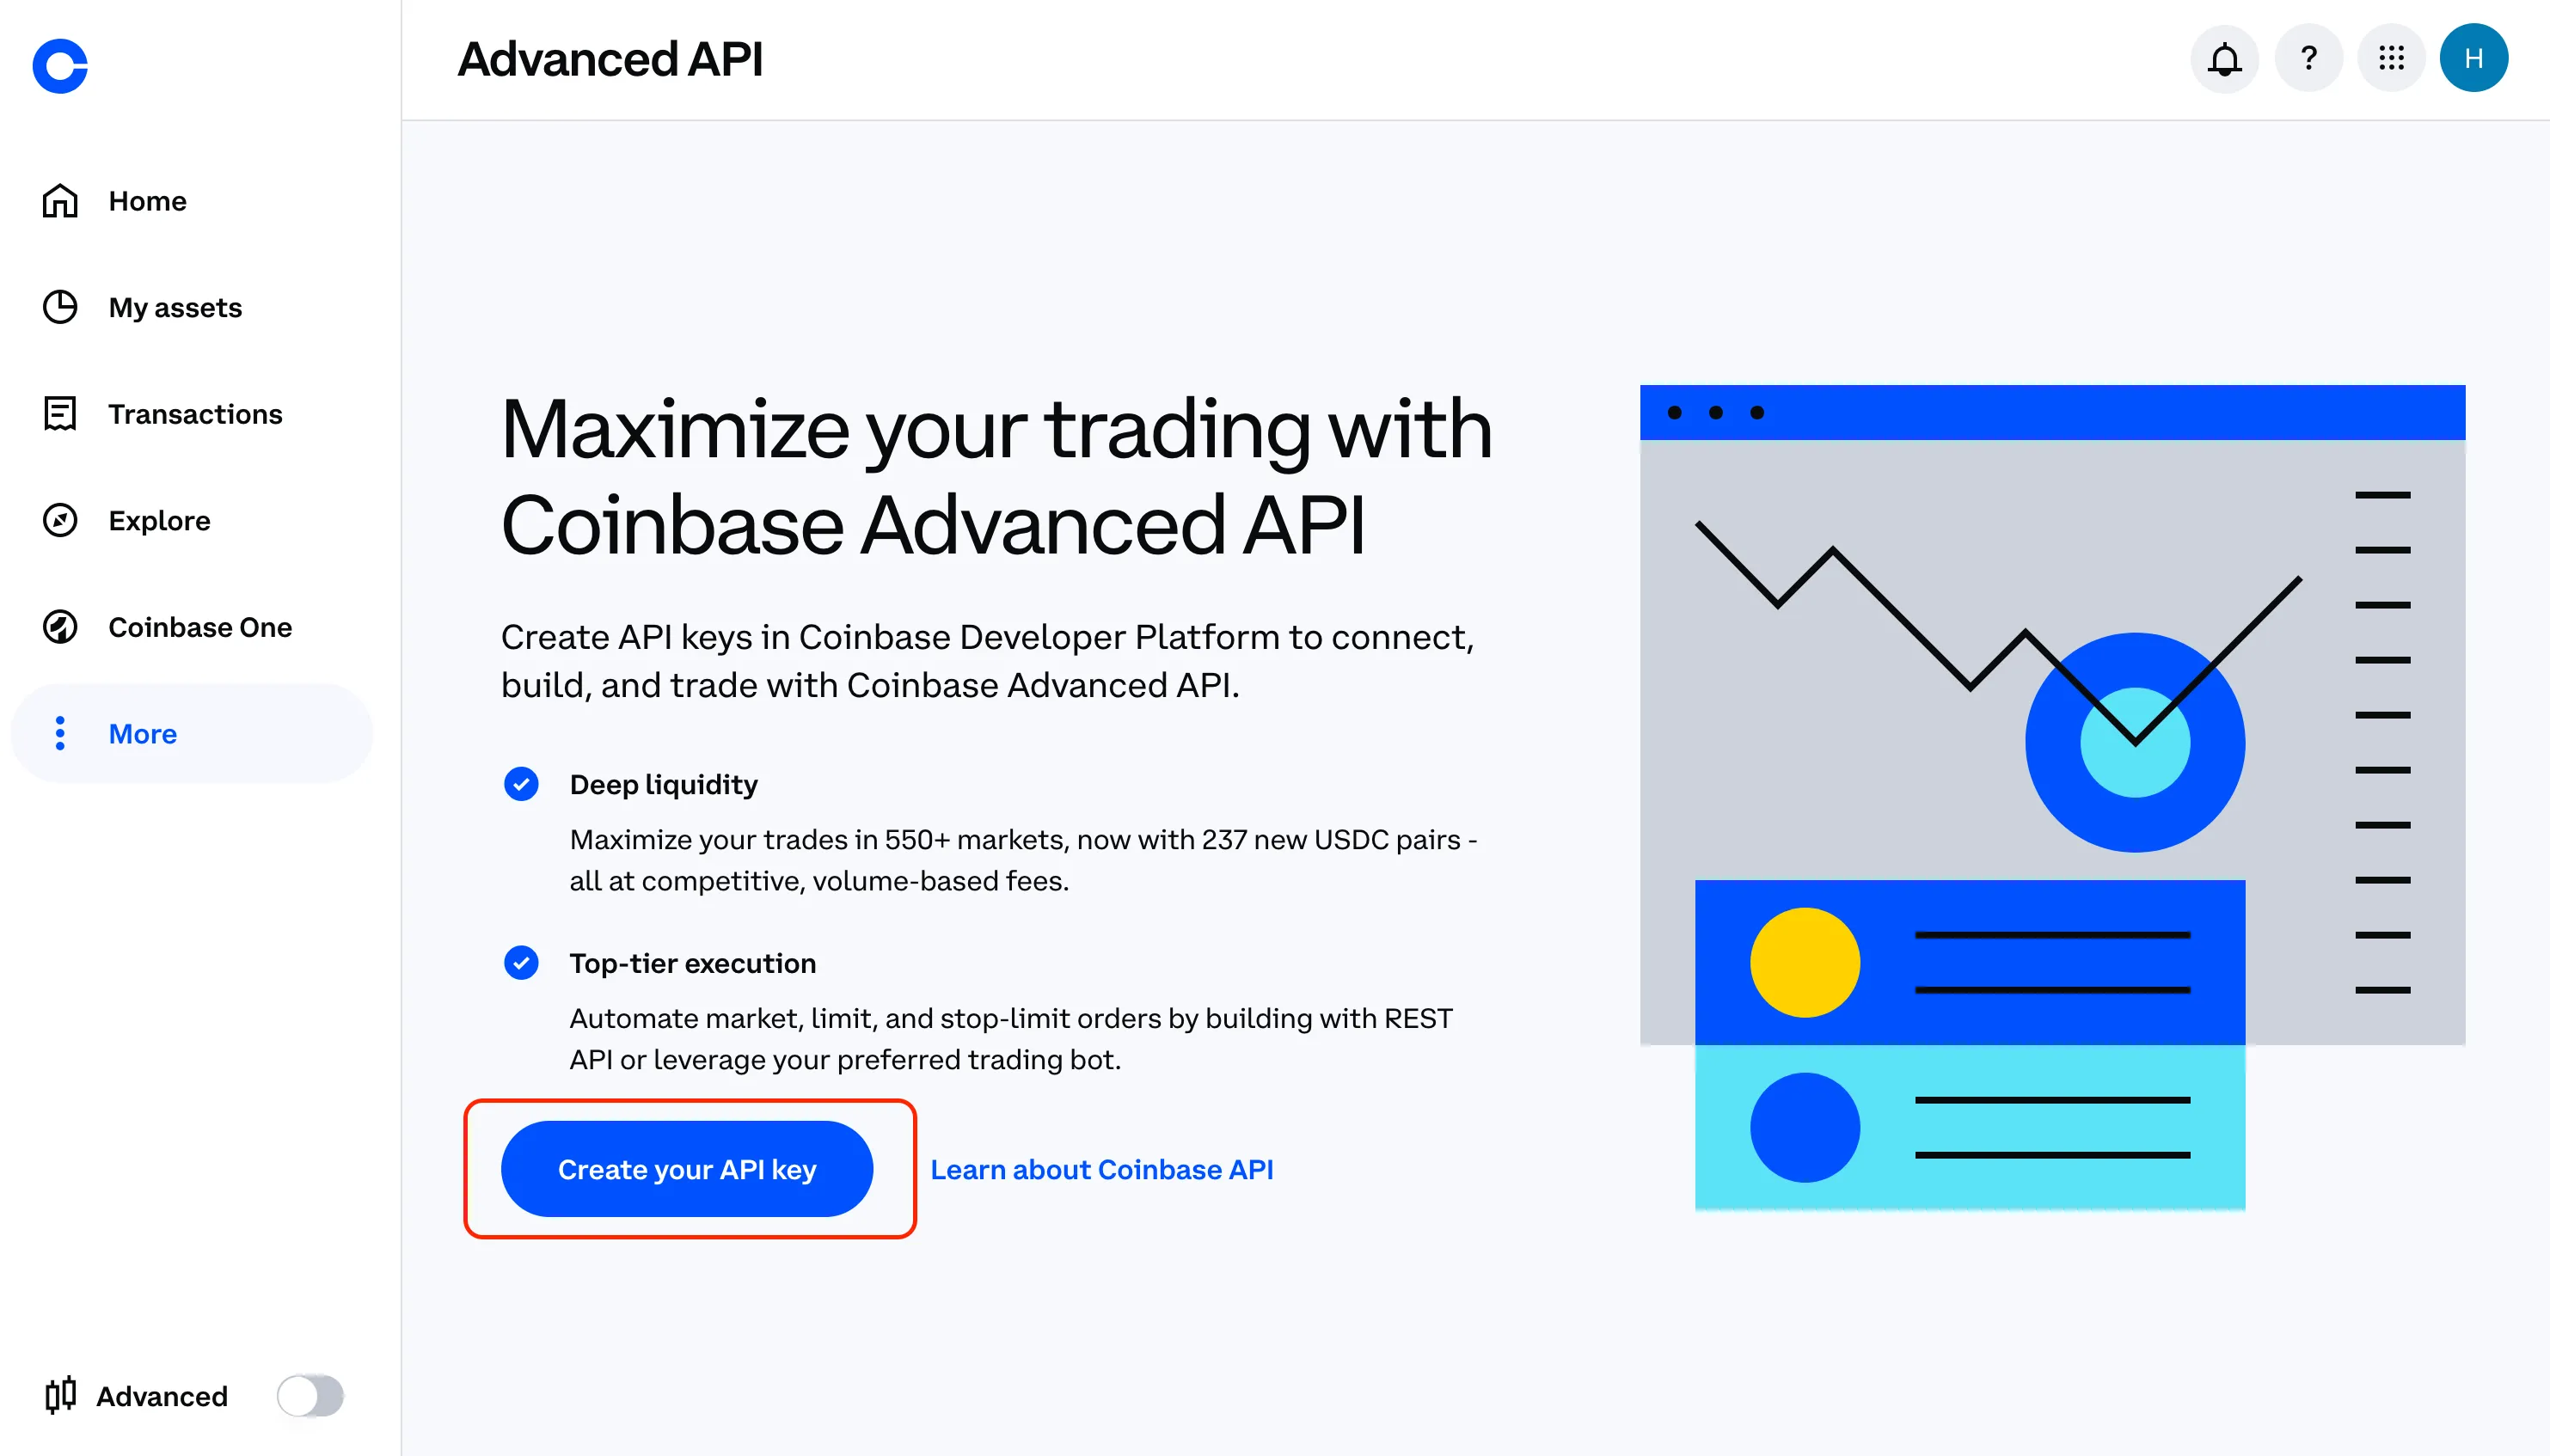
Step 6: Create a Coinbase API Key
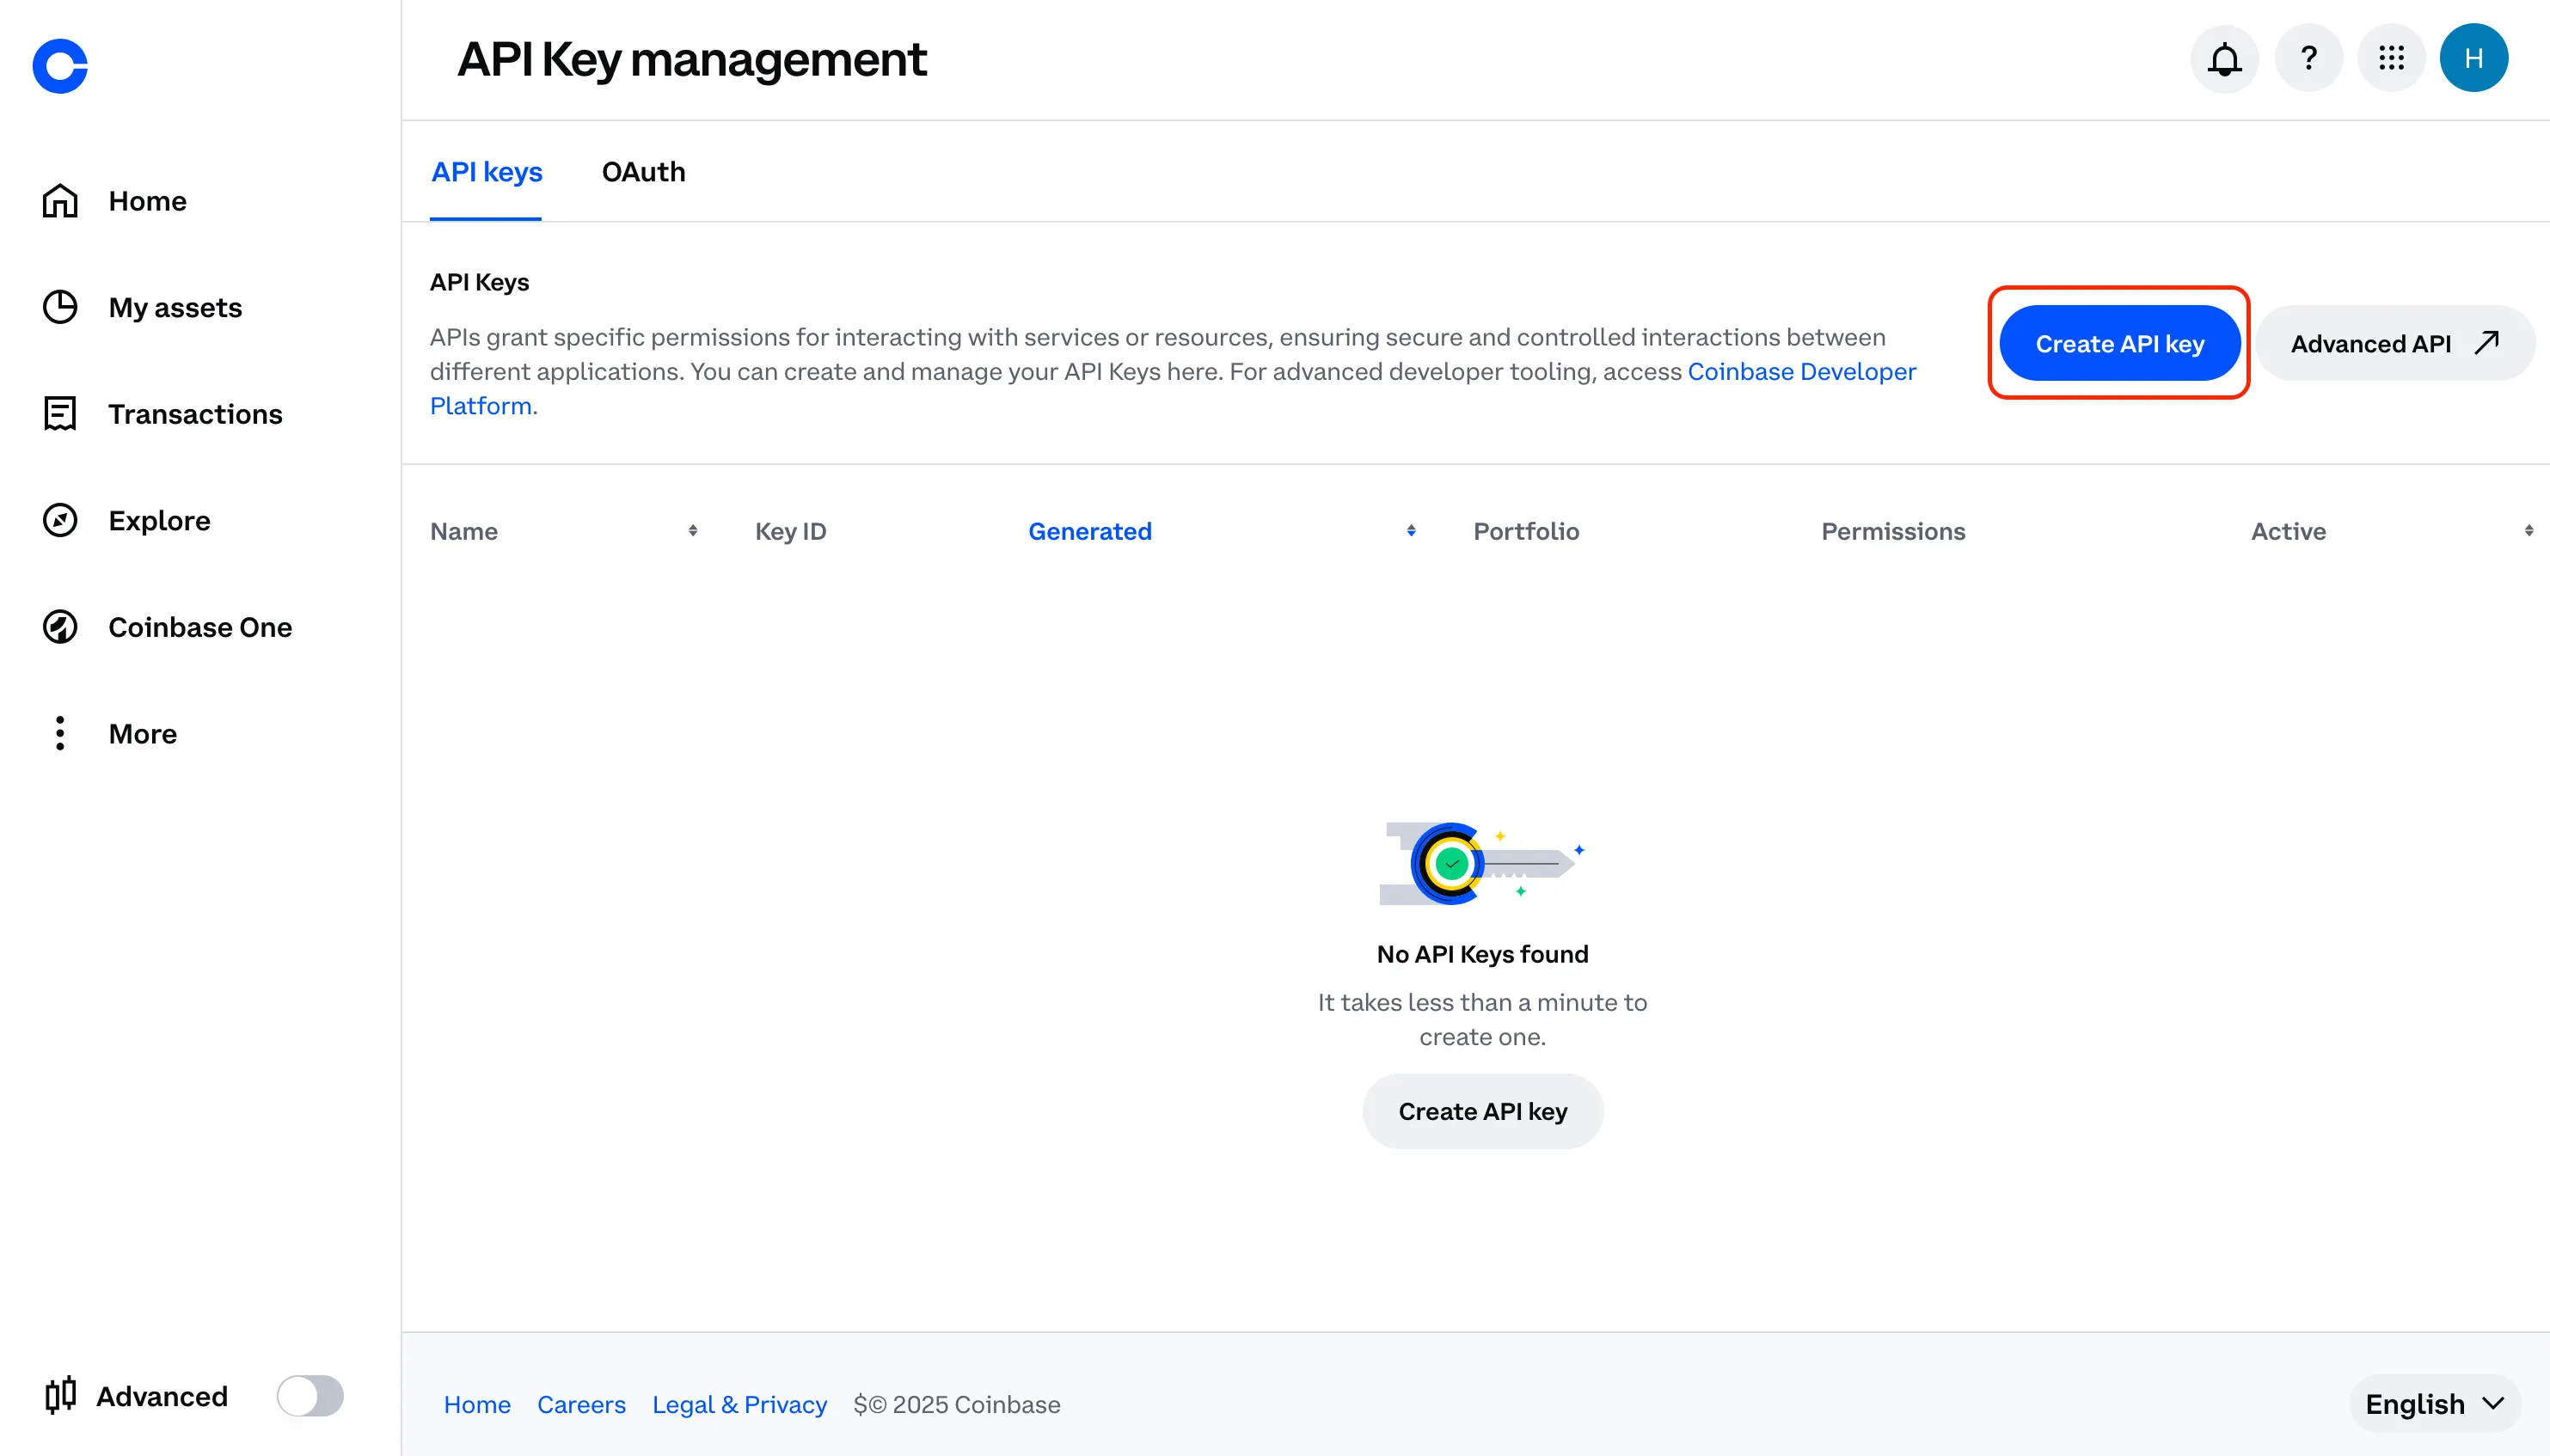
Click on the “Create your API key” button to open the “API Key management page.”
Next, click on “Create API key” to begin the setup process.
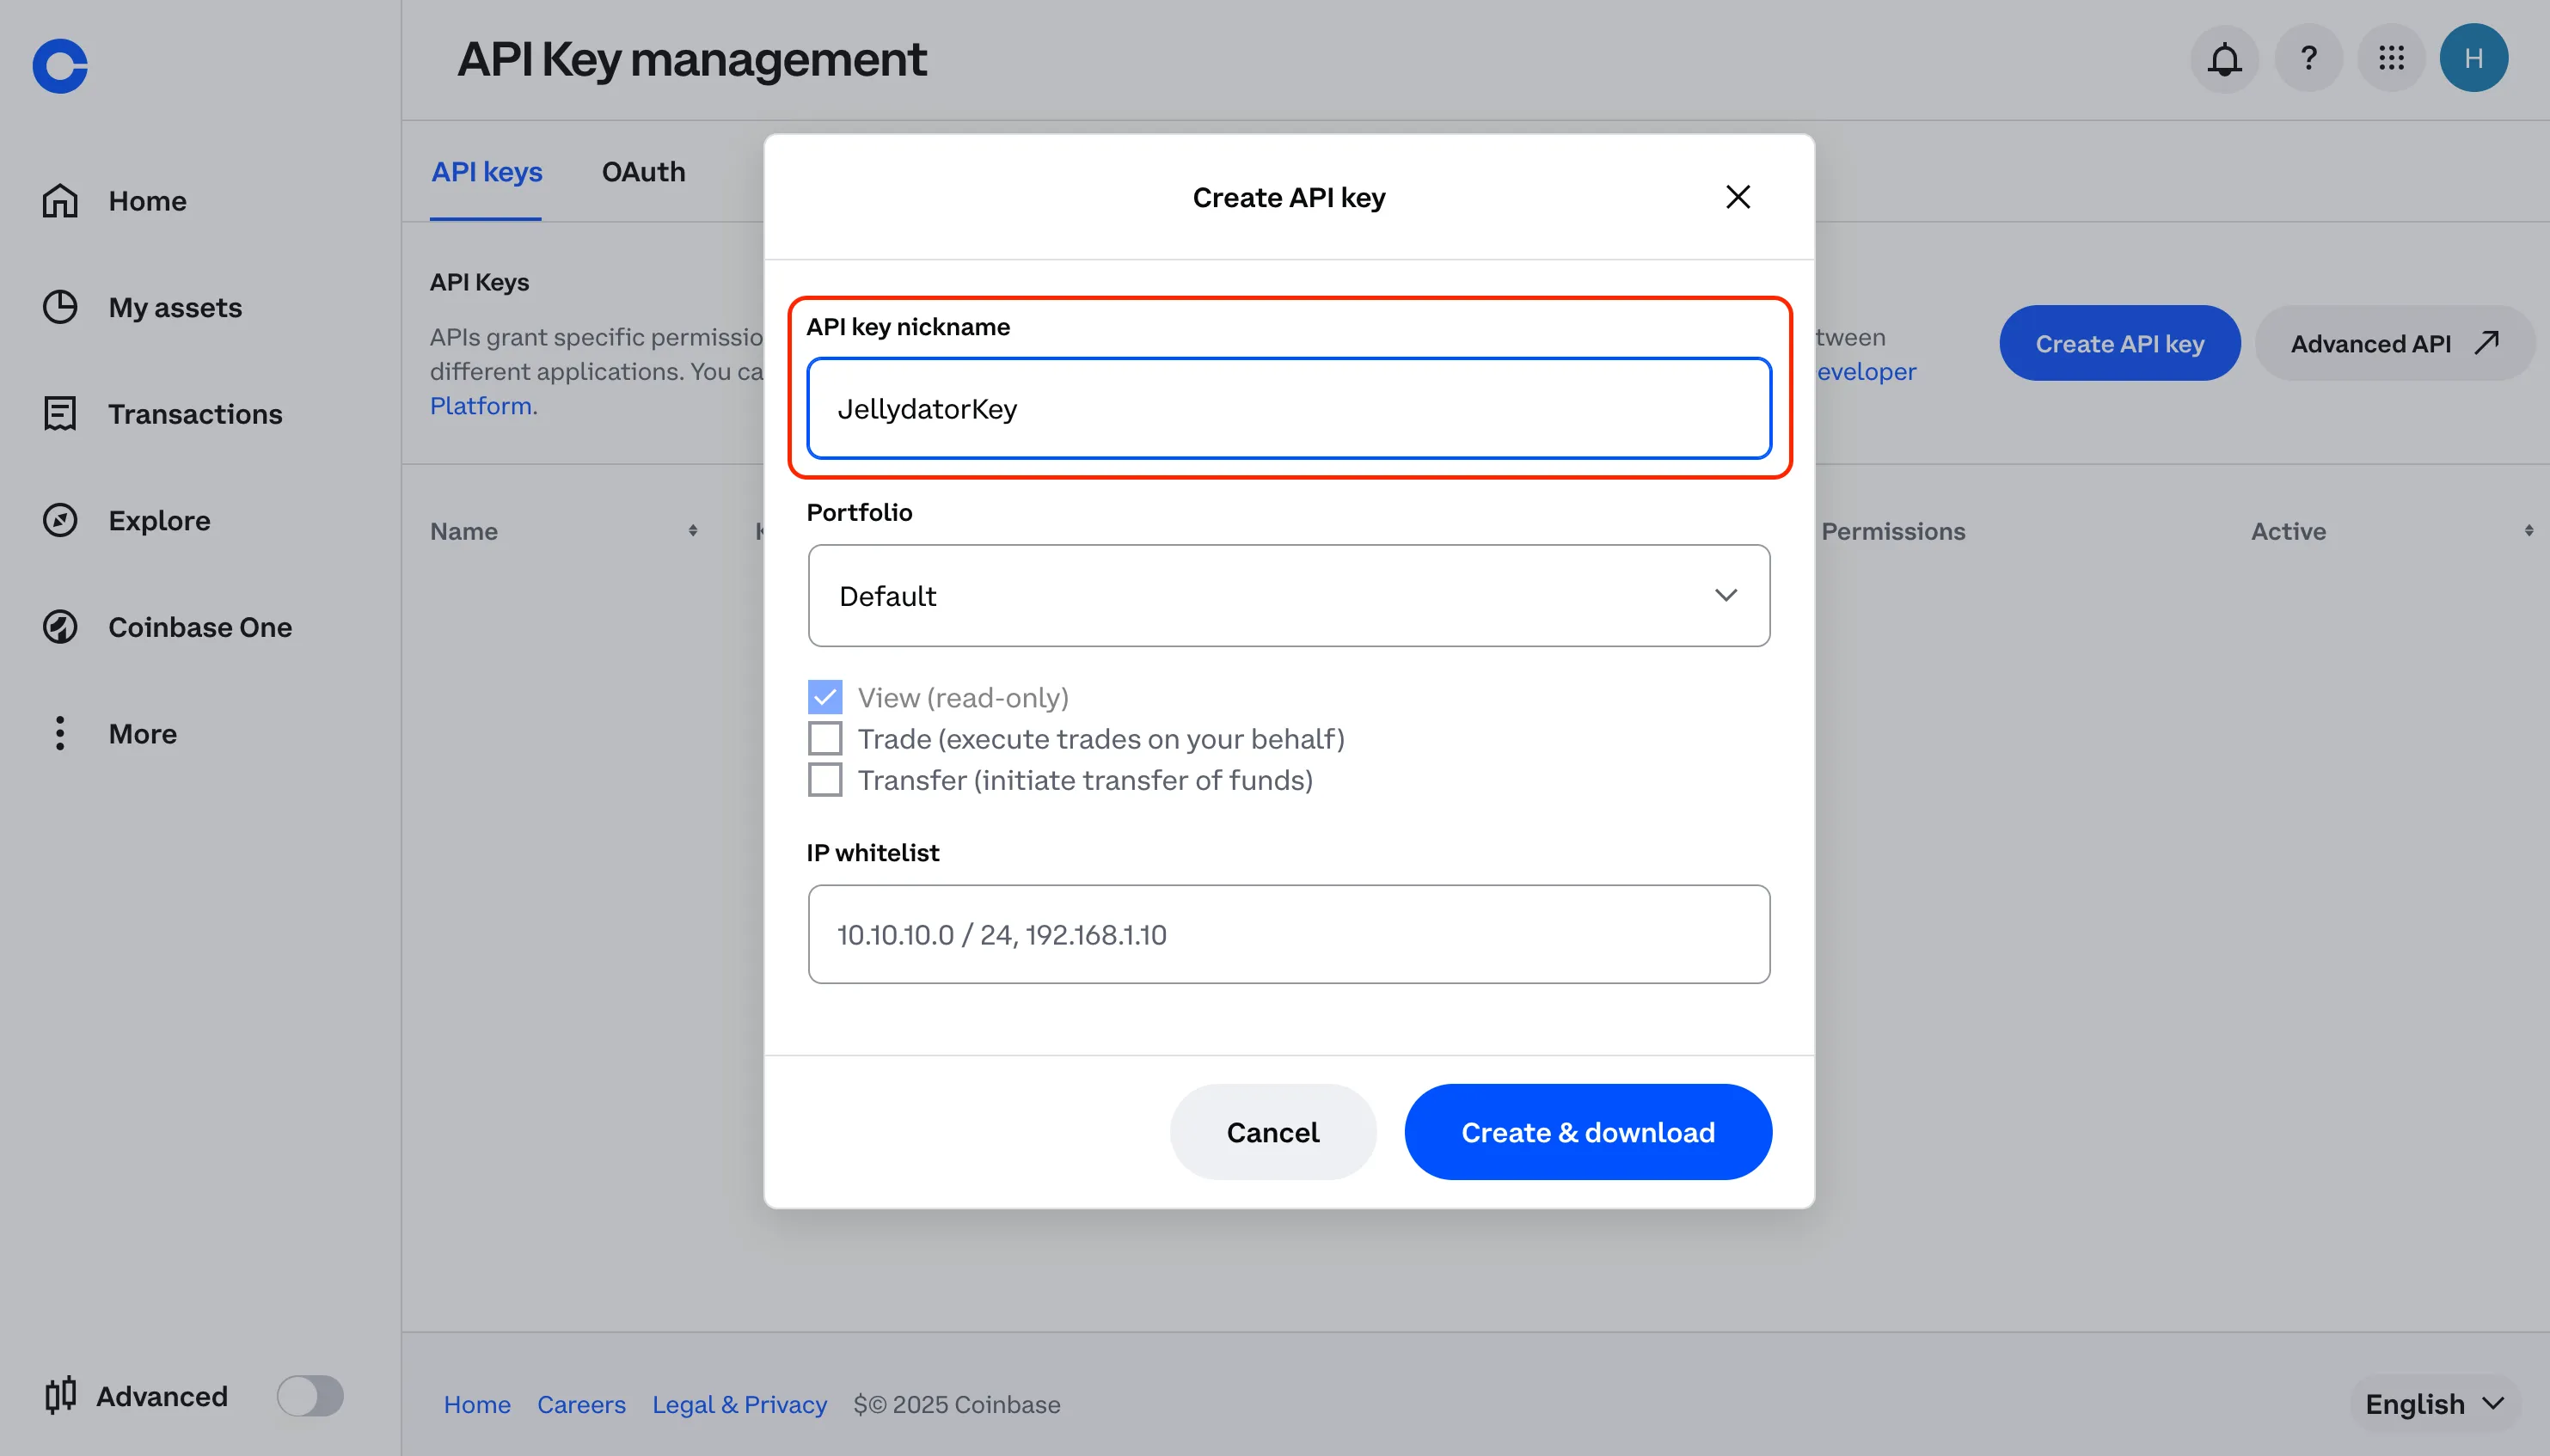
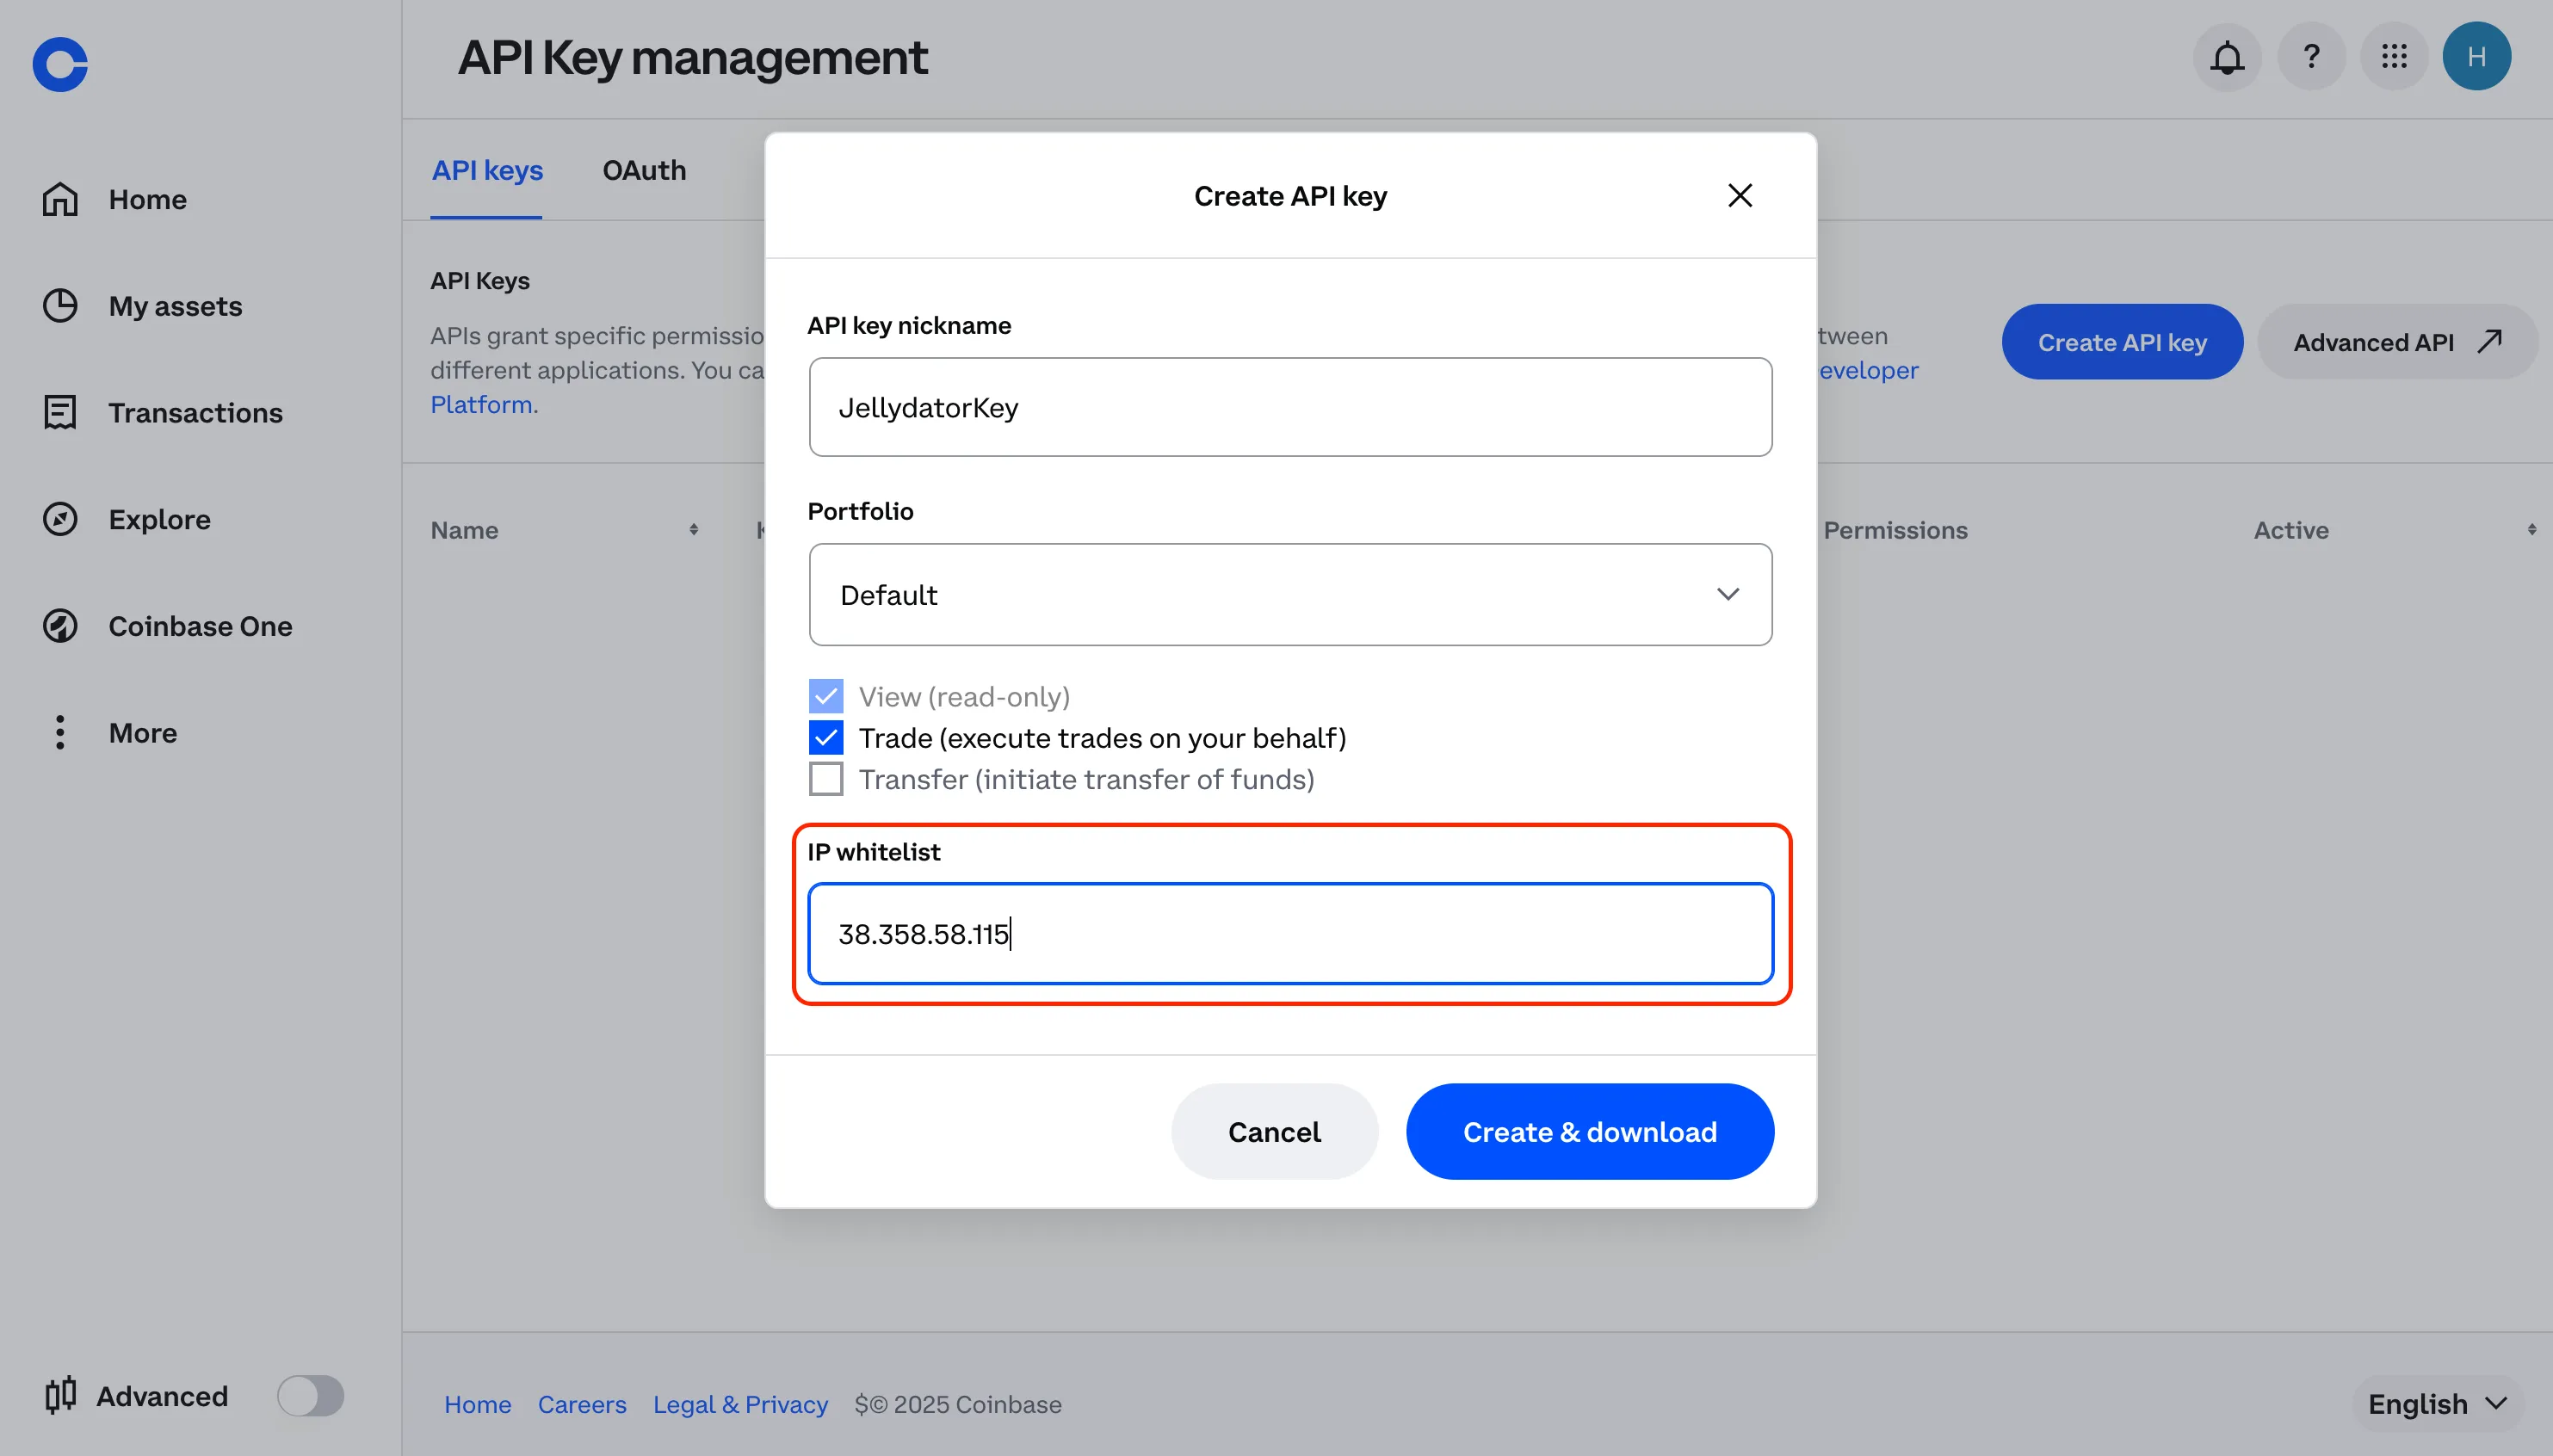
Give your API key a memorable nickname like “JellydatorKey” so you can easily identify it within Coinbase later.
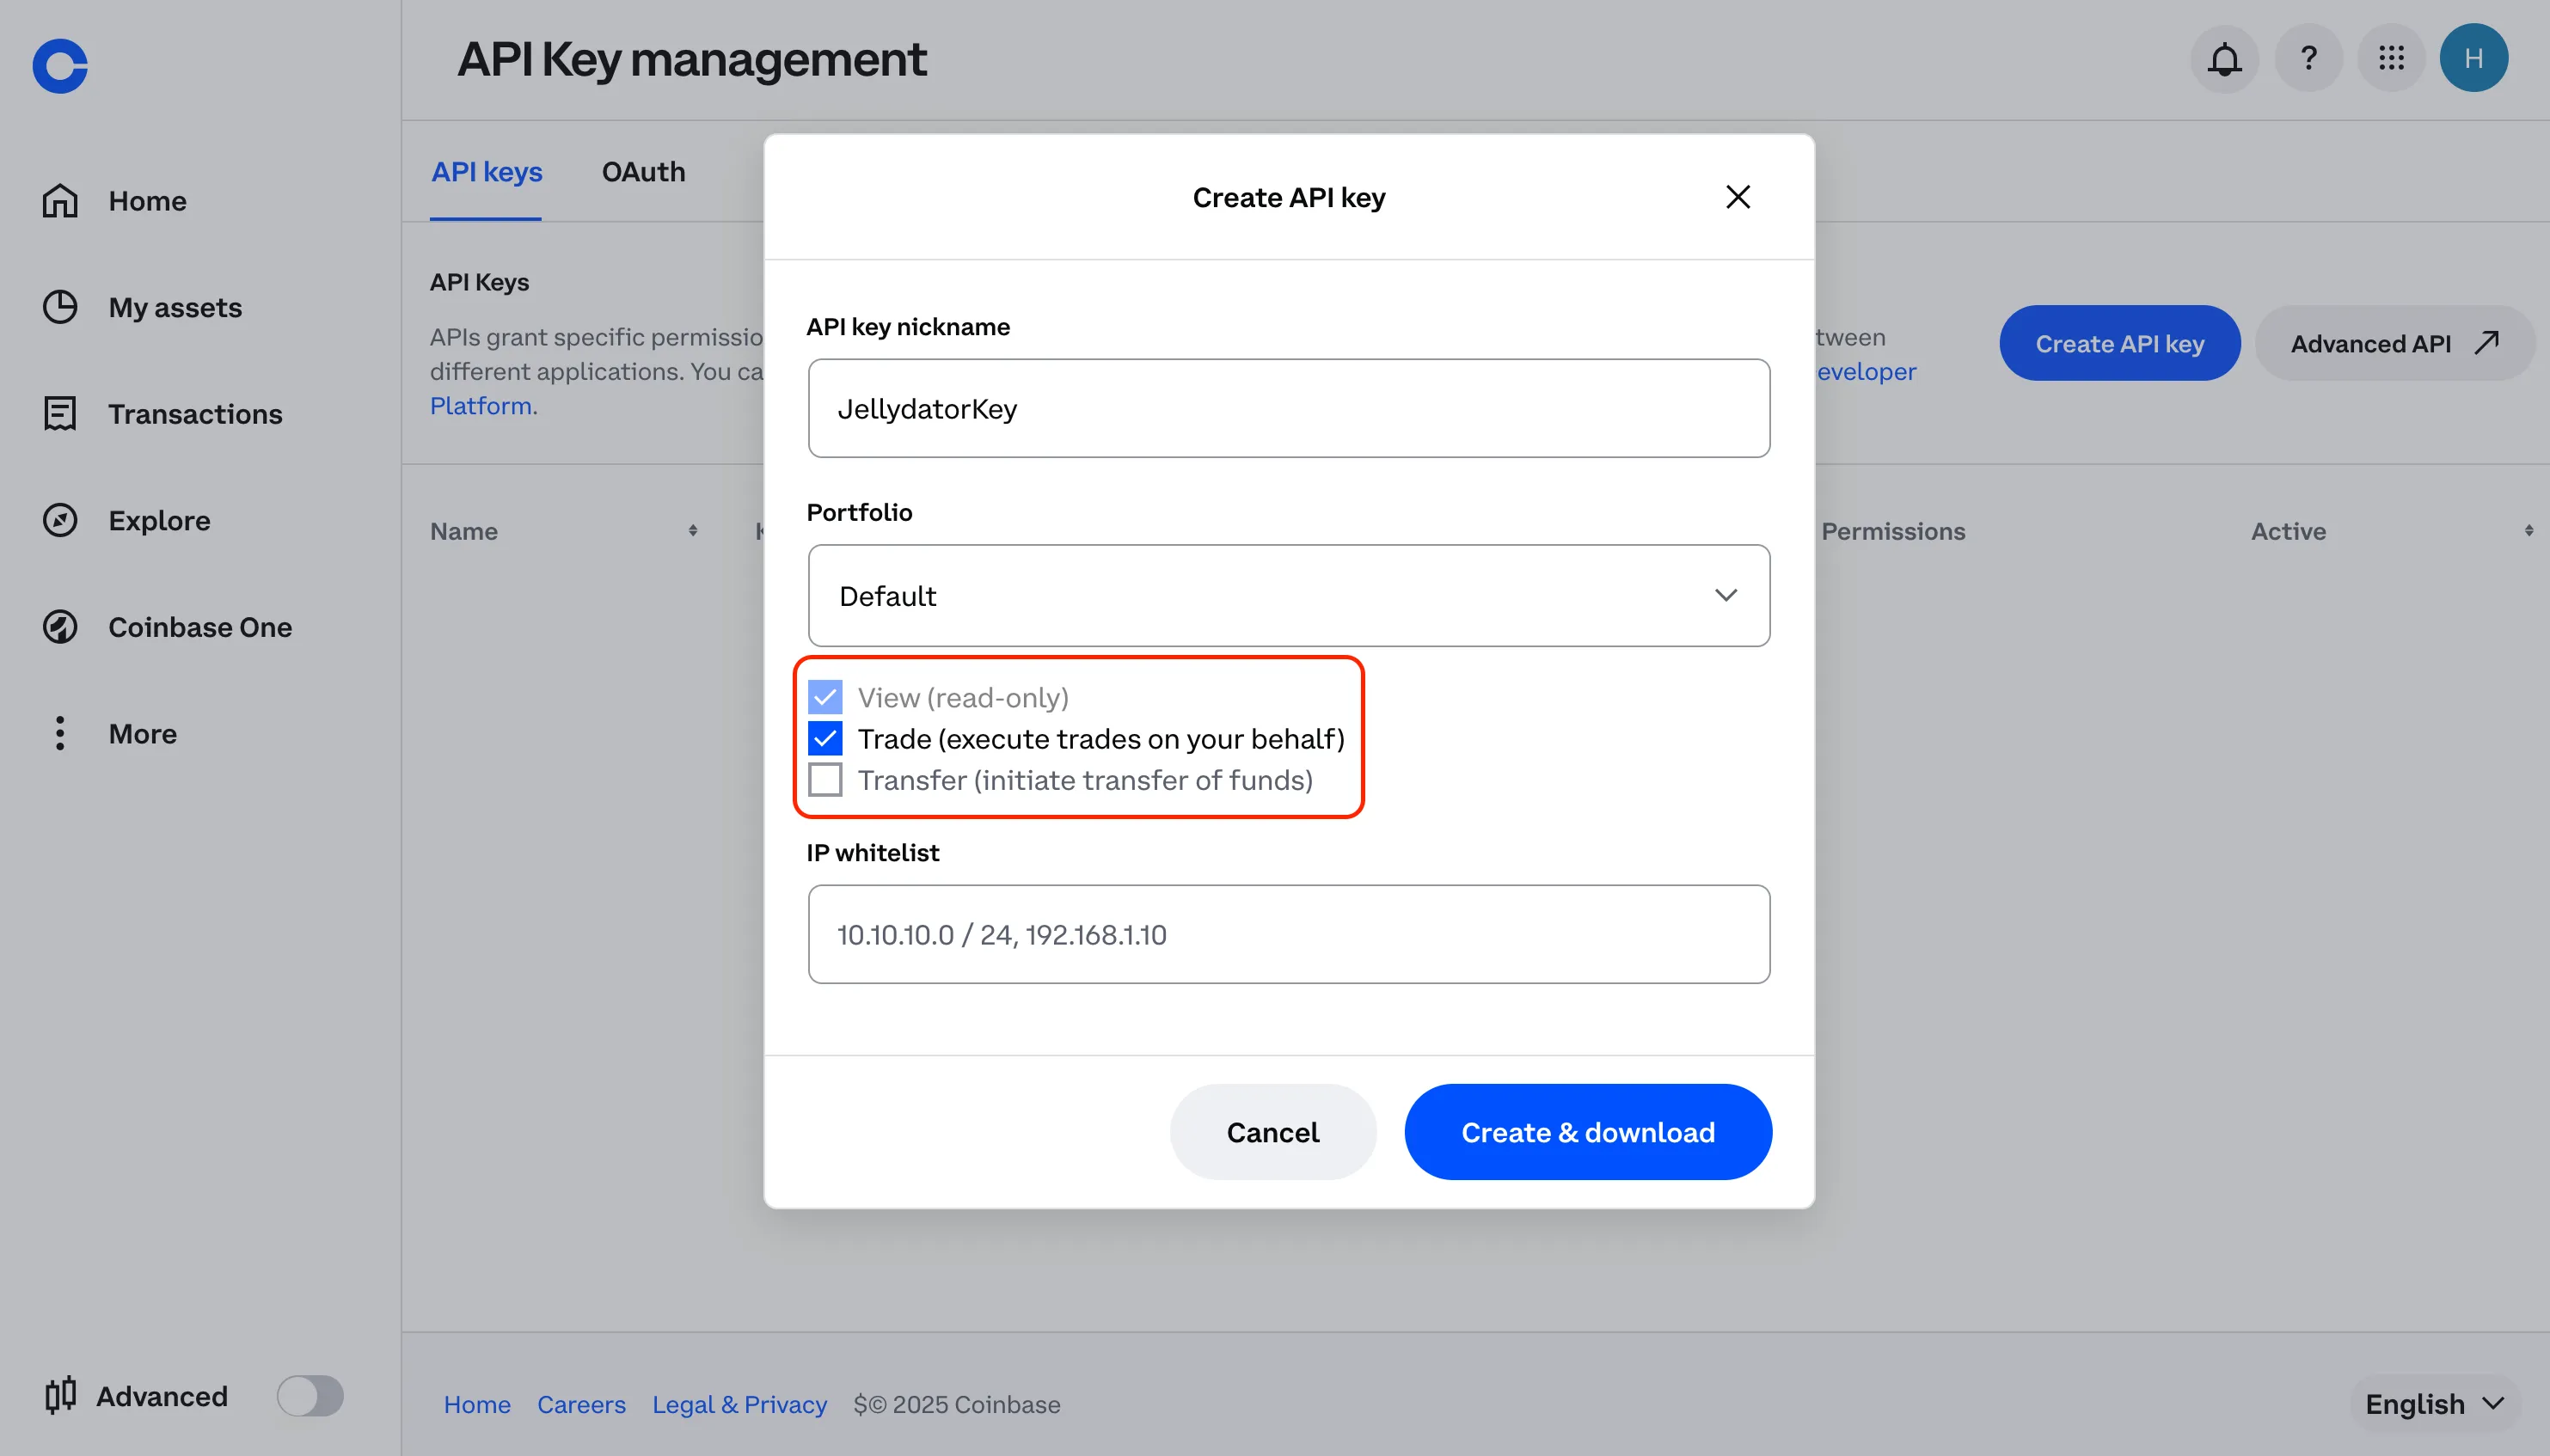
For security, enable just the “View” and “Trade” permissions, but leave “Transfer” disabled. This ensures that Jellydator can see your assets and execute trades but cannot withdraw funds.
Now you need to whitelist Jellydator’s IP addresses to ensure that only Jellydator is able to use this API key. To do that, return to the Jellydator tab and copy all the trusted IPs by clicking on the IP address field.
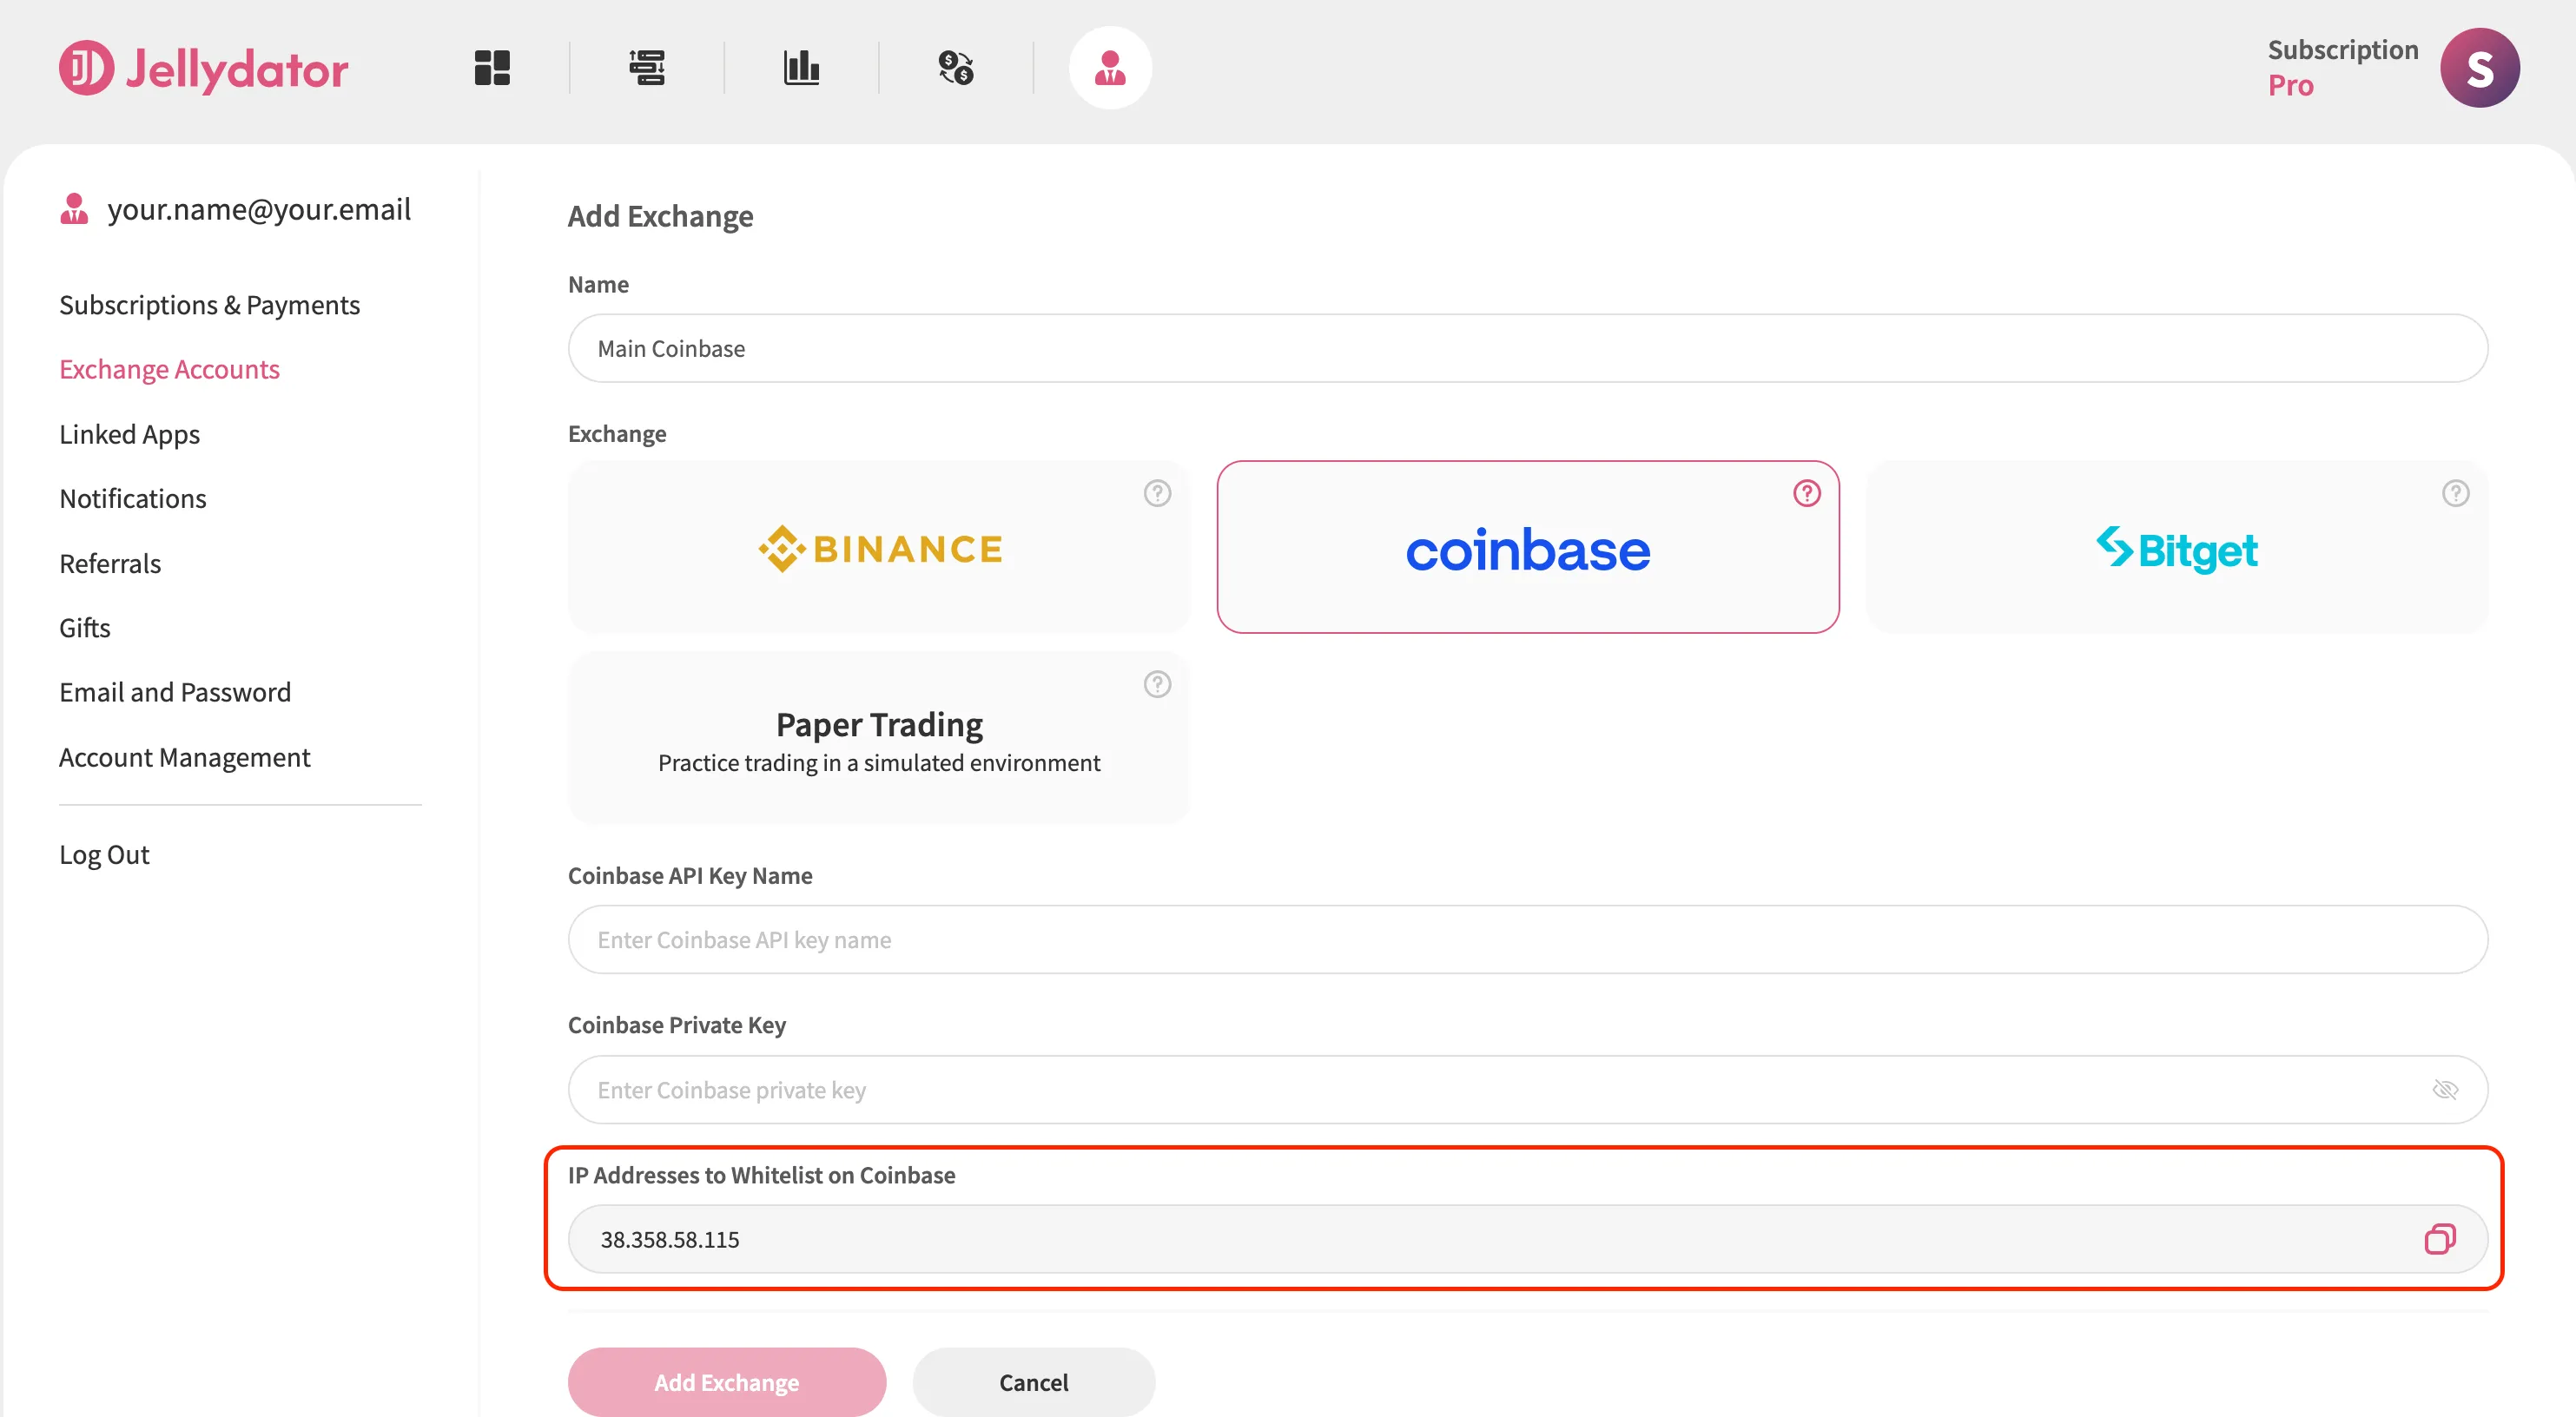
Paste these IP addresses into Coinbase’s IP whitelist field.
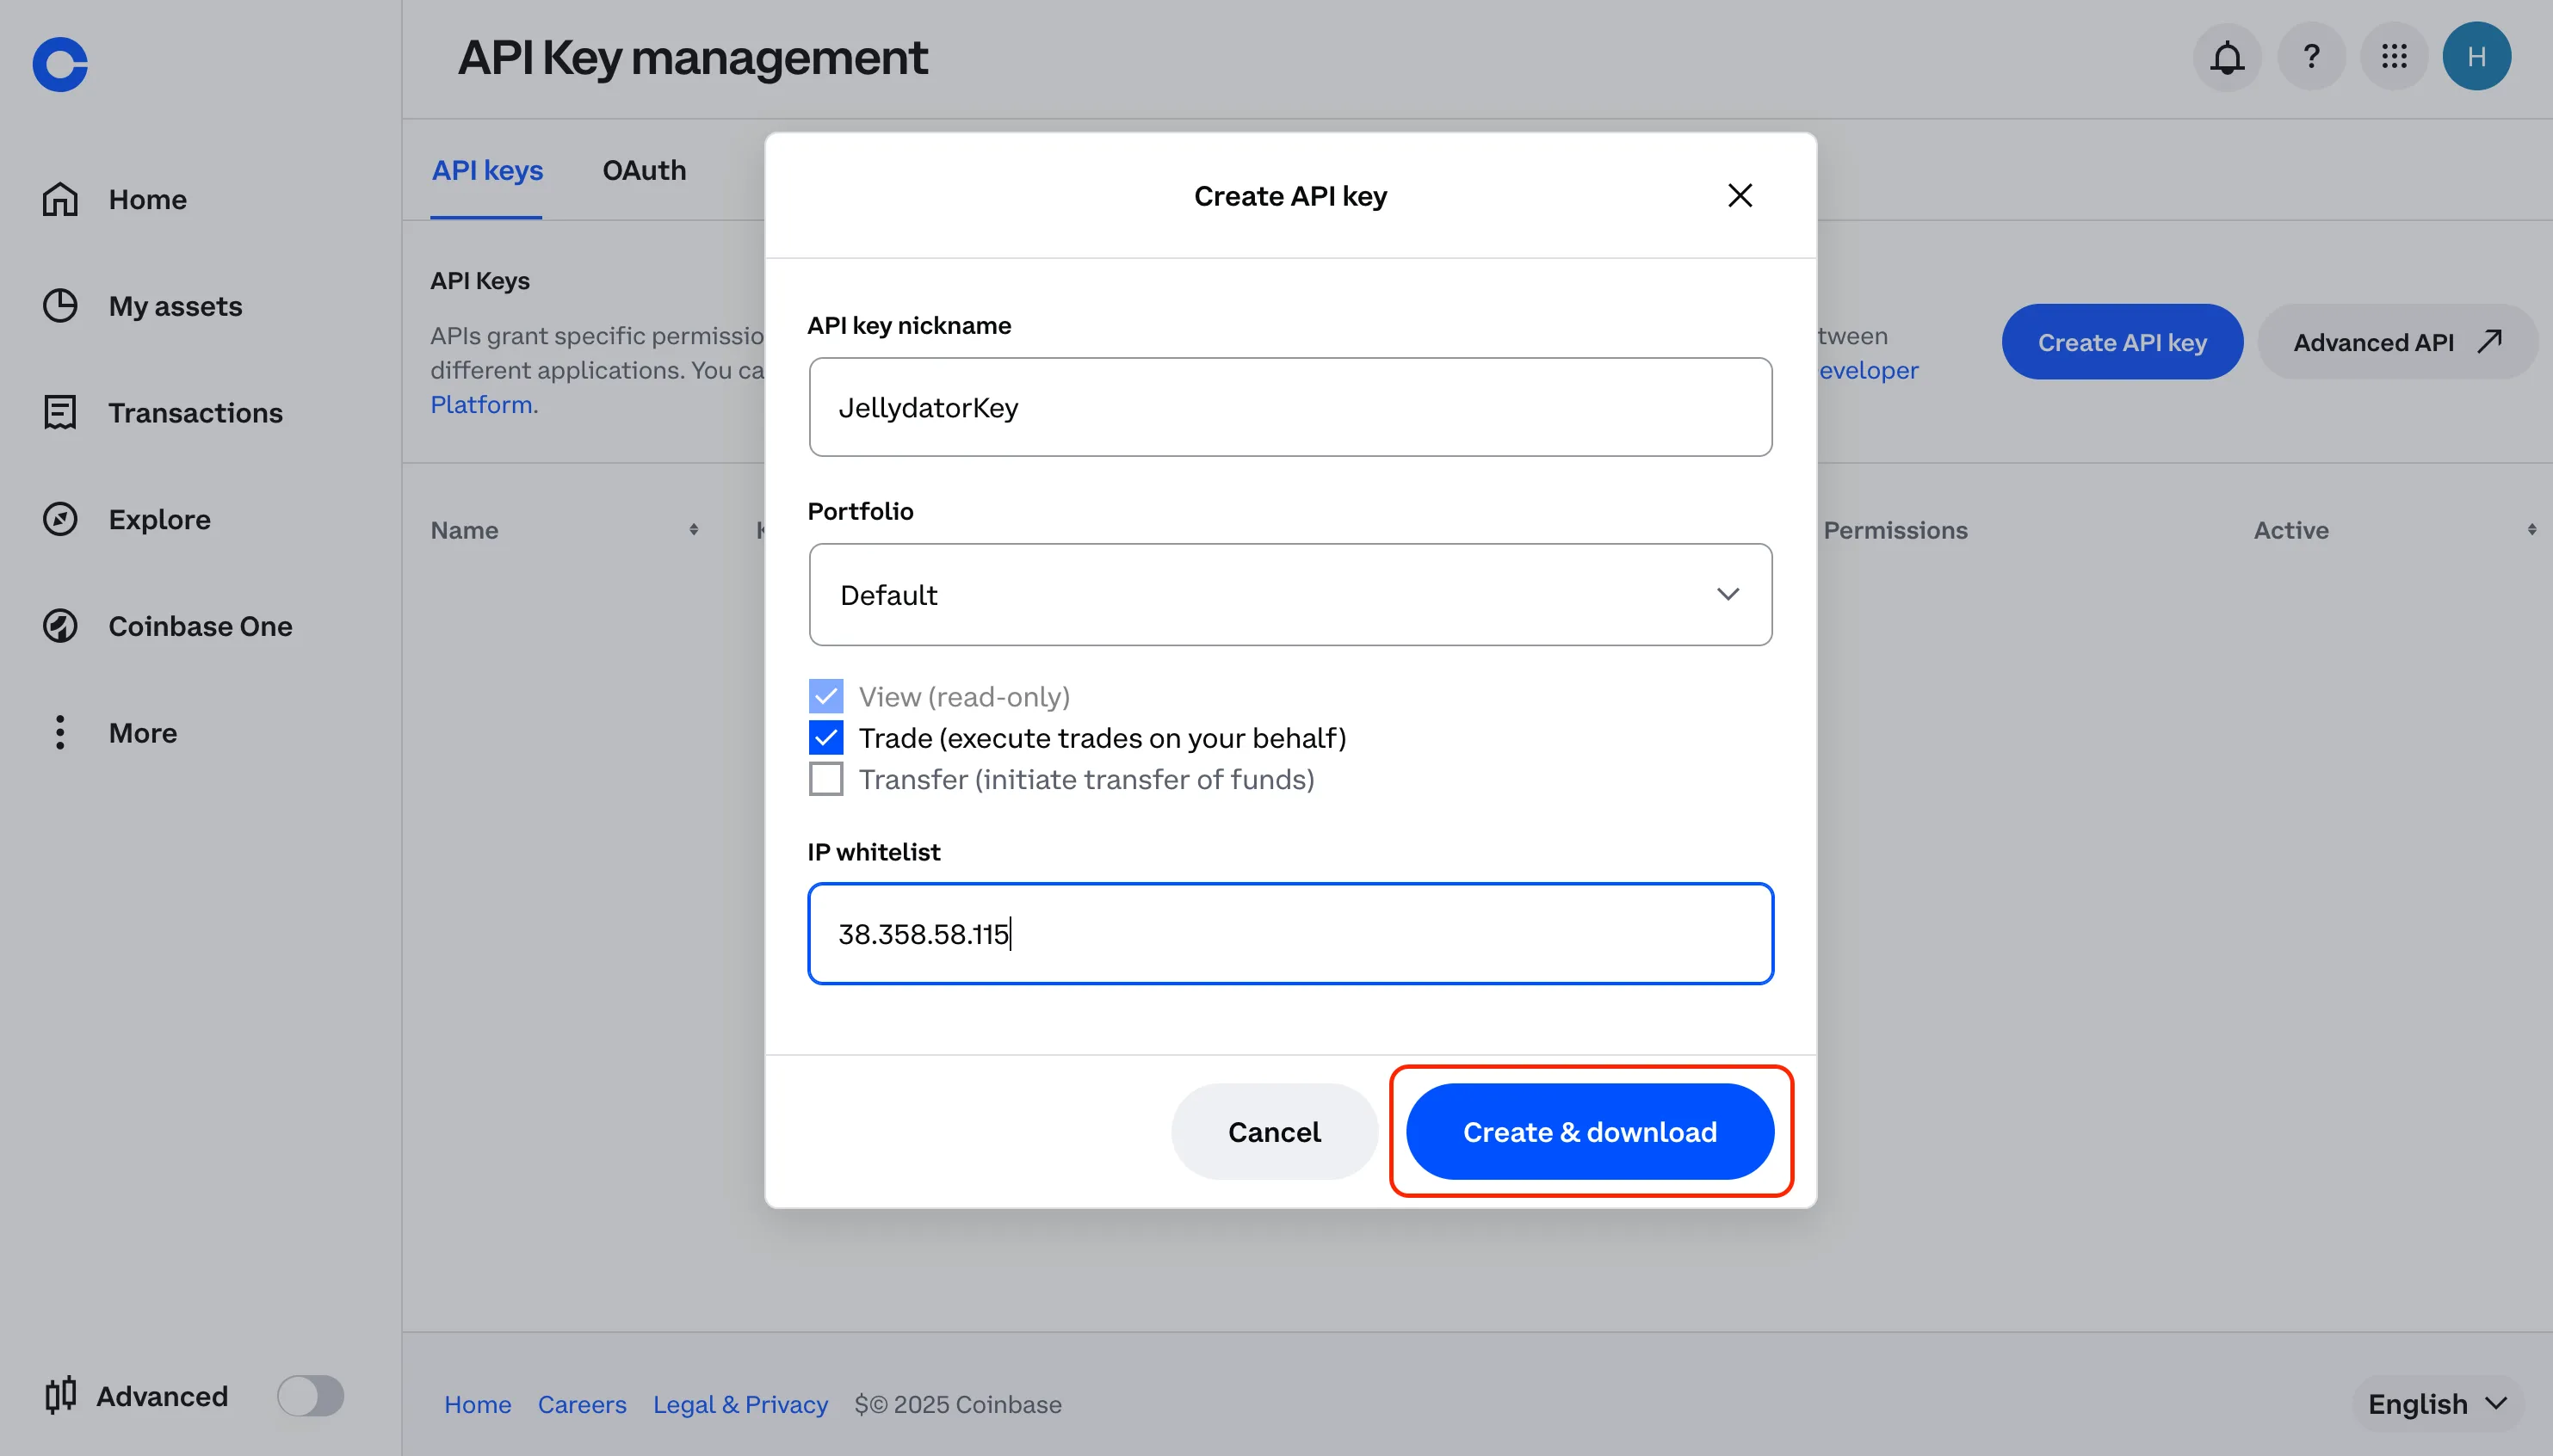
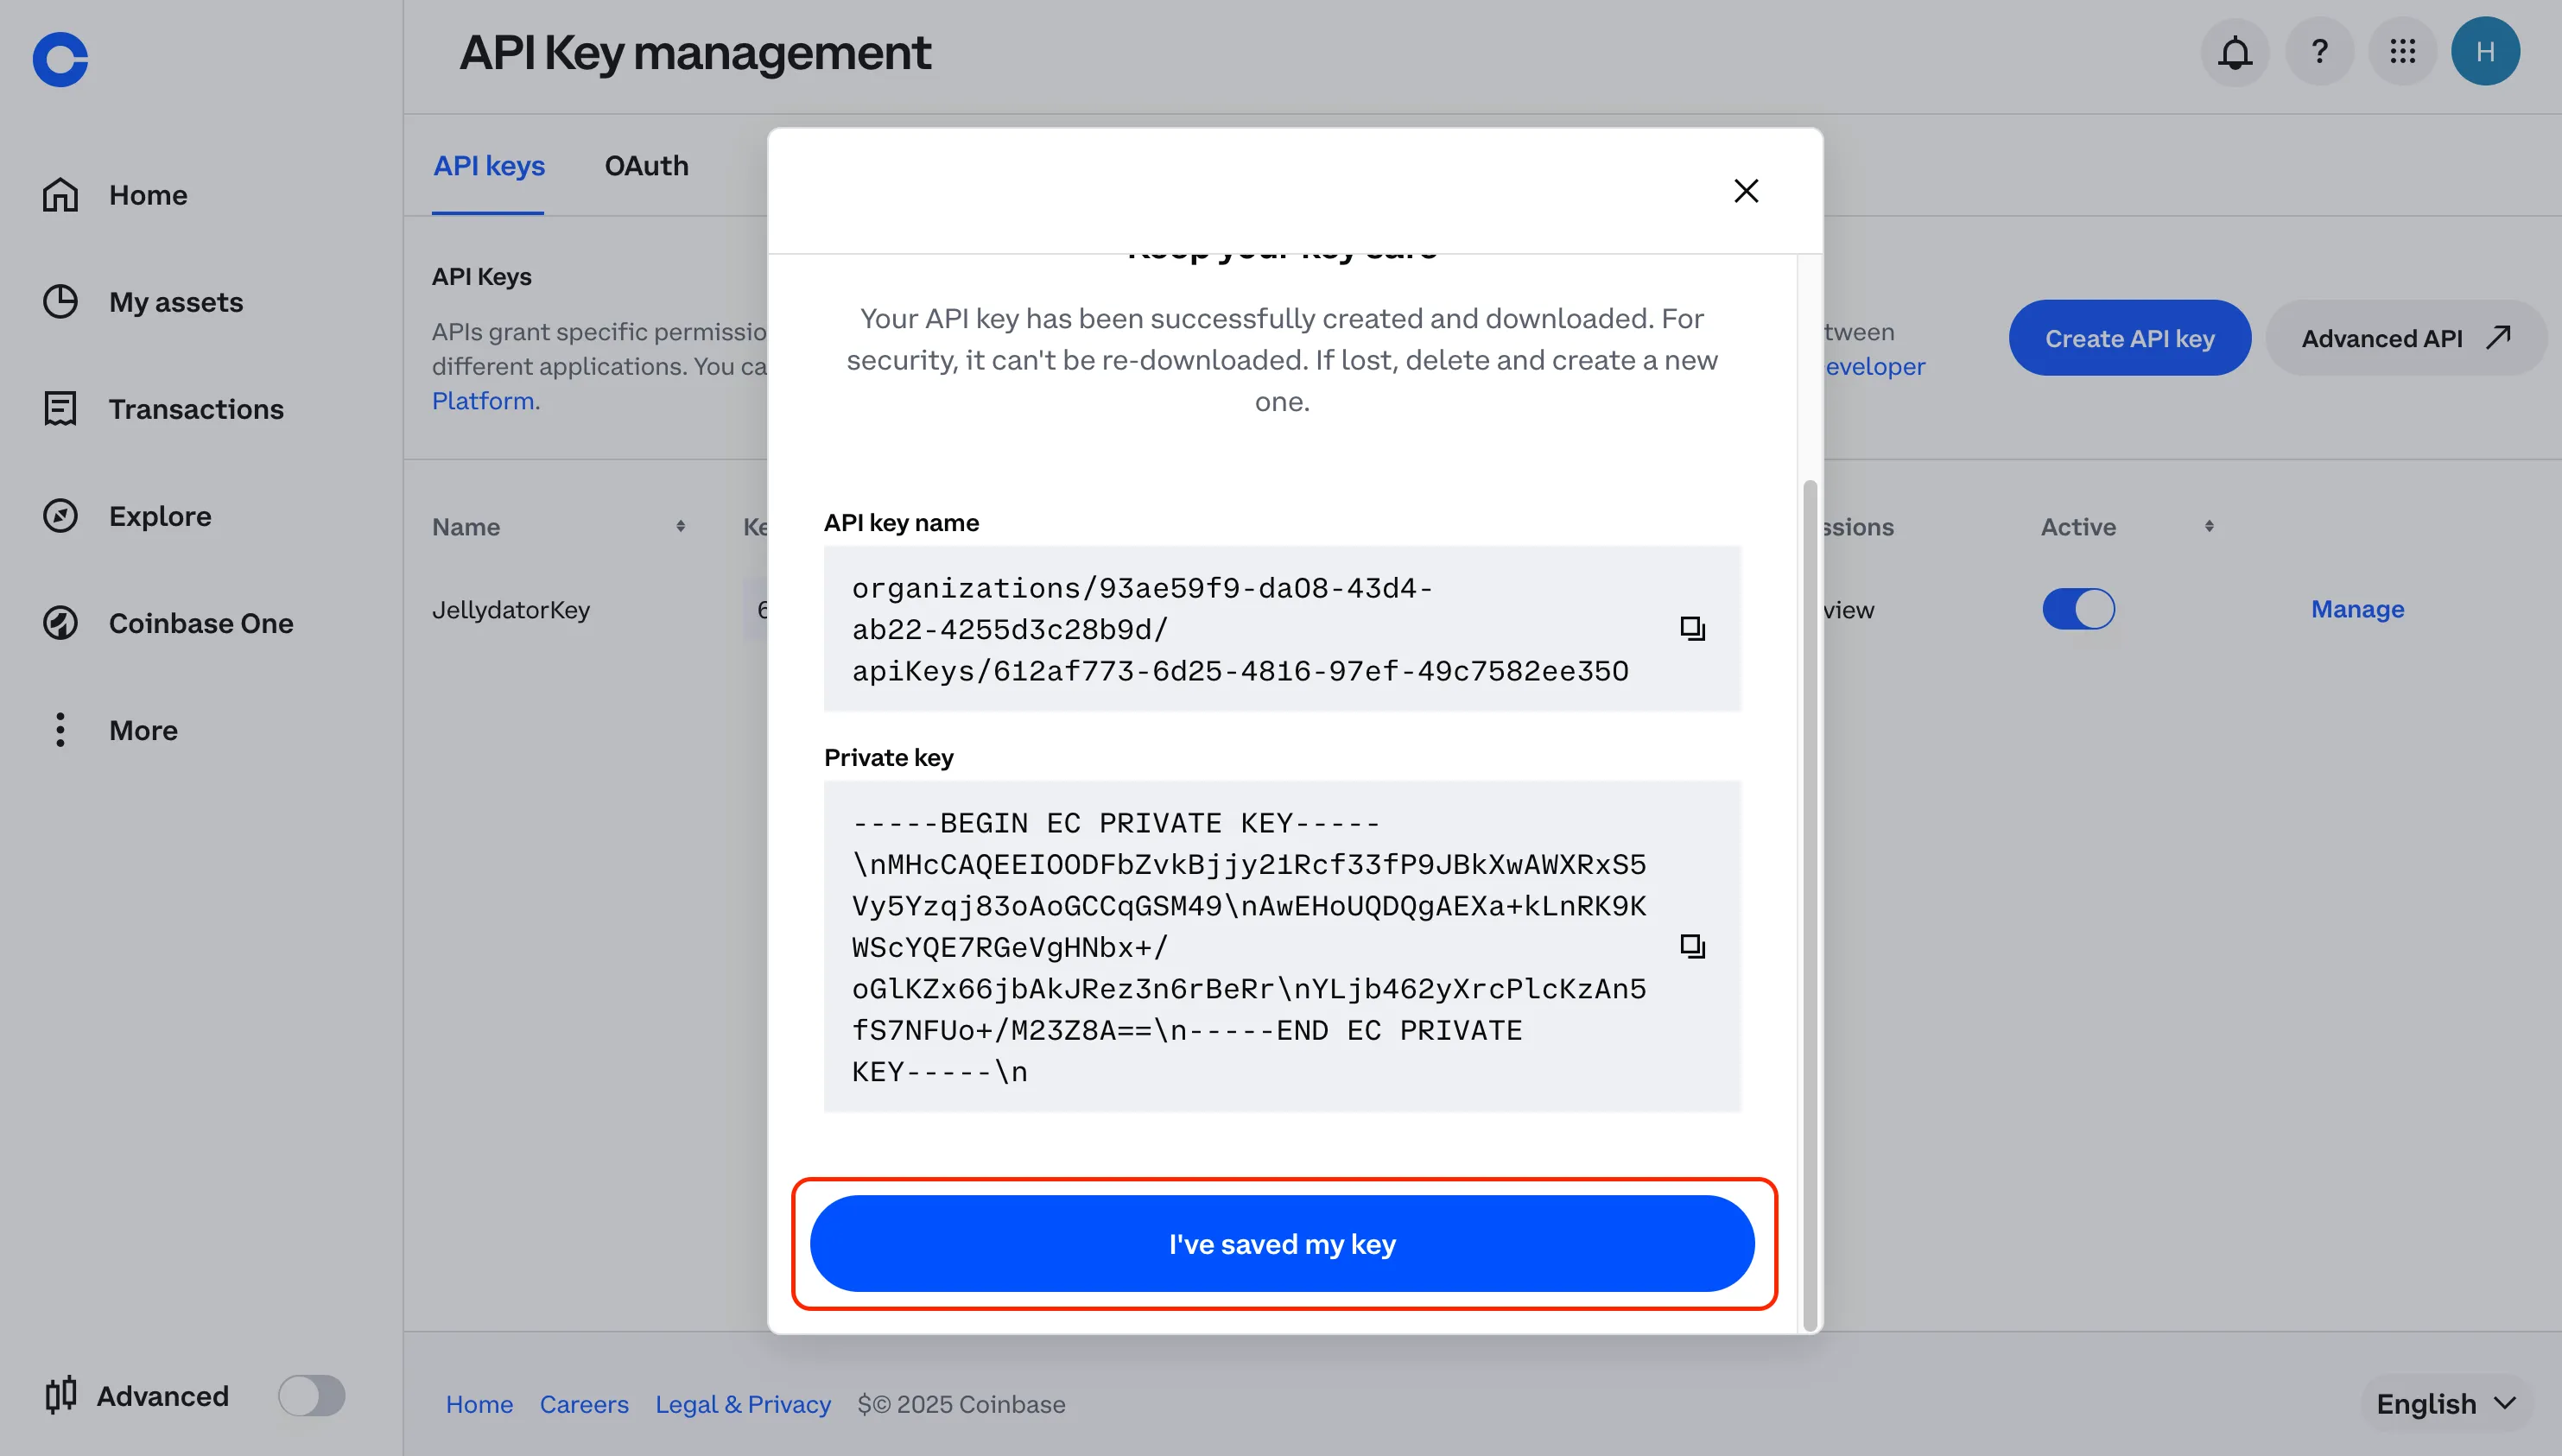
Click “Create & download” and you’ll see a download prompt for your API key details. You can cancel the download process since we’ll be copying the information directly from the Coinbase page.
Step 7: Copy and Paste Your New API Key
Use the copy buttons to grab both the “API key name” and “Private key” exactly as shown. Using the copy buttons helps avoid typos that could prevent your exchange connection from working.
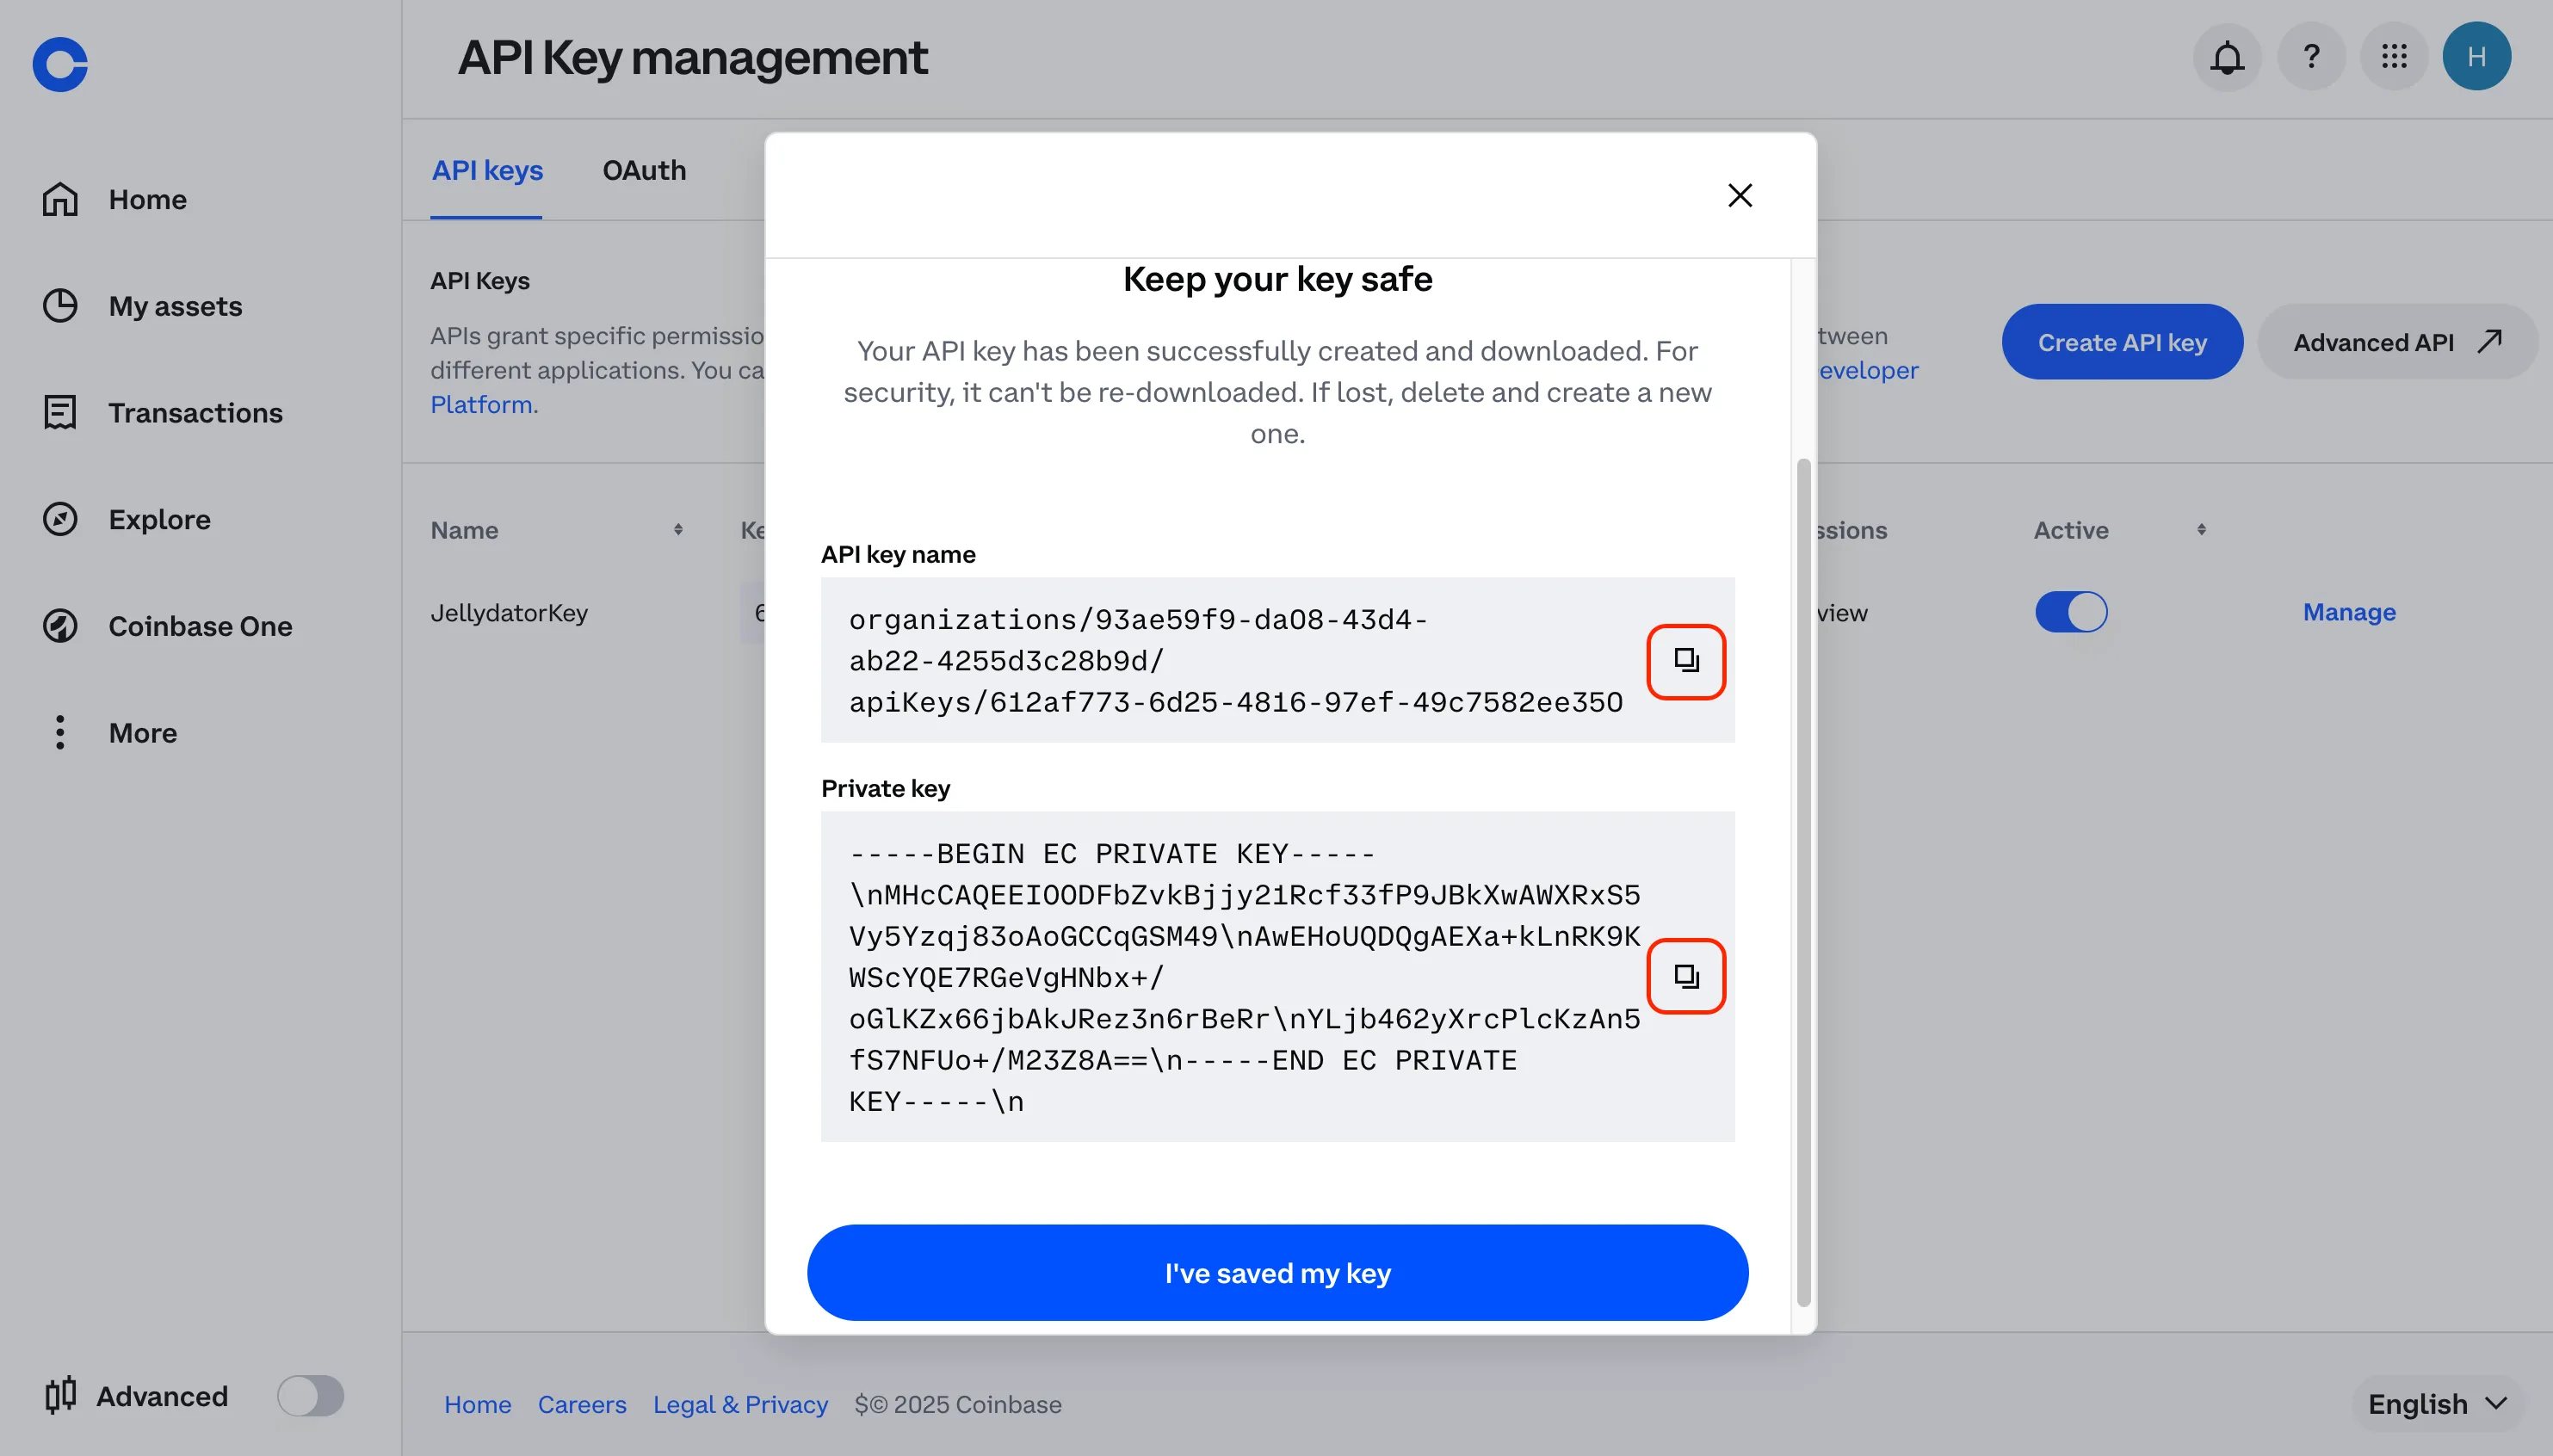
Switch back to Jellydator and paste these values into their corresponding fields.
Return to your Coinbase tab and click “I’ve saved my key” to activate the API connection.
Back in Jellydator, click “Add Exchange” to complete the process.
That’s it! If everything is set up correctly, your Coinbase account will appear in your Jellydator exchange account list. You’ll now be able to view balances, monitor asset performance, and integrate this account into your trading strategies.