
Binance is the go-to exchange for millions of crypto traders worldwide. Its intuitive interface and powerful tools make manual trading a breeze. But why stop there? By connecting your Binance account to Jellydator, you can enhance your trading experience with features that go beyond what Binance offers. From tracking market sentiment to analyzing institutional trends, Jellydator provides everything you need to take your trading further.
In this guide, we’ll walk you through the steps needed to connect your Binance account to Jellydator.
Step 1: Navigate to the Jellydator Account Page
Start by heading to your Jellydator account page. This is where you’ll manage all your exchange connections.
Step 2: Open Exchange Accounts Sub-Page
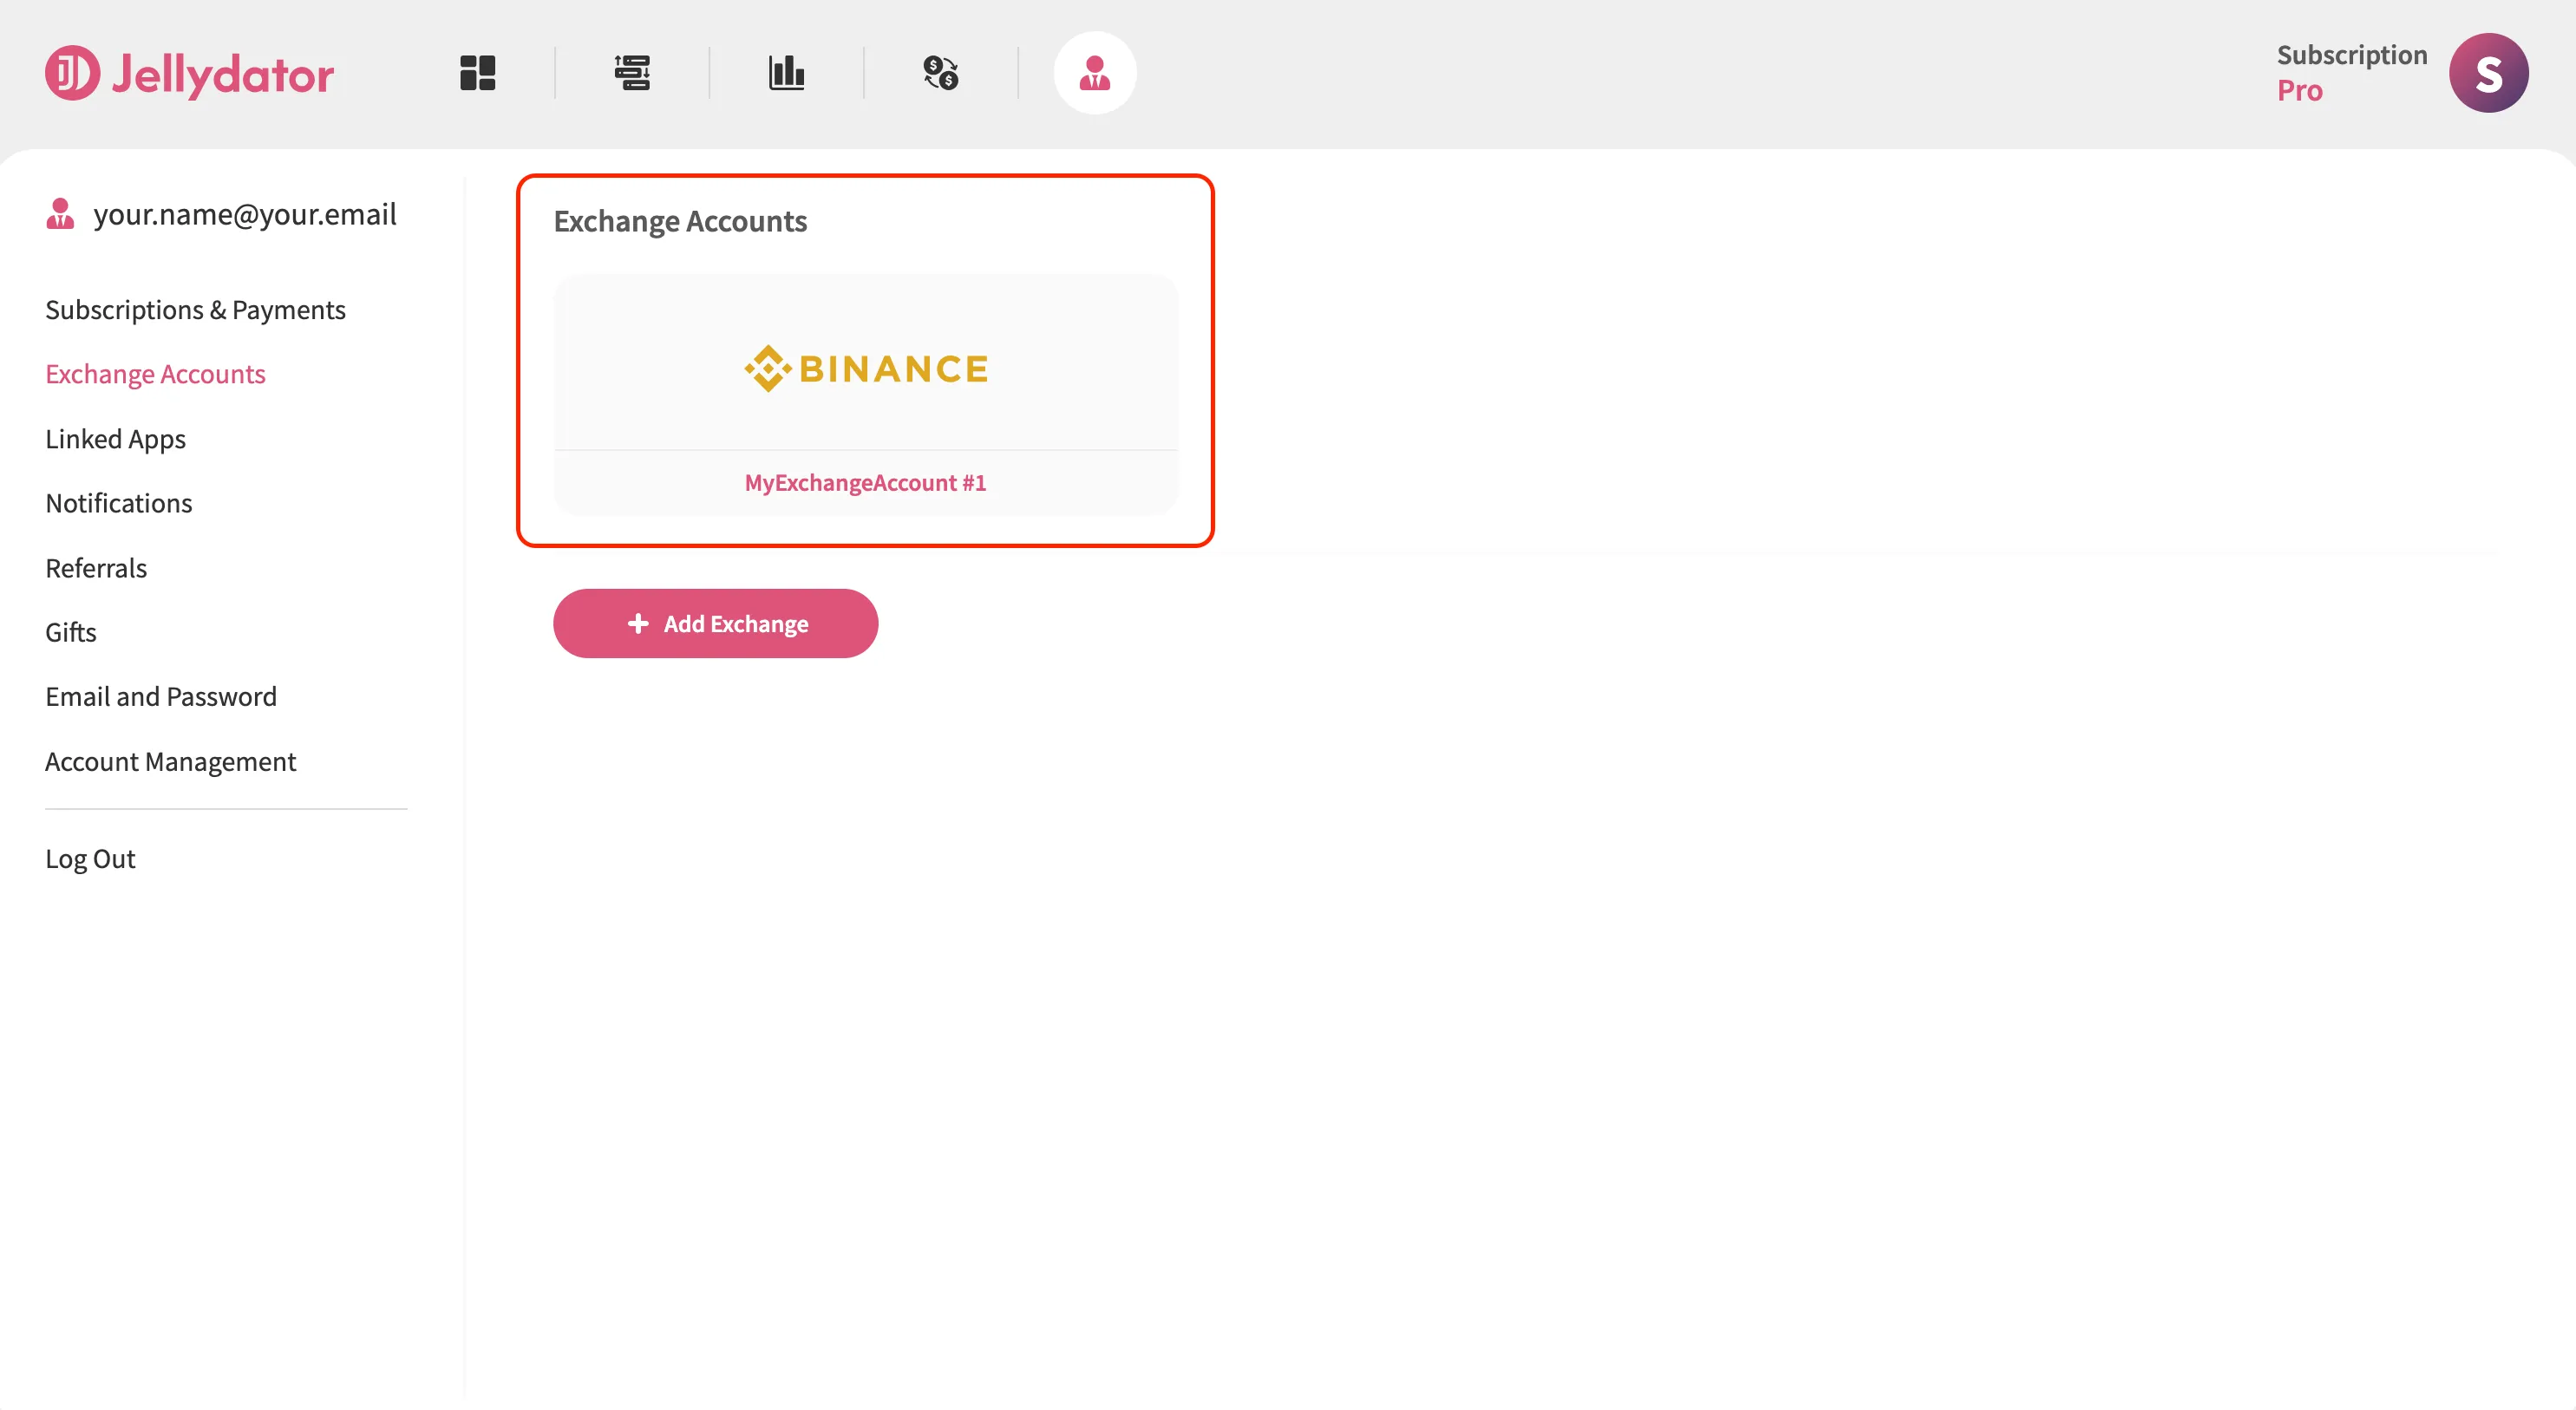
Next, go to the “Exchange Accounts” sub-page. This section is dedicated to connecting and managing your exchange accounts.
Step 3: Create a New Exchange Account Connection
If you already have other exchange accounts connected, click “Add Exchange” to start the process of connecting a new one. If this is your first connection, skip this step and continue to the next one.
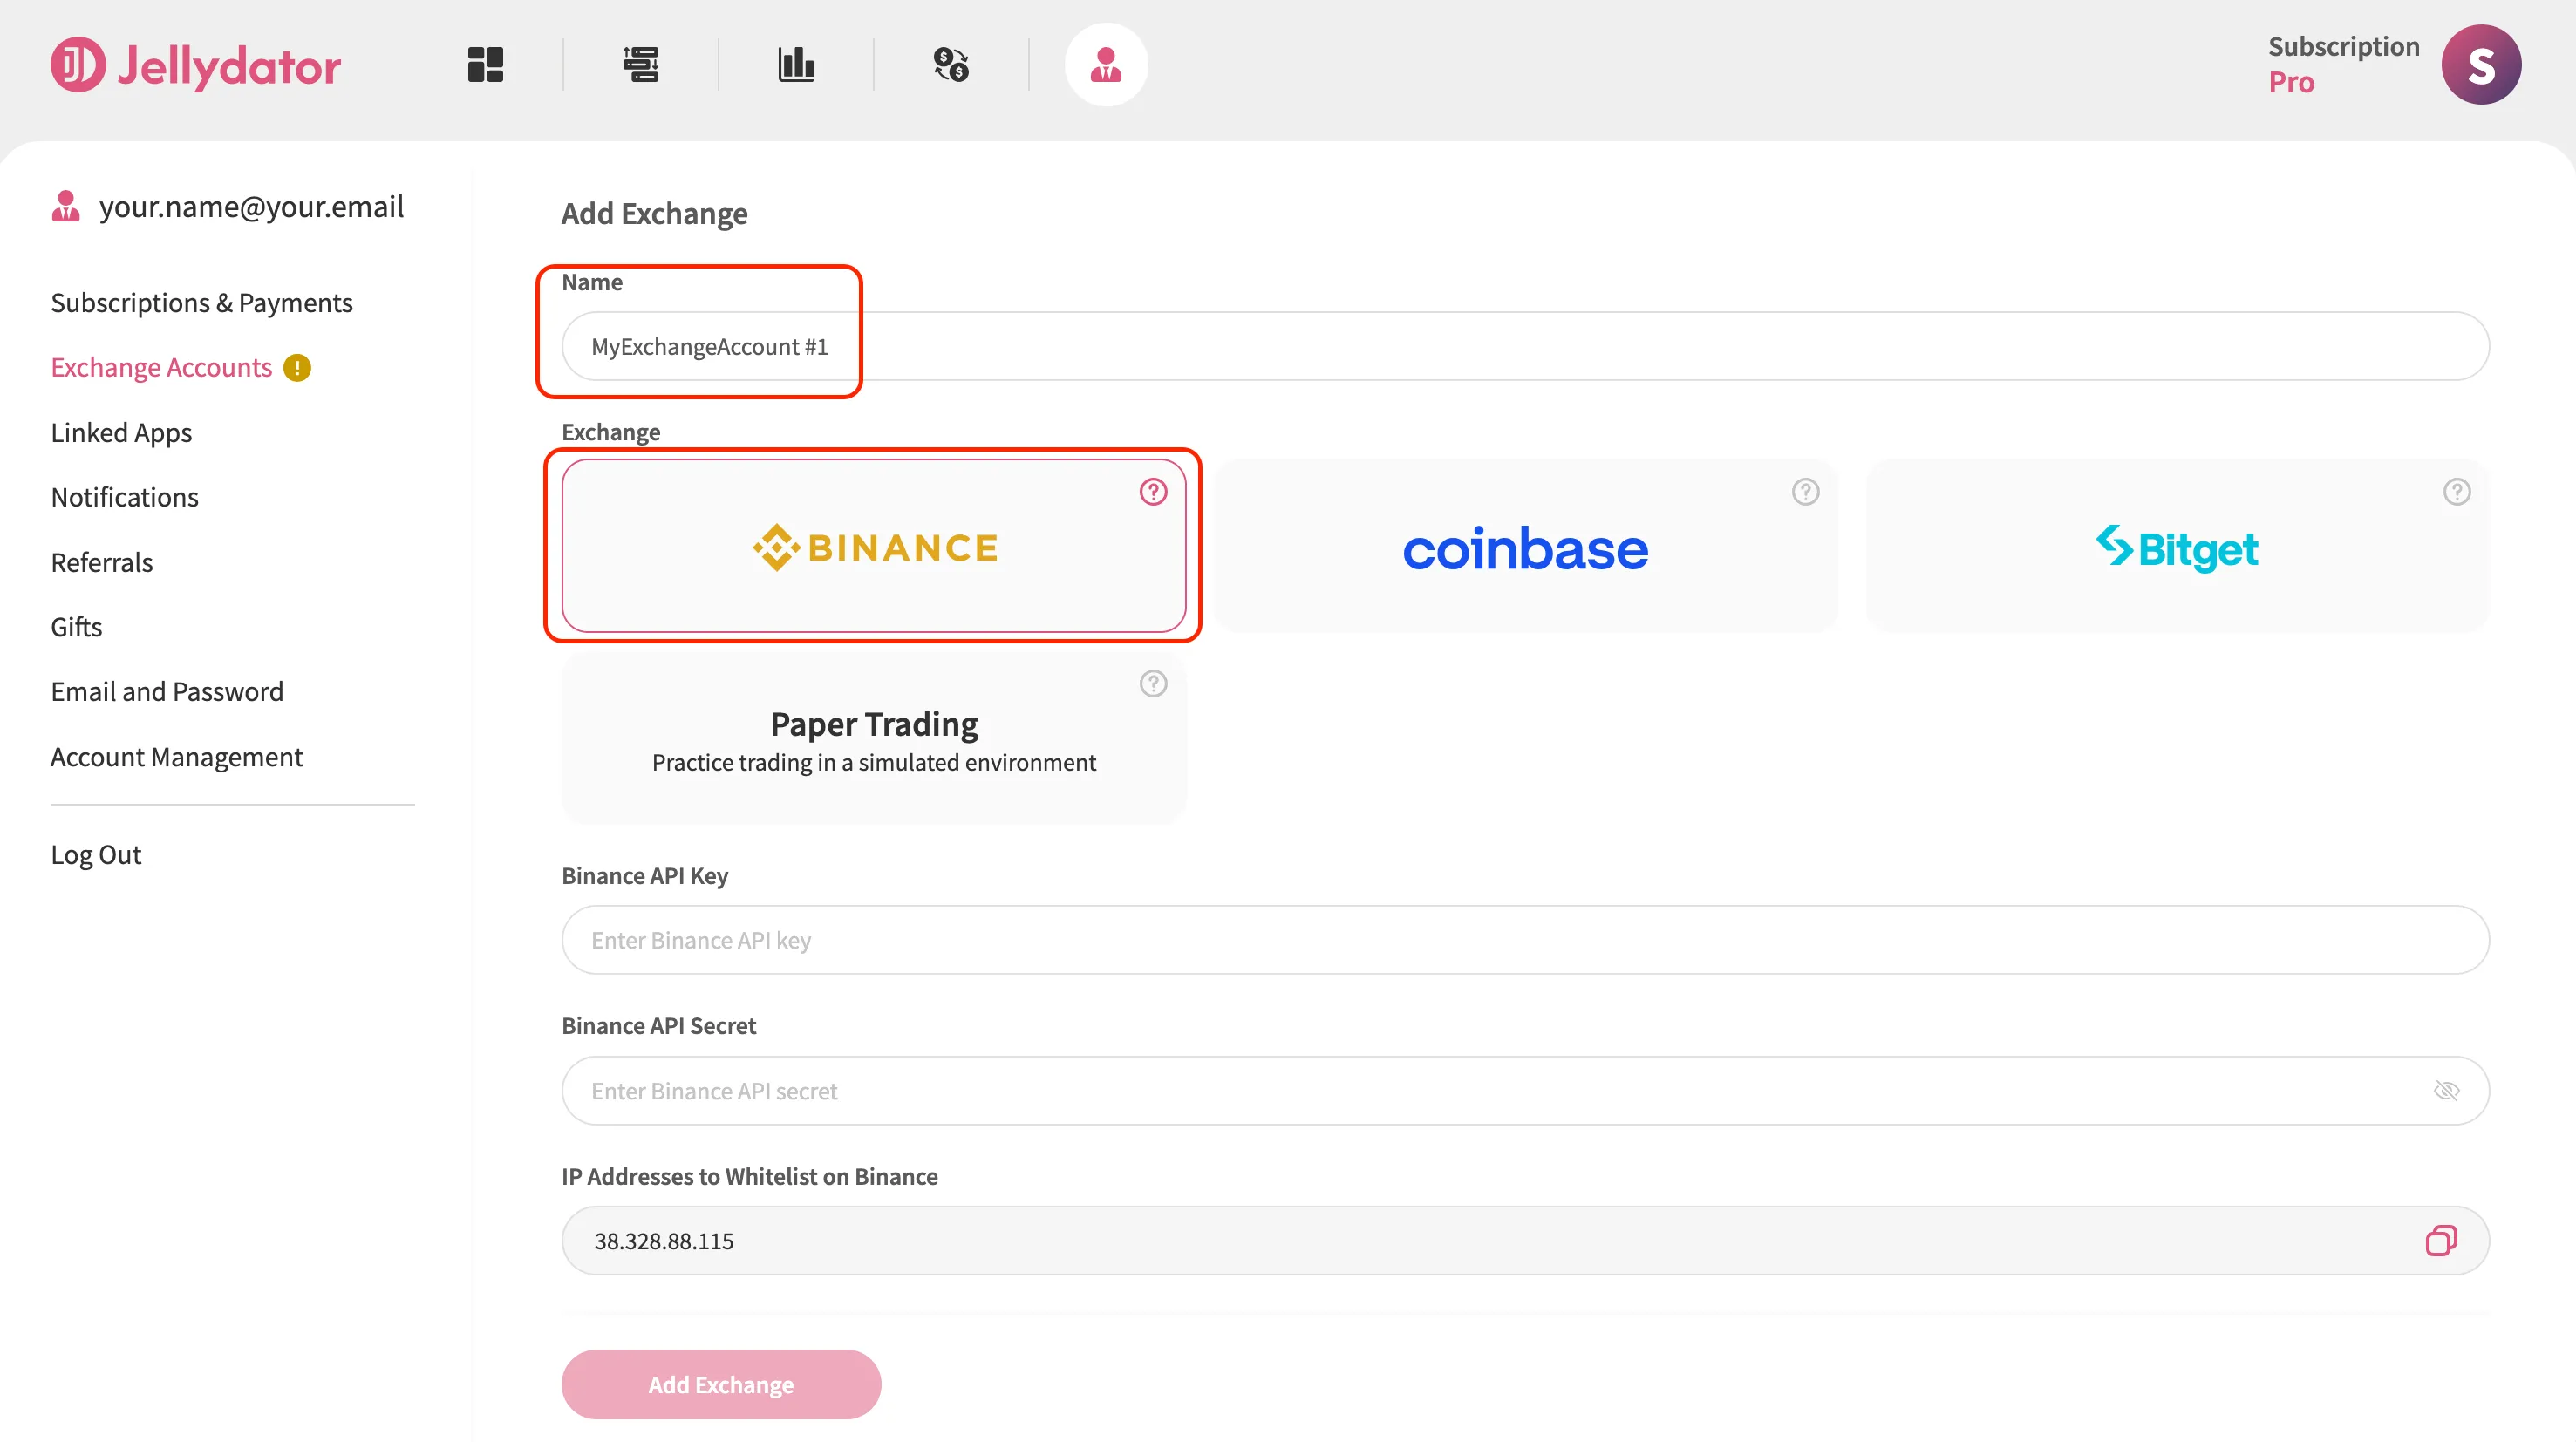
Step 4: Create an Exchange Connection Name and Select an Exchange Type
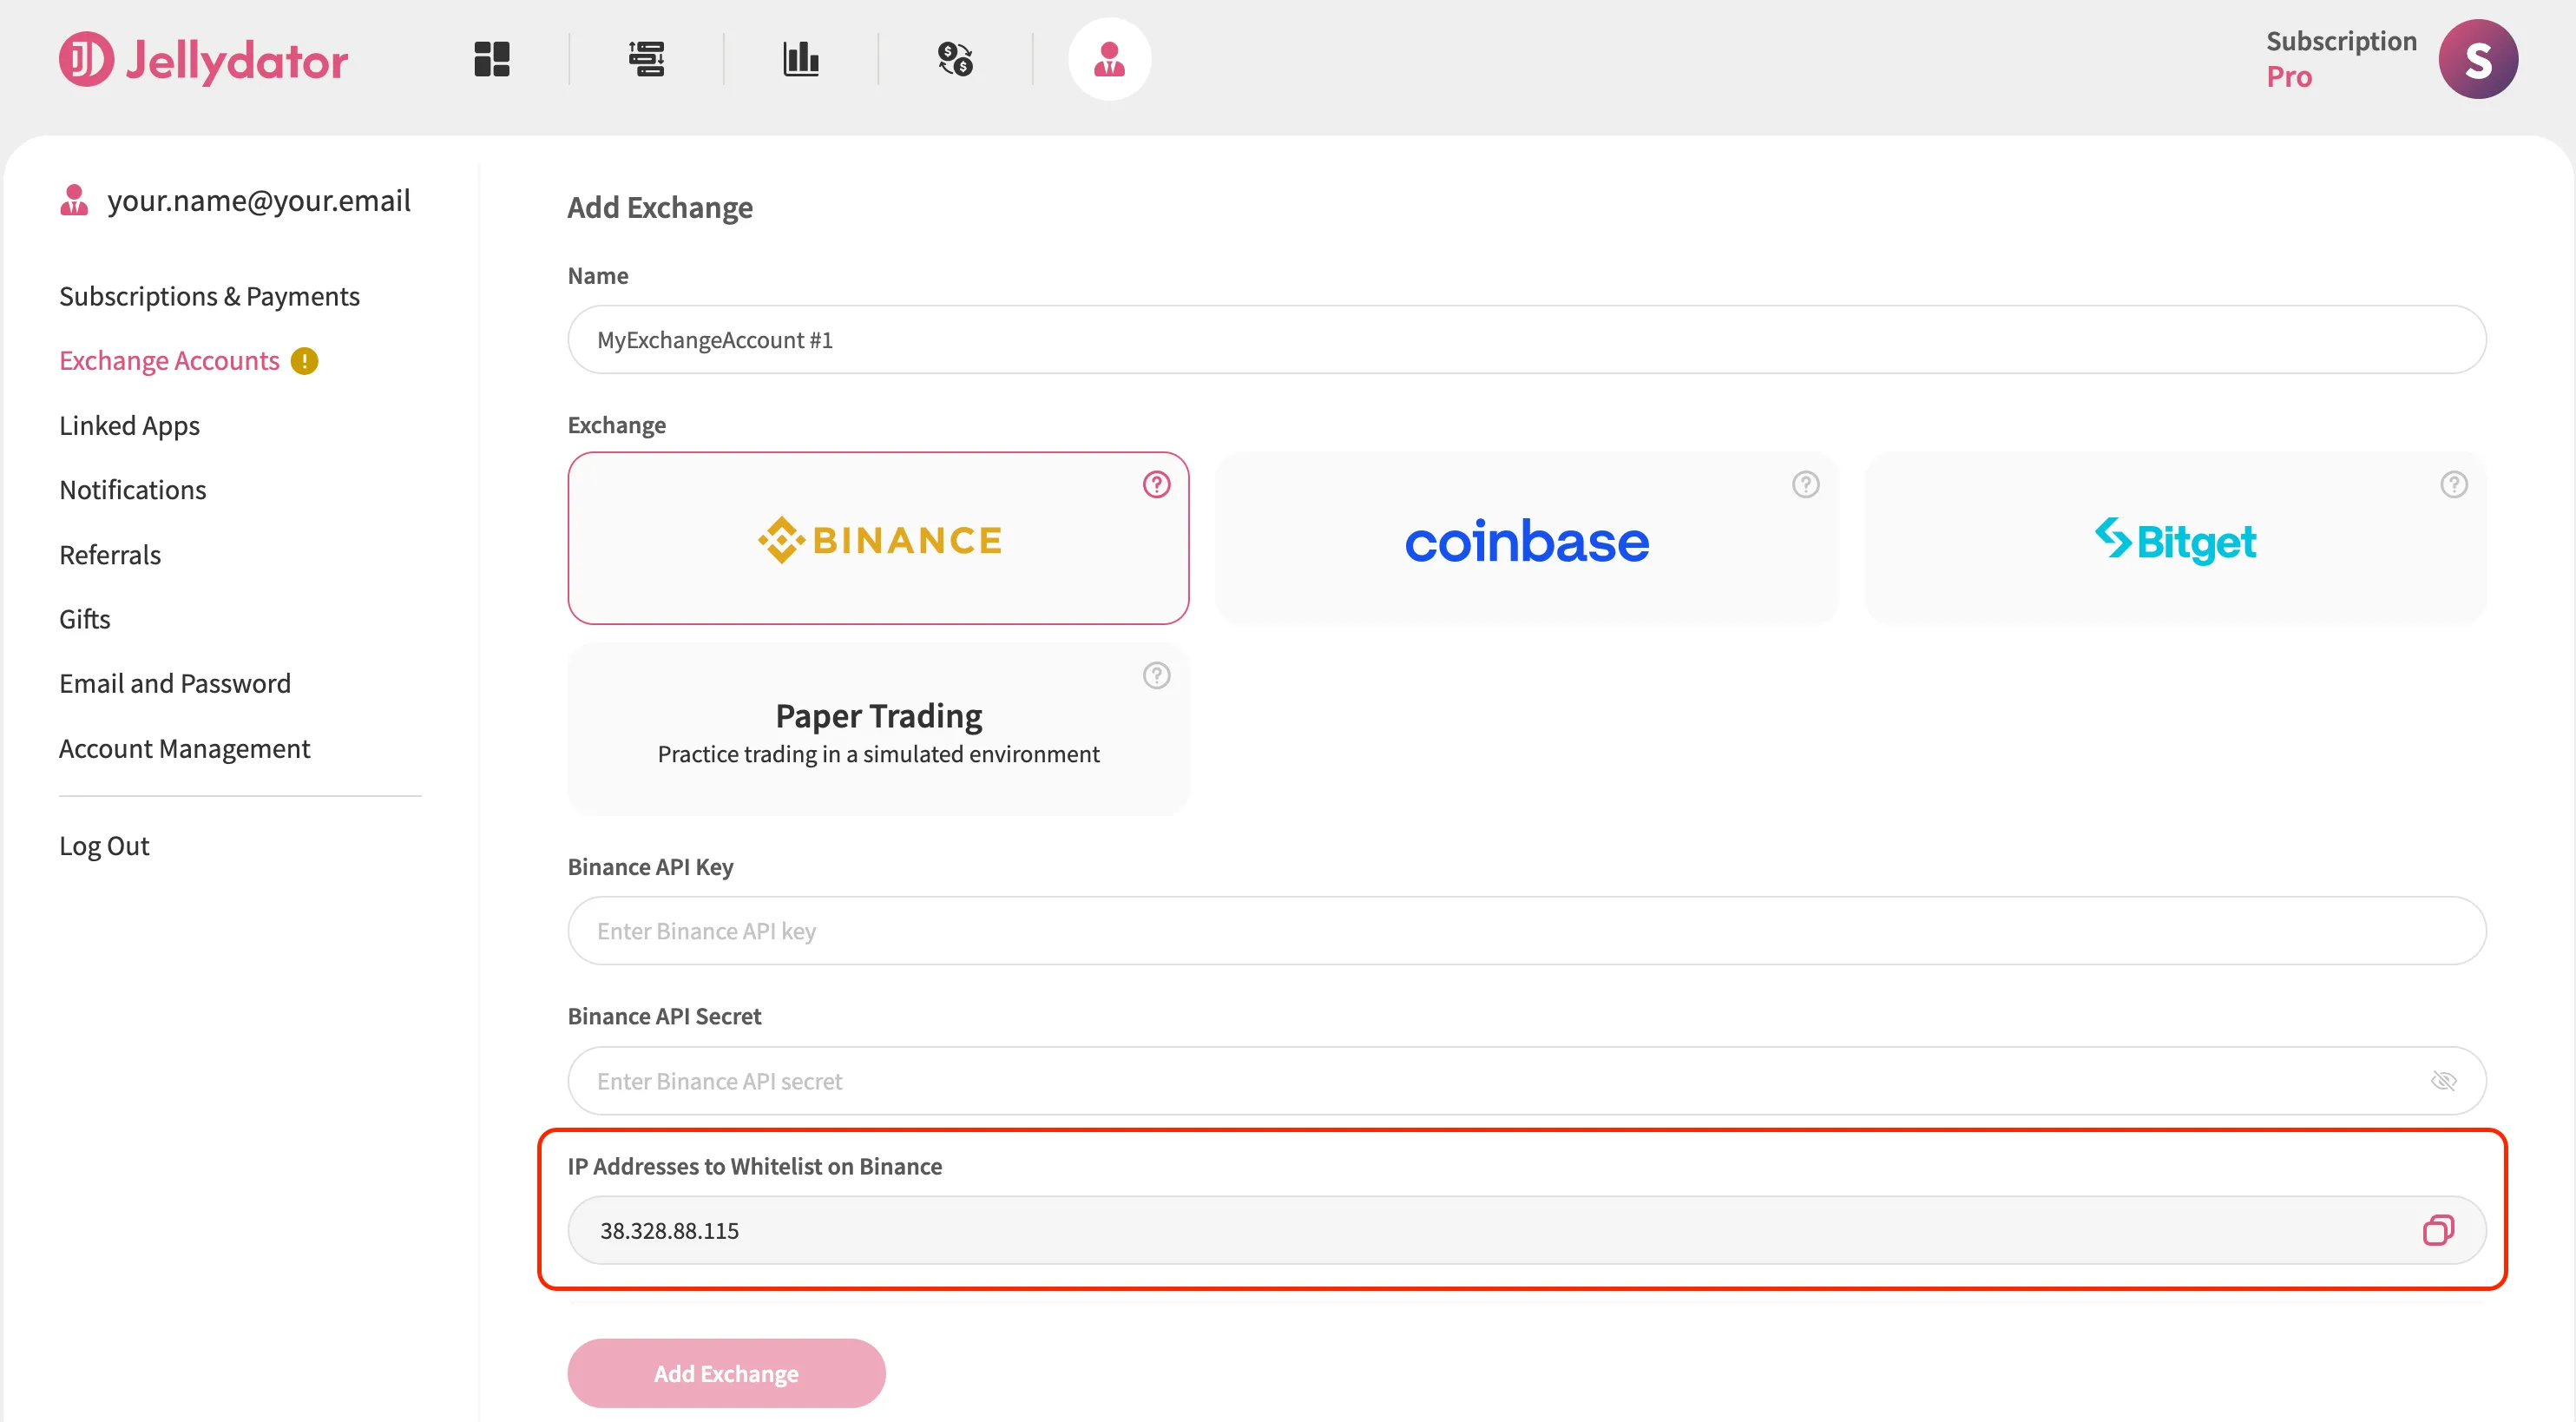
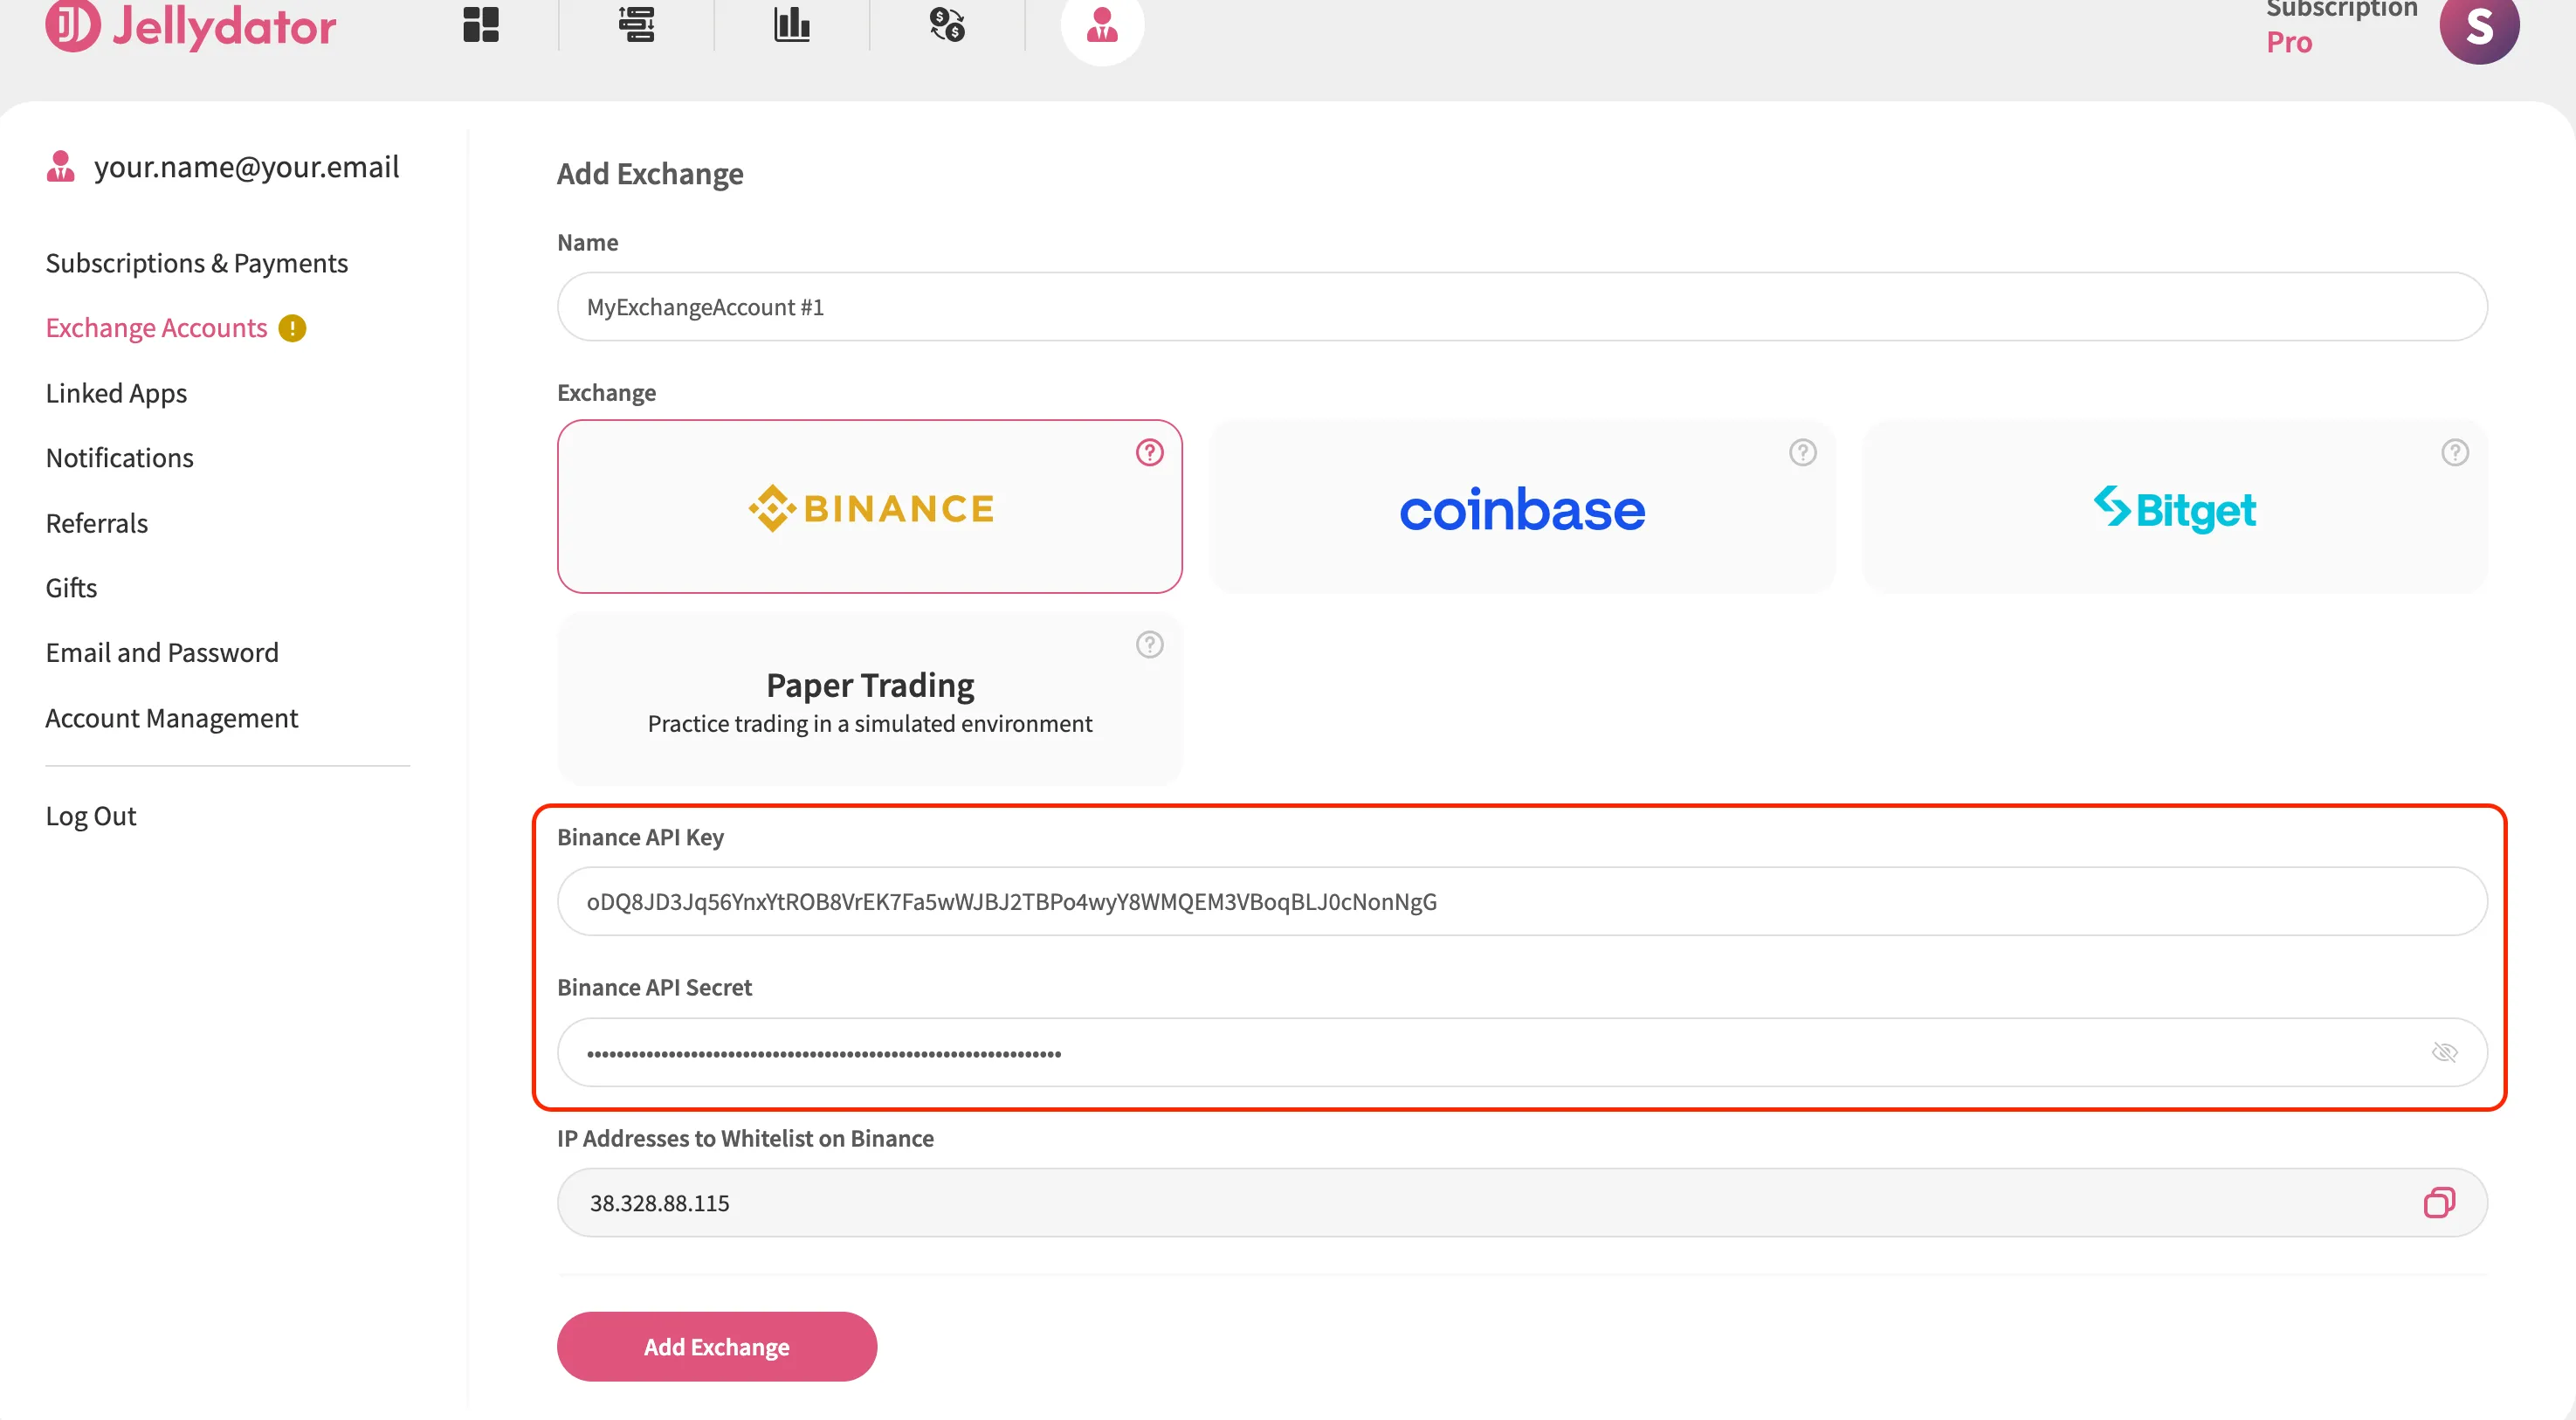
Choose a name for this connection that’s easy to recognize, especially if you plan to connect multiple accounts. Then, select “Binance” as the exchange type.
Step 5: Navigate to API Management on Binance
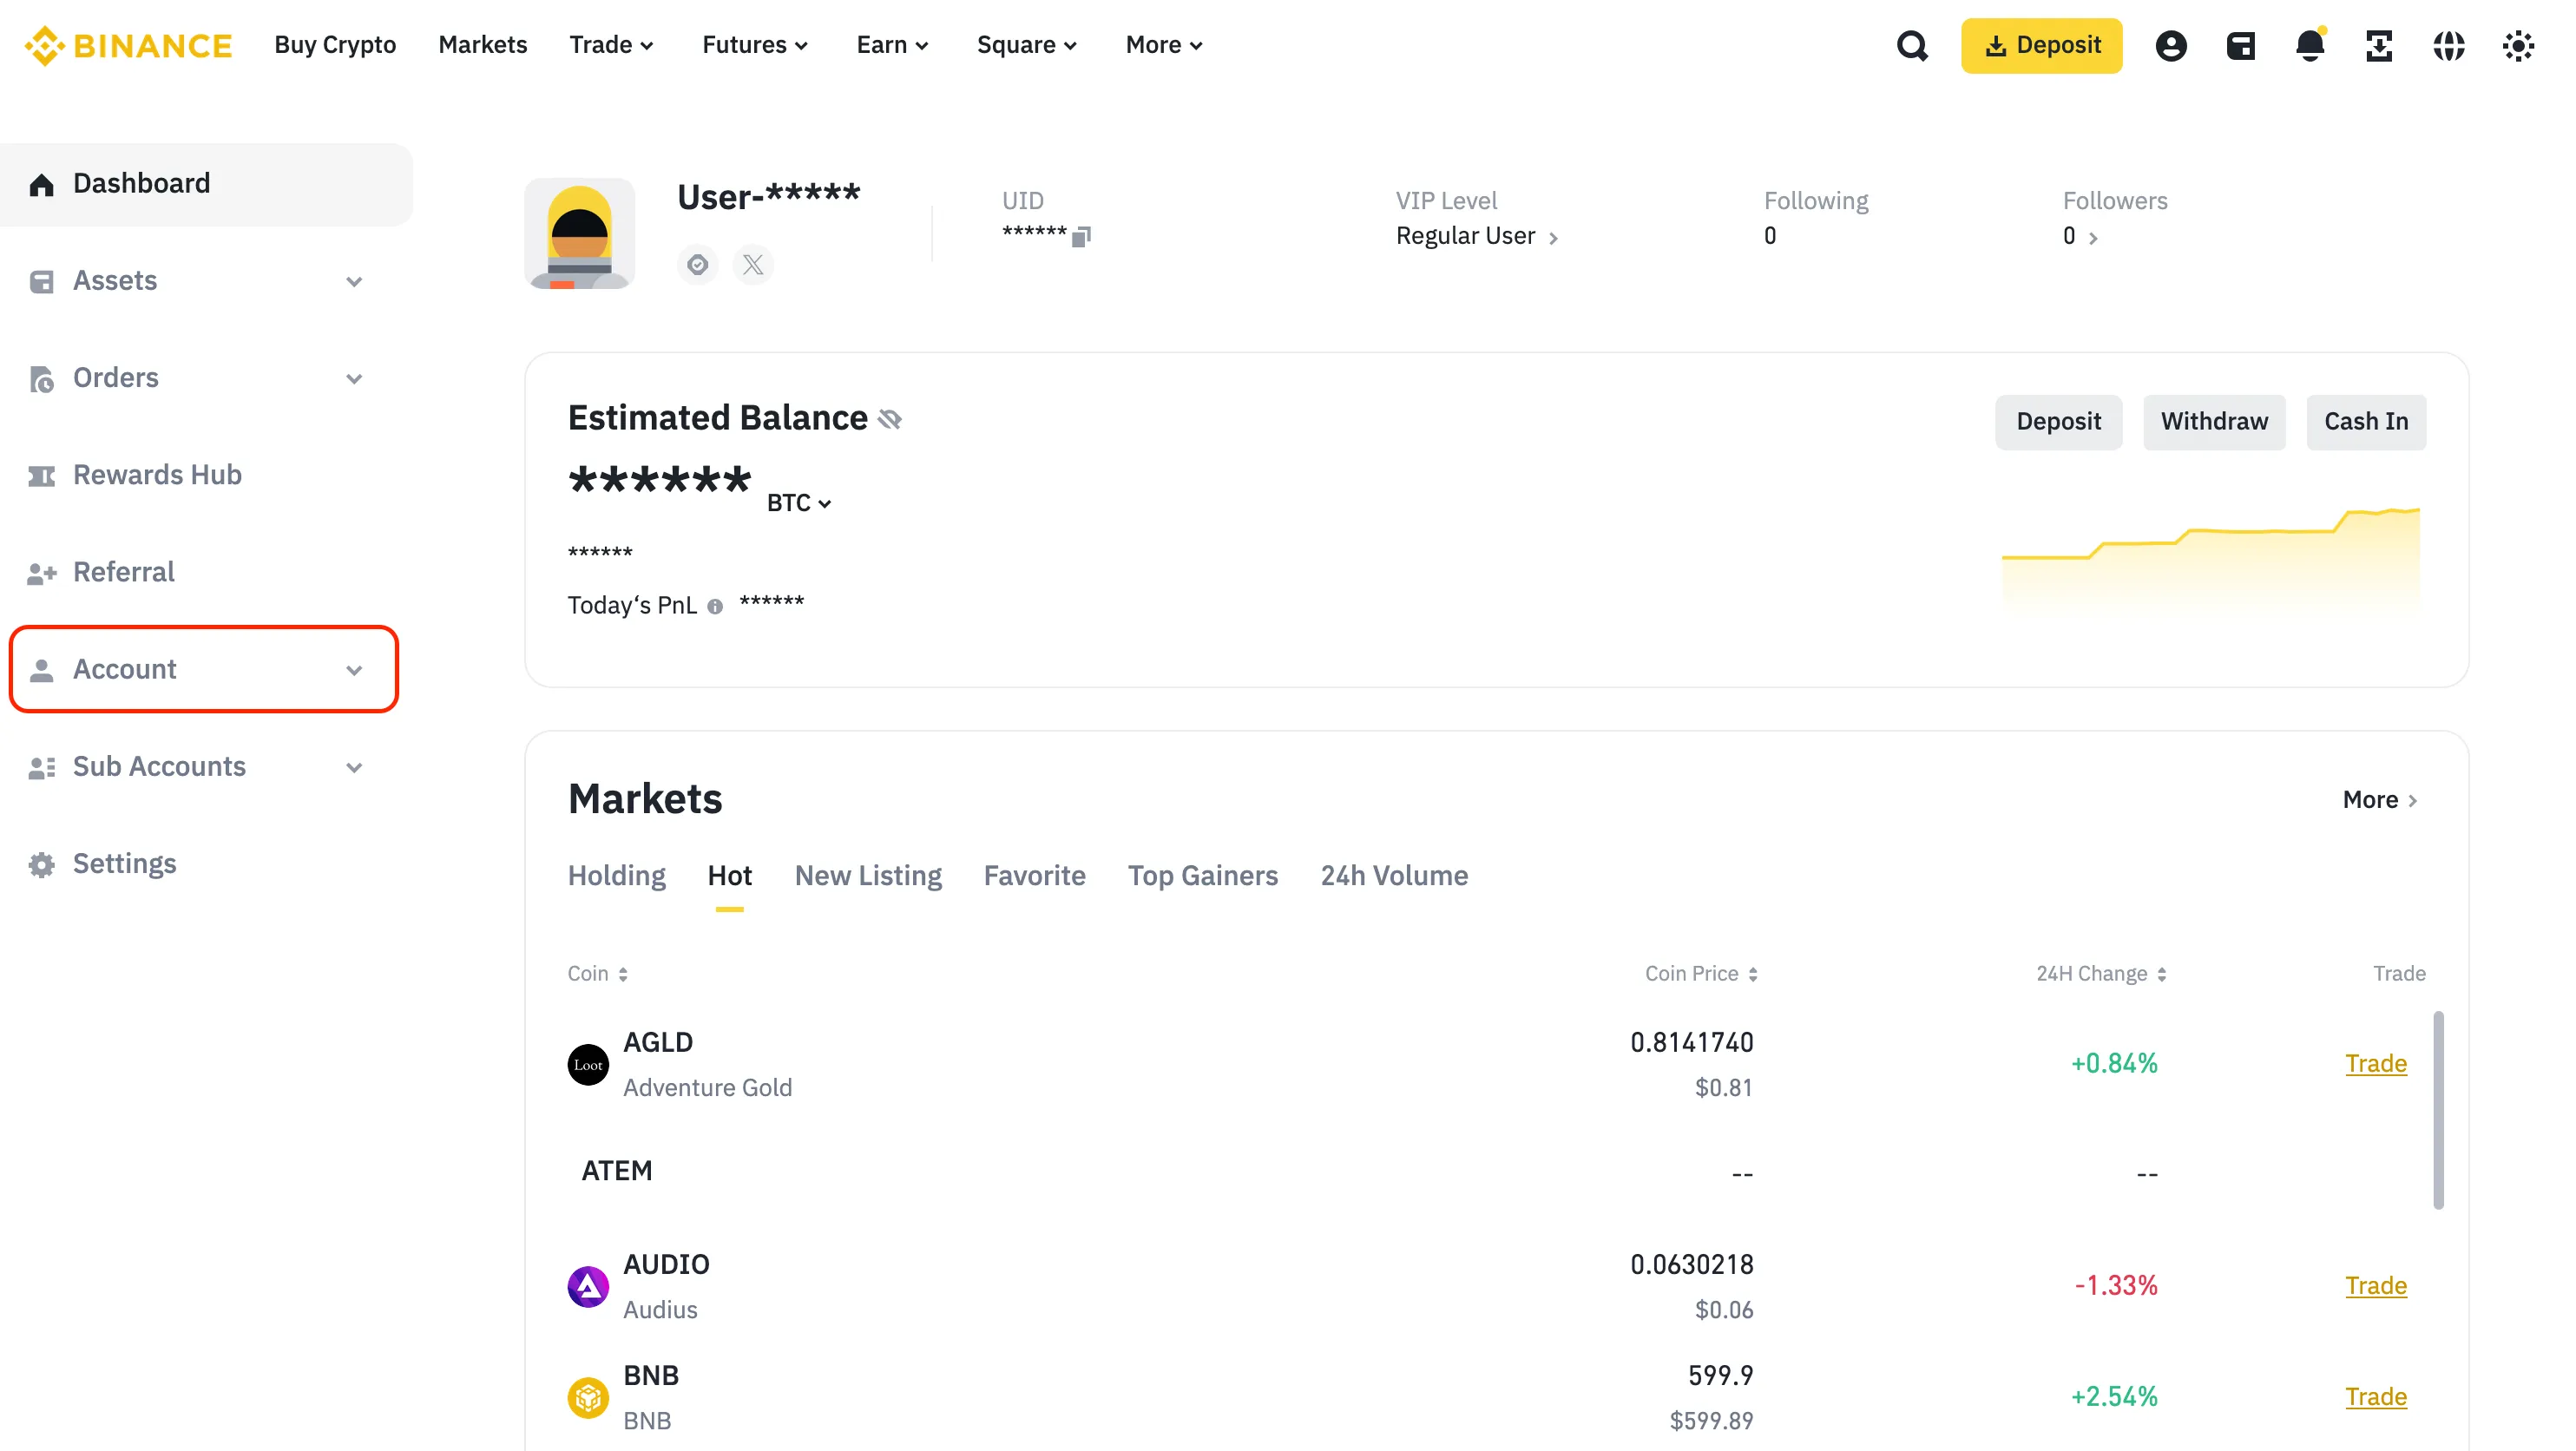
Open a new browser tab and log in to your Binance account (https://accounts.binance.com/en/login). Once logged in, click the profile icon at the top-right corner of the page.

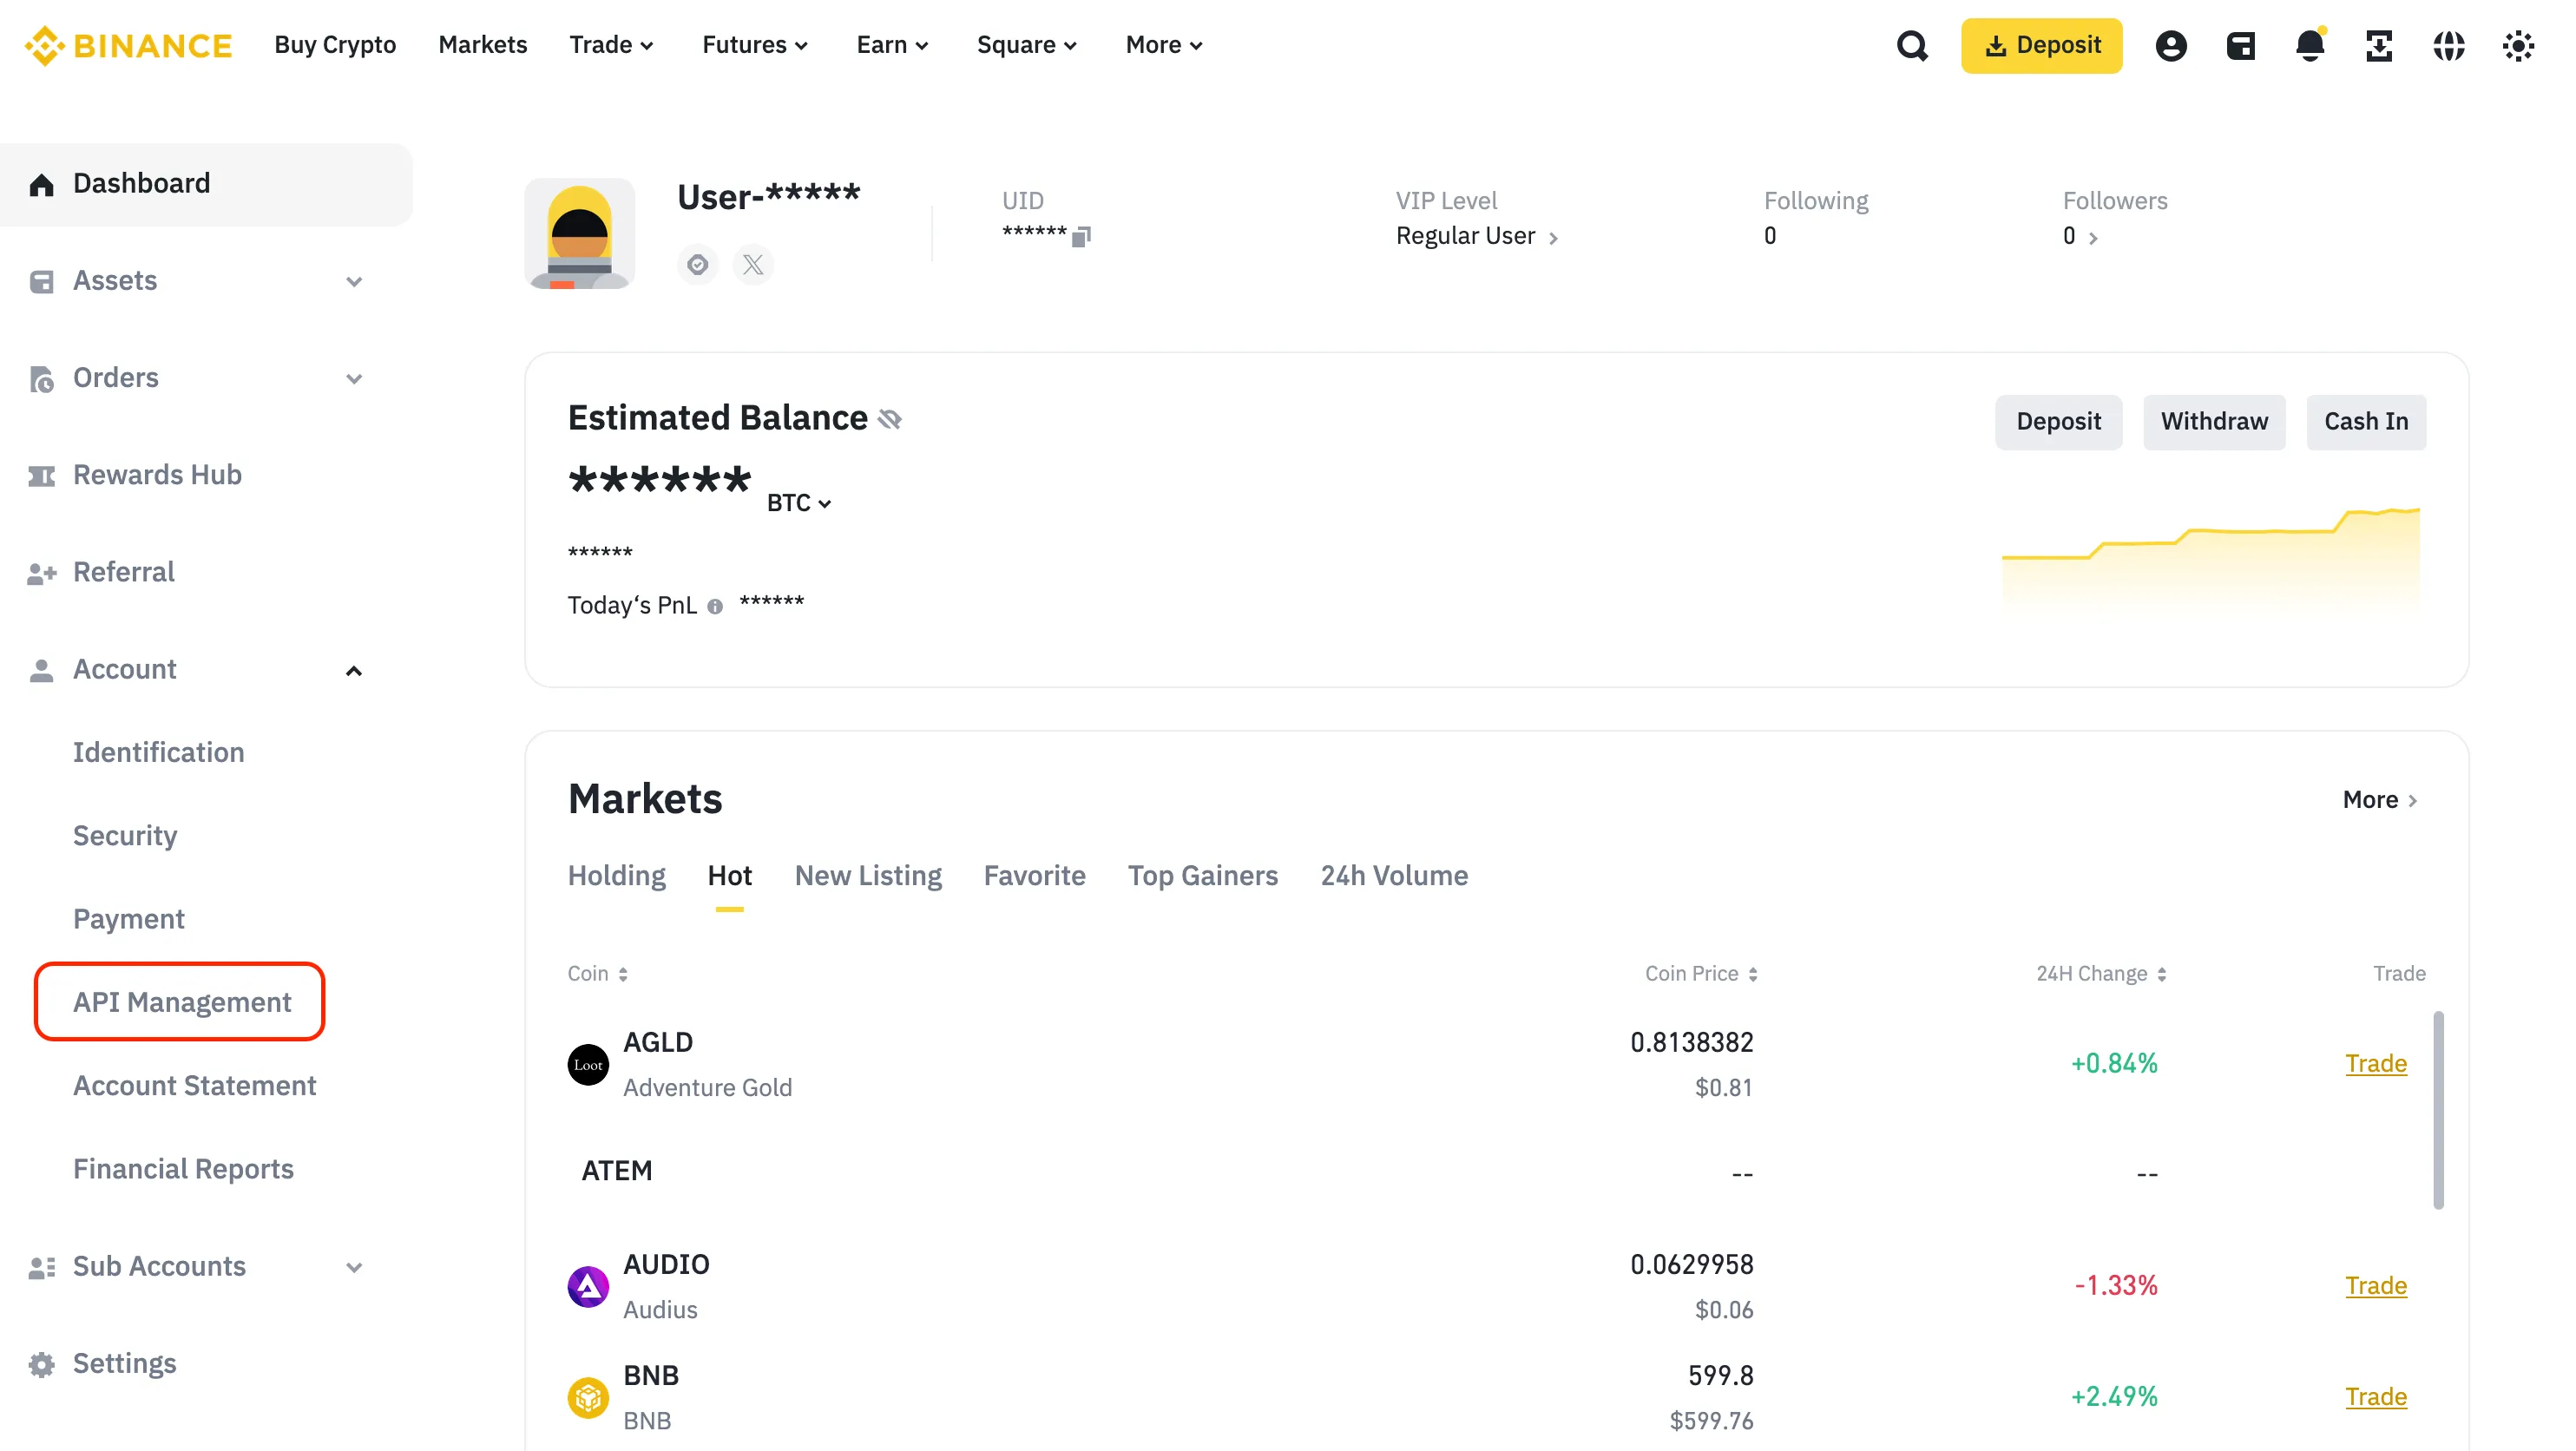
From there, select “Account” on the left-hand menu.
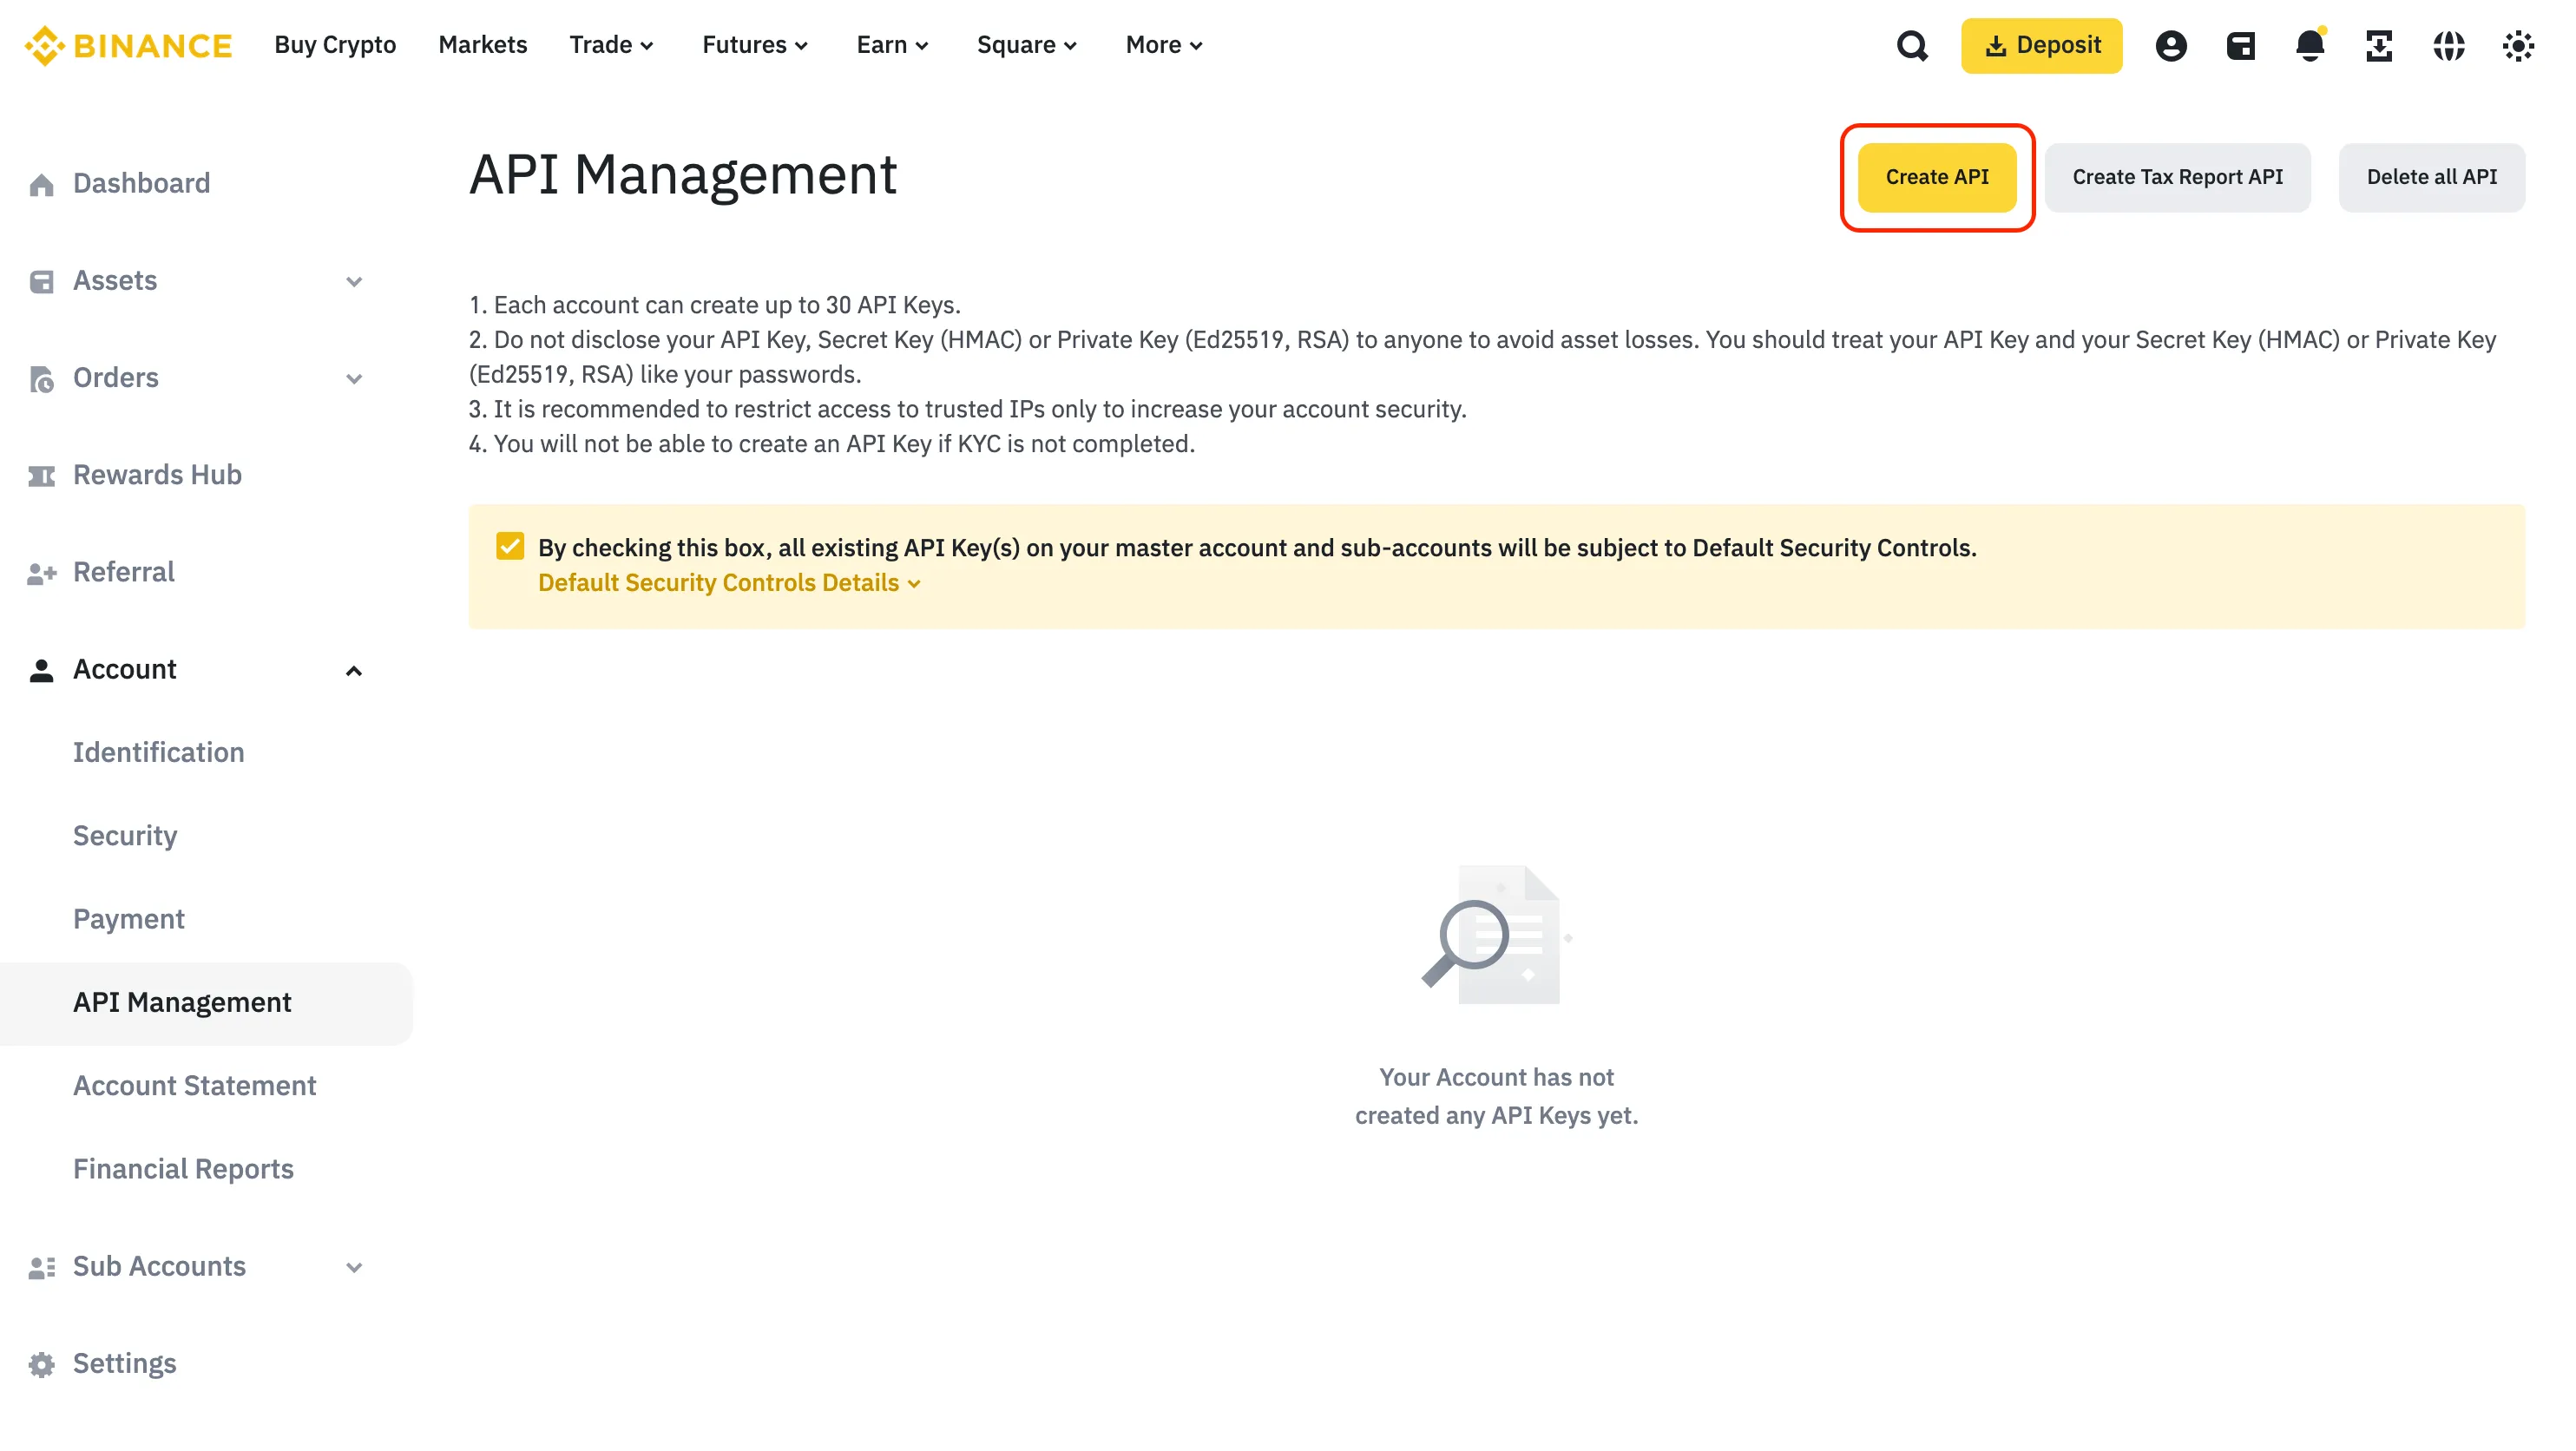
Finally, click on “API Management” in the account submenu.
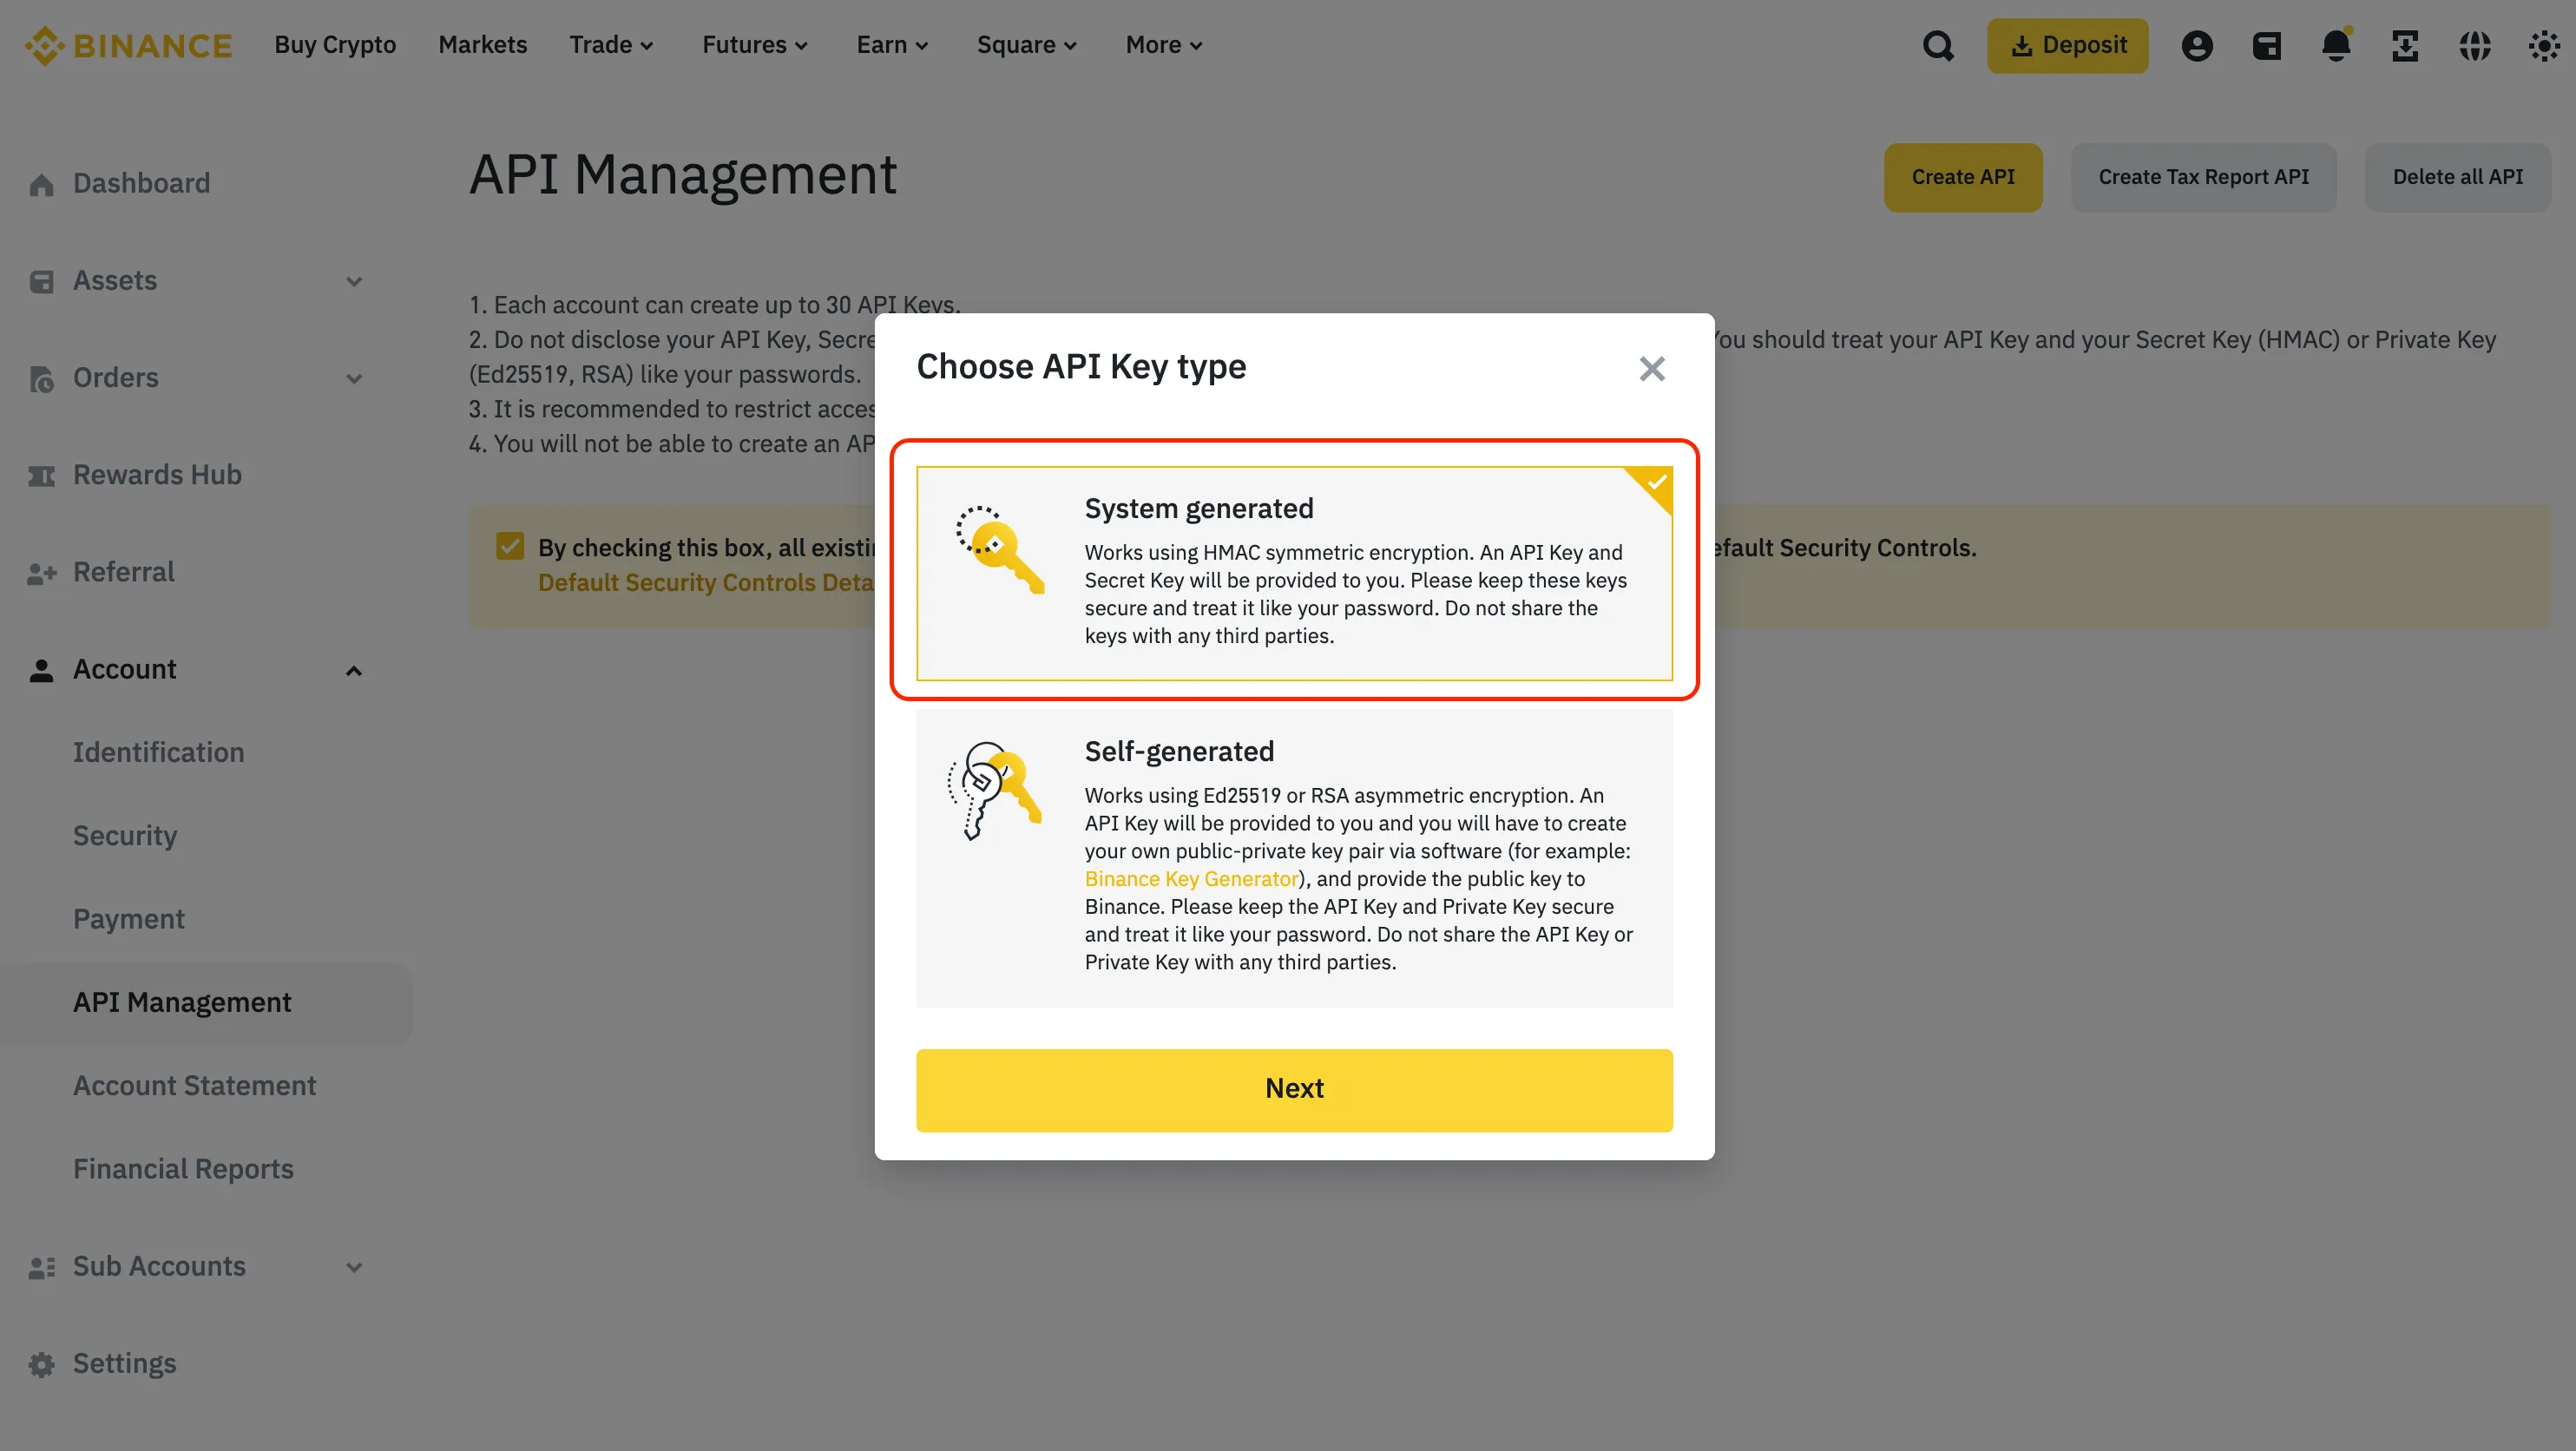
Step 6: Create a Binance API Key
Click “Create API” to begin setting up your API key.
Select “System generated” as the API key type and click “Next.”
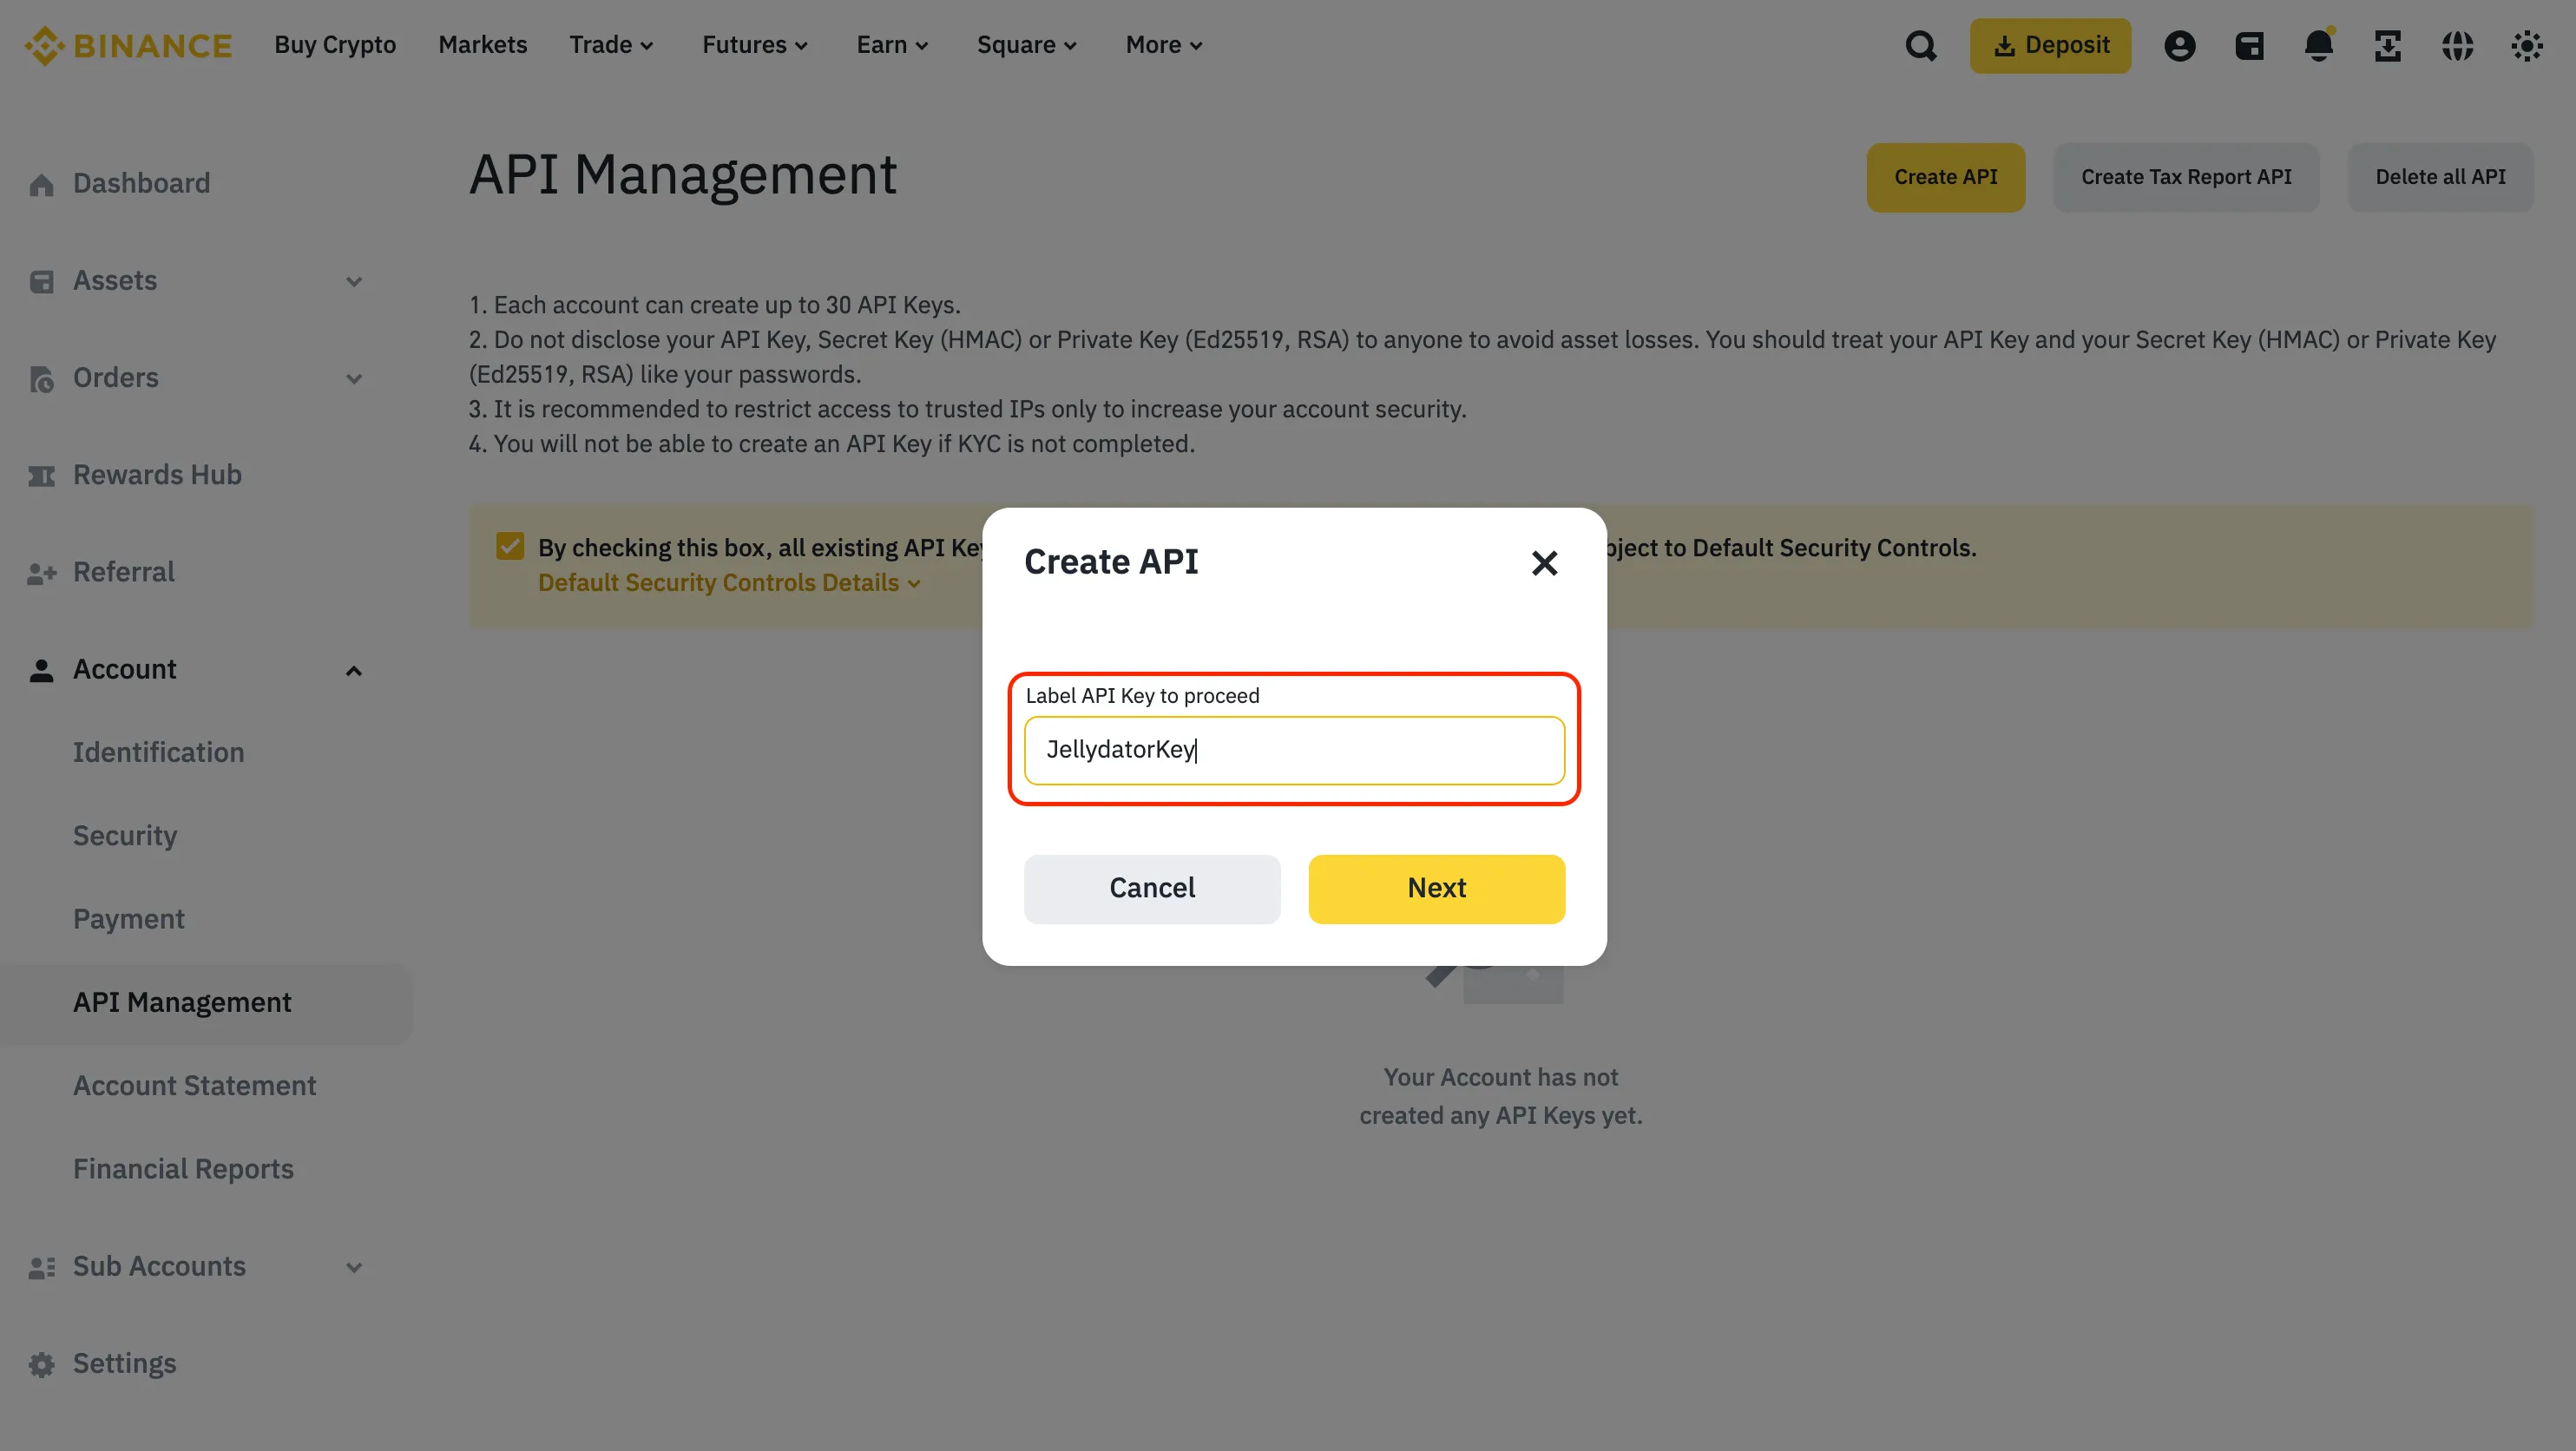
Give your API key a label (e.g., “JellydatorKey”) so you can easily identify it later. Then, click “Next.”
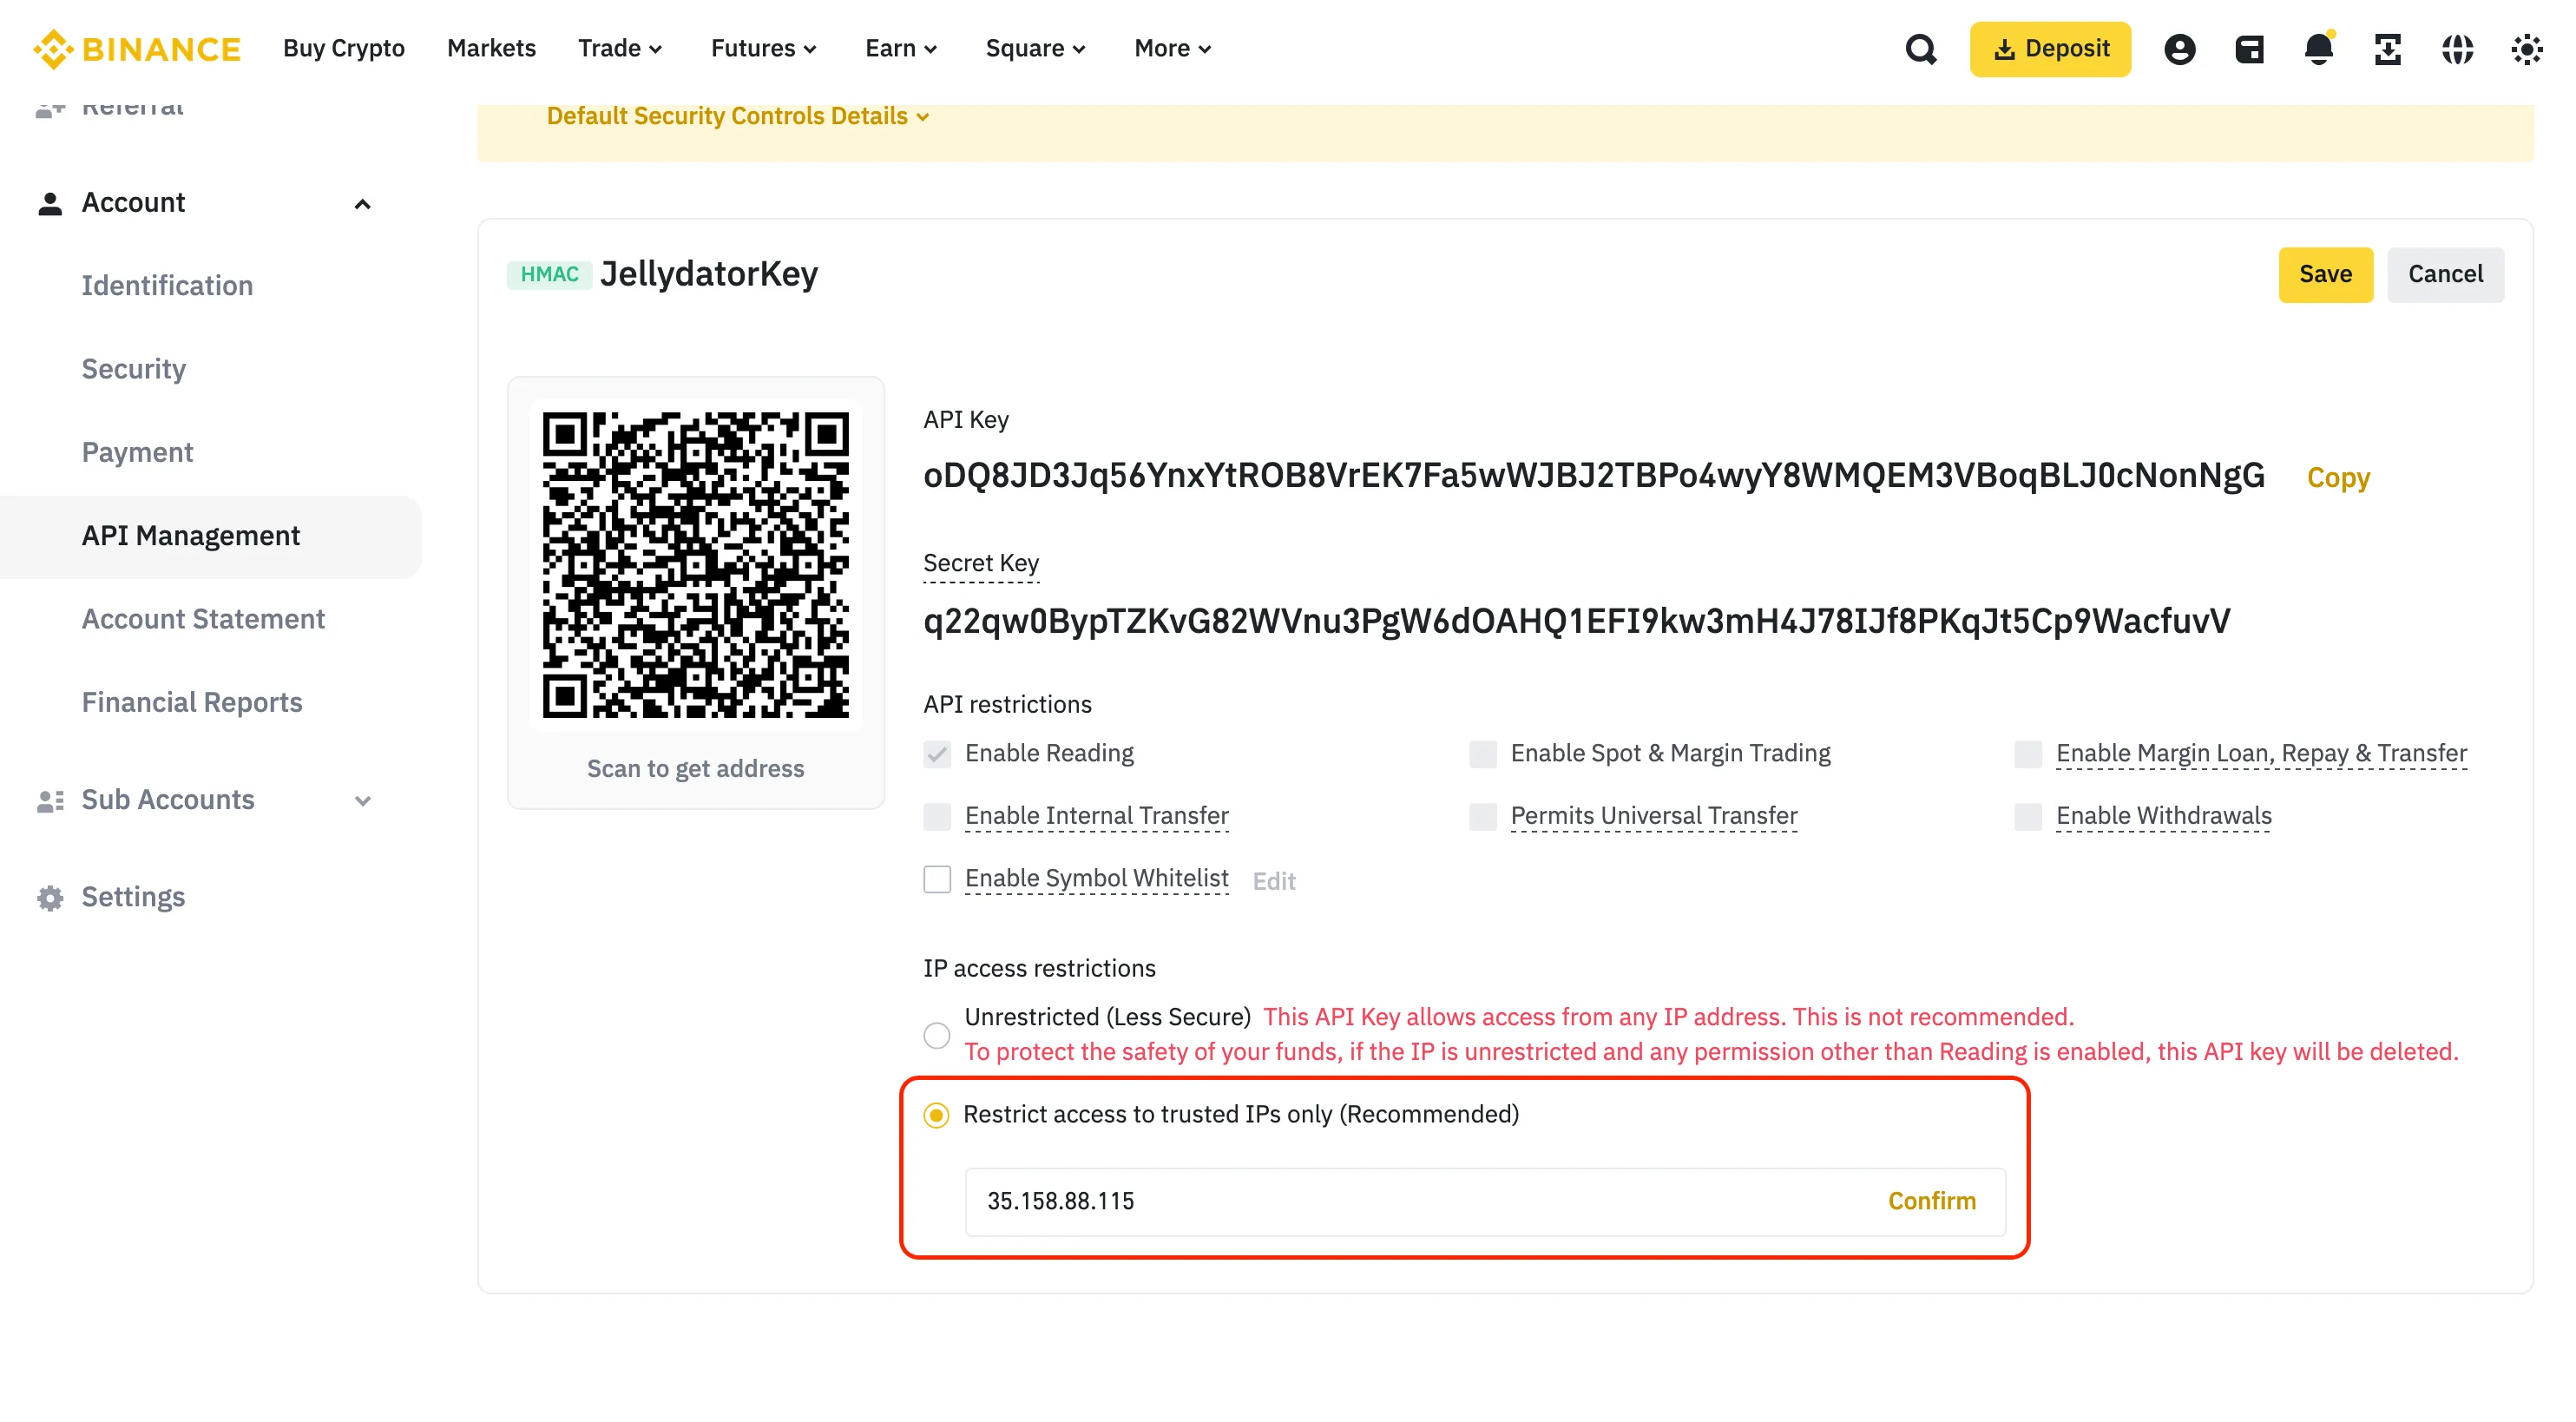
Once your API key is created, click “Edit restrictions.”

Enable the “Restrict access to trusted IPs” option.
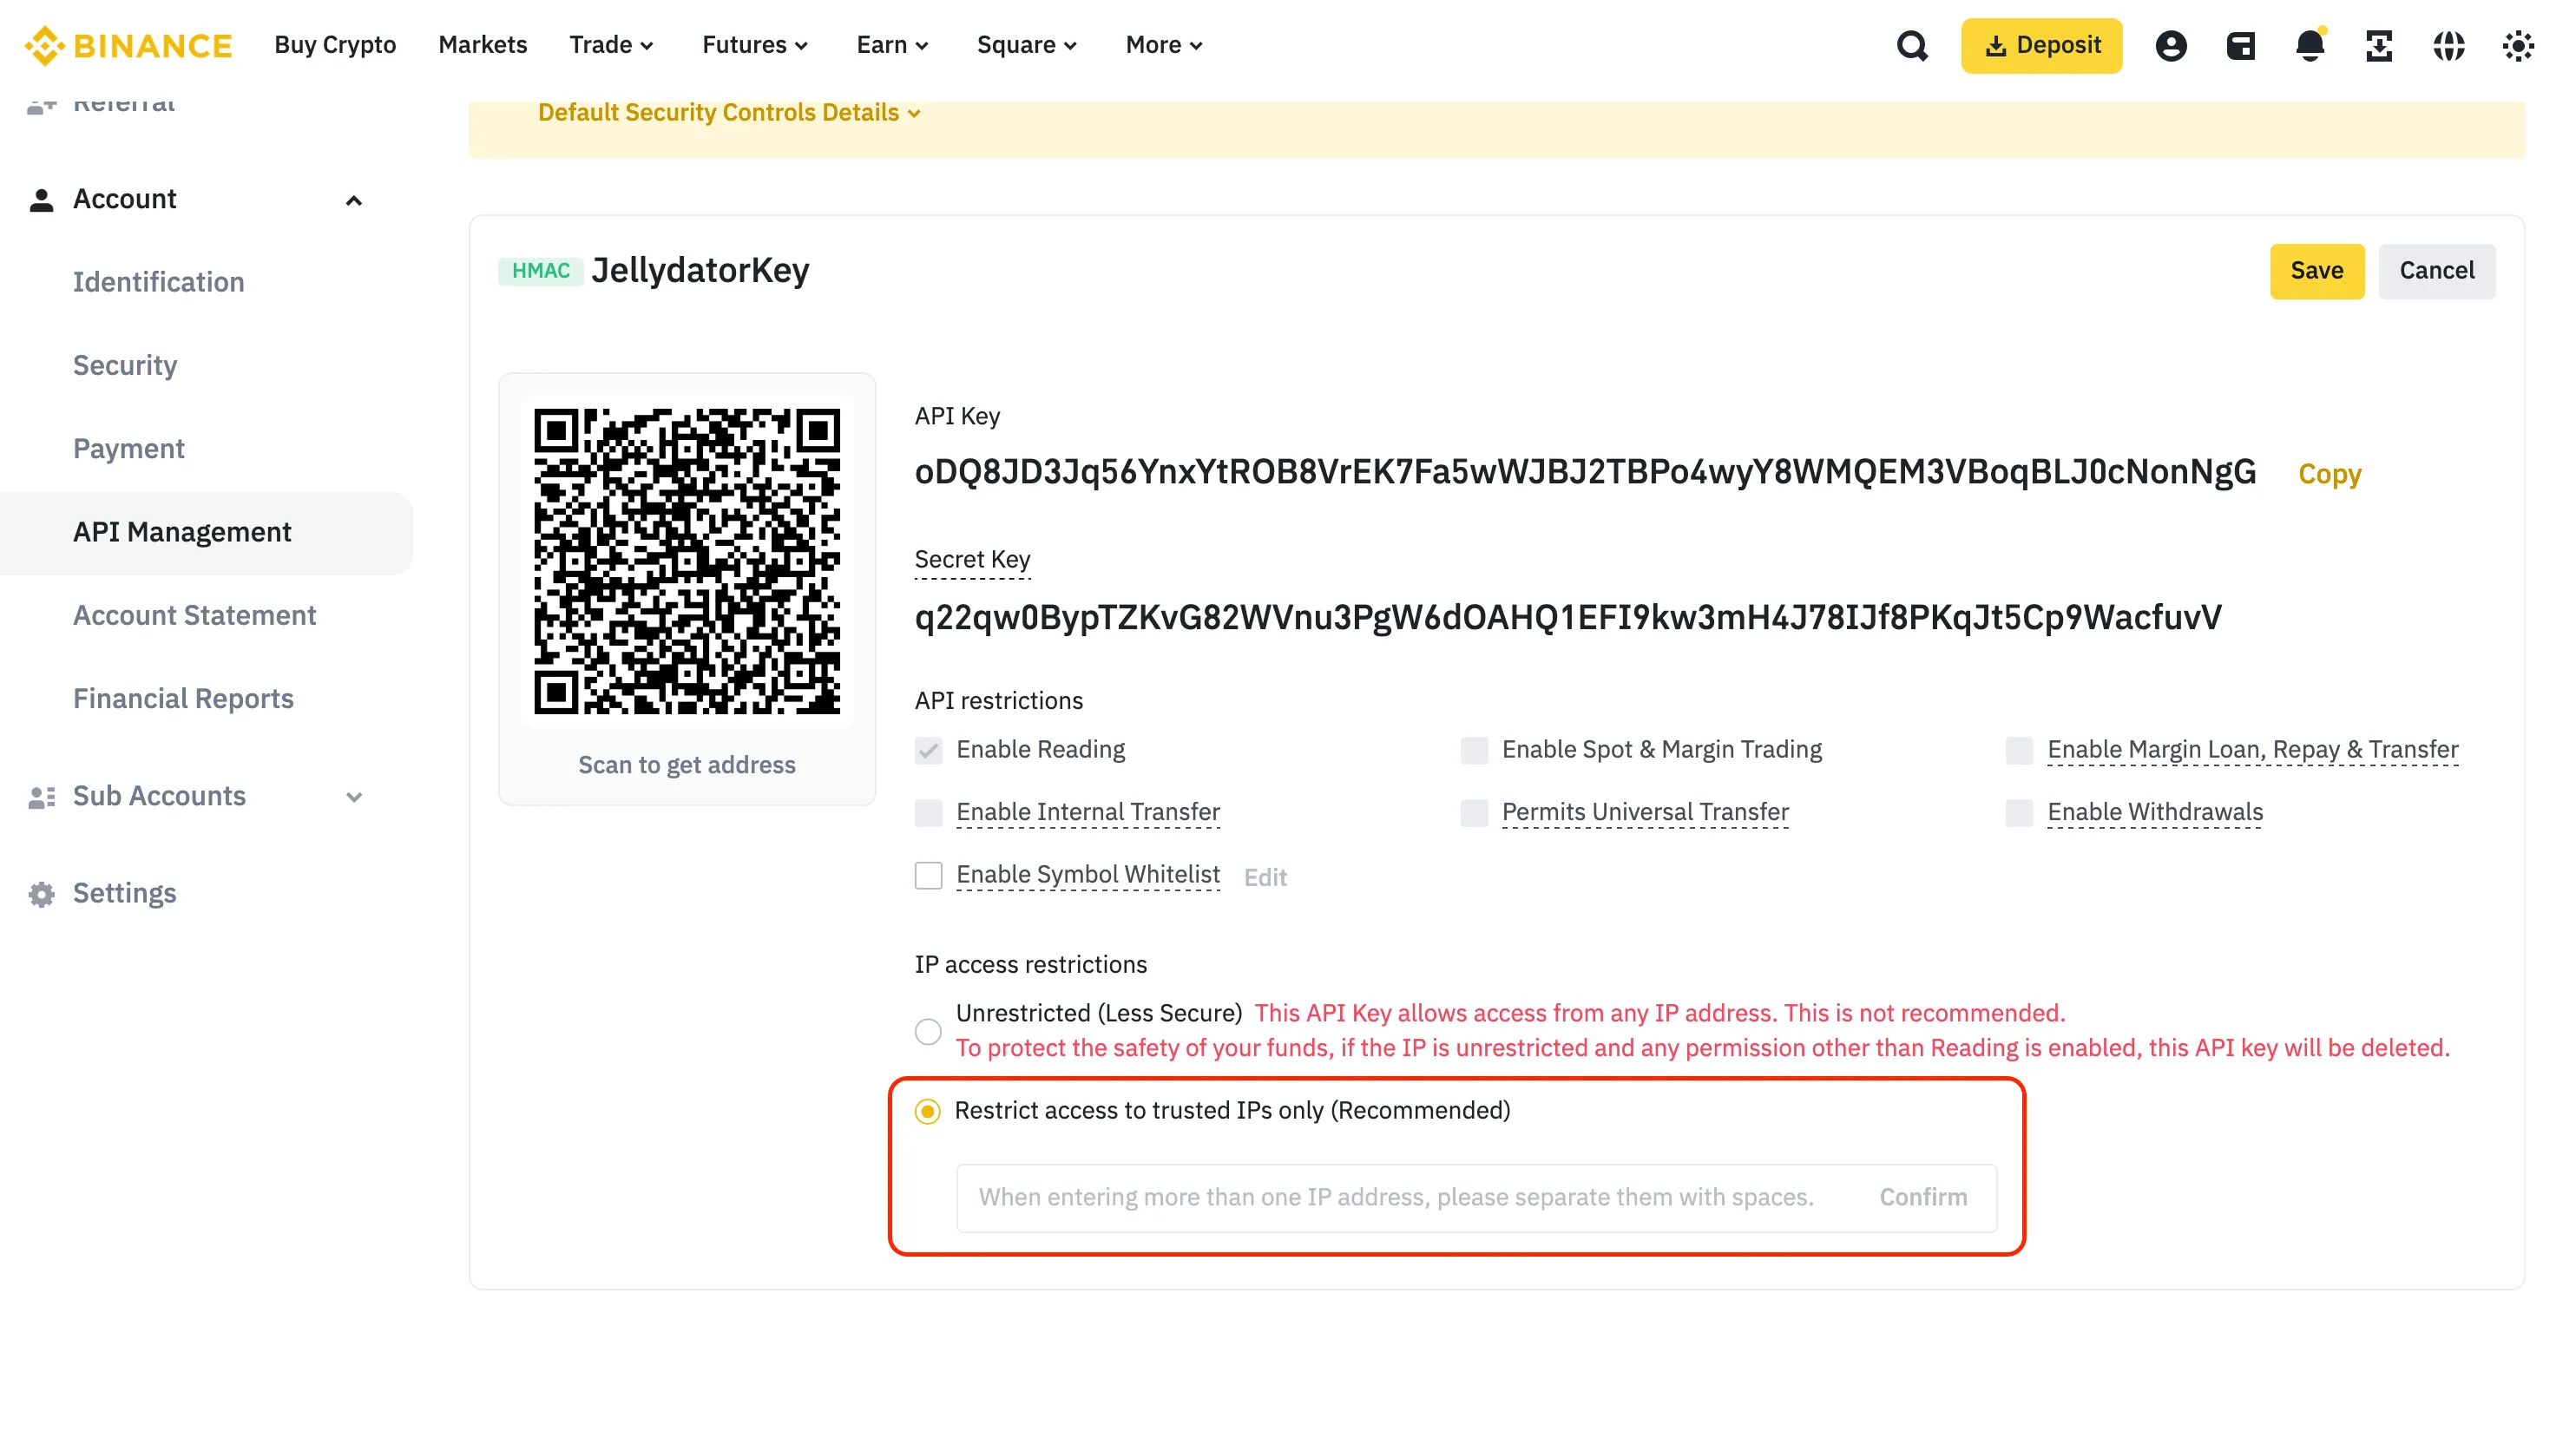
To whitelist IP addresses, return to Jellydator’s exchange connection tab and copy the provided list of trusted IPs. You can copy them all by simply clicking on the field.
Paste the copied IP addresses into Binance’s trusted IPs field and click “Confirm.”
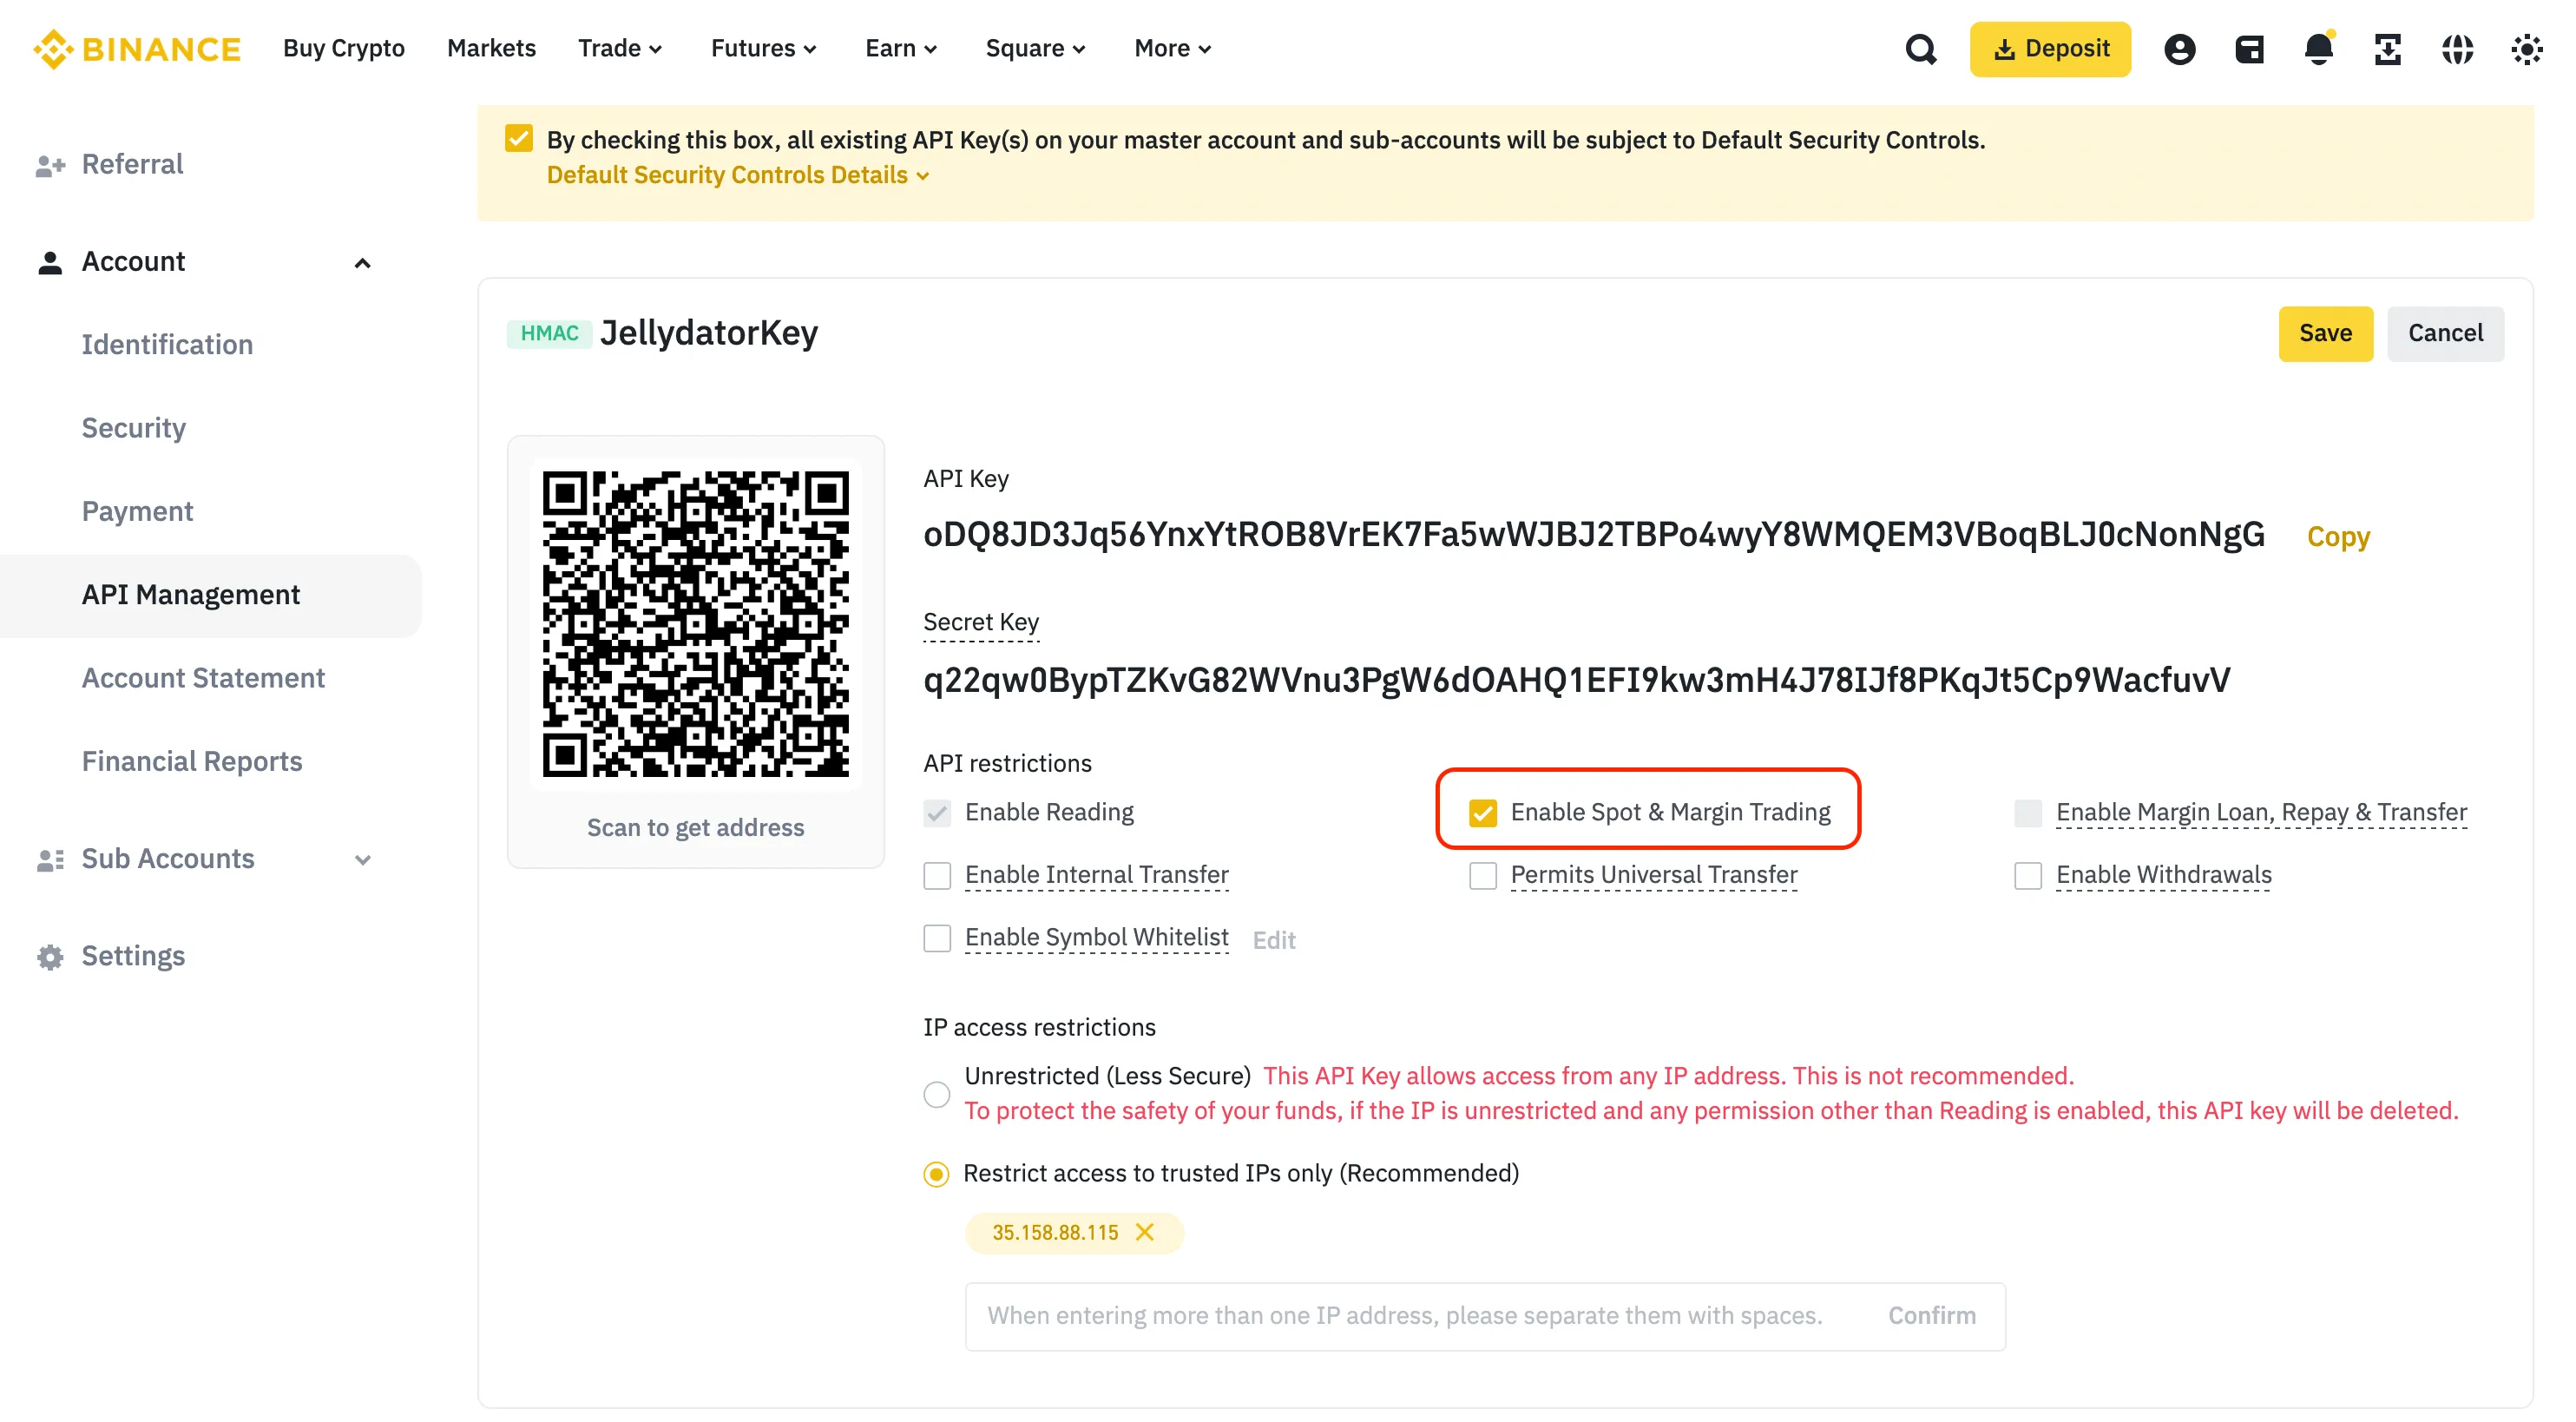
Activate the “Enable Spot & Margin Trading” permission while ensuring no other permissions are enabled—especially those related to transfers or withdrawals.
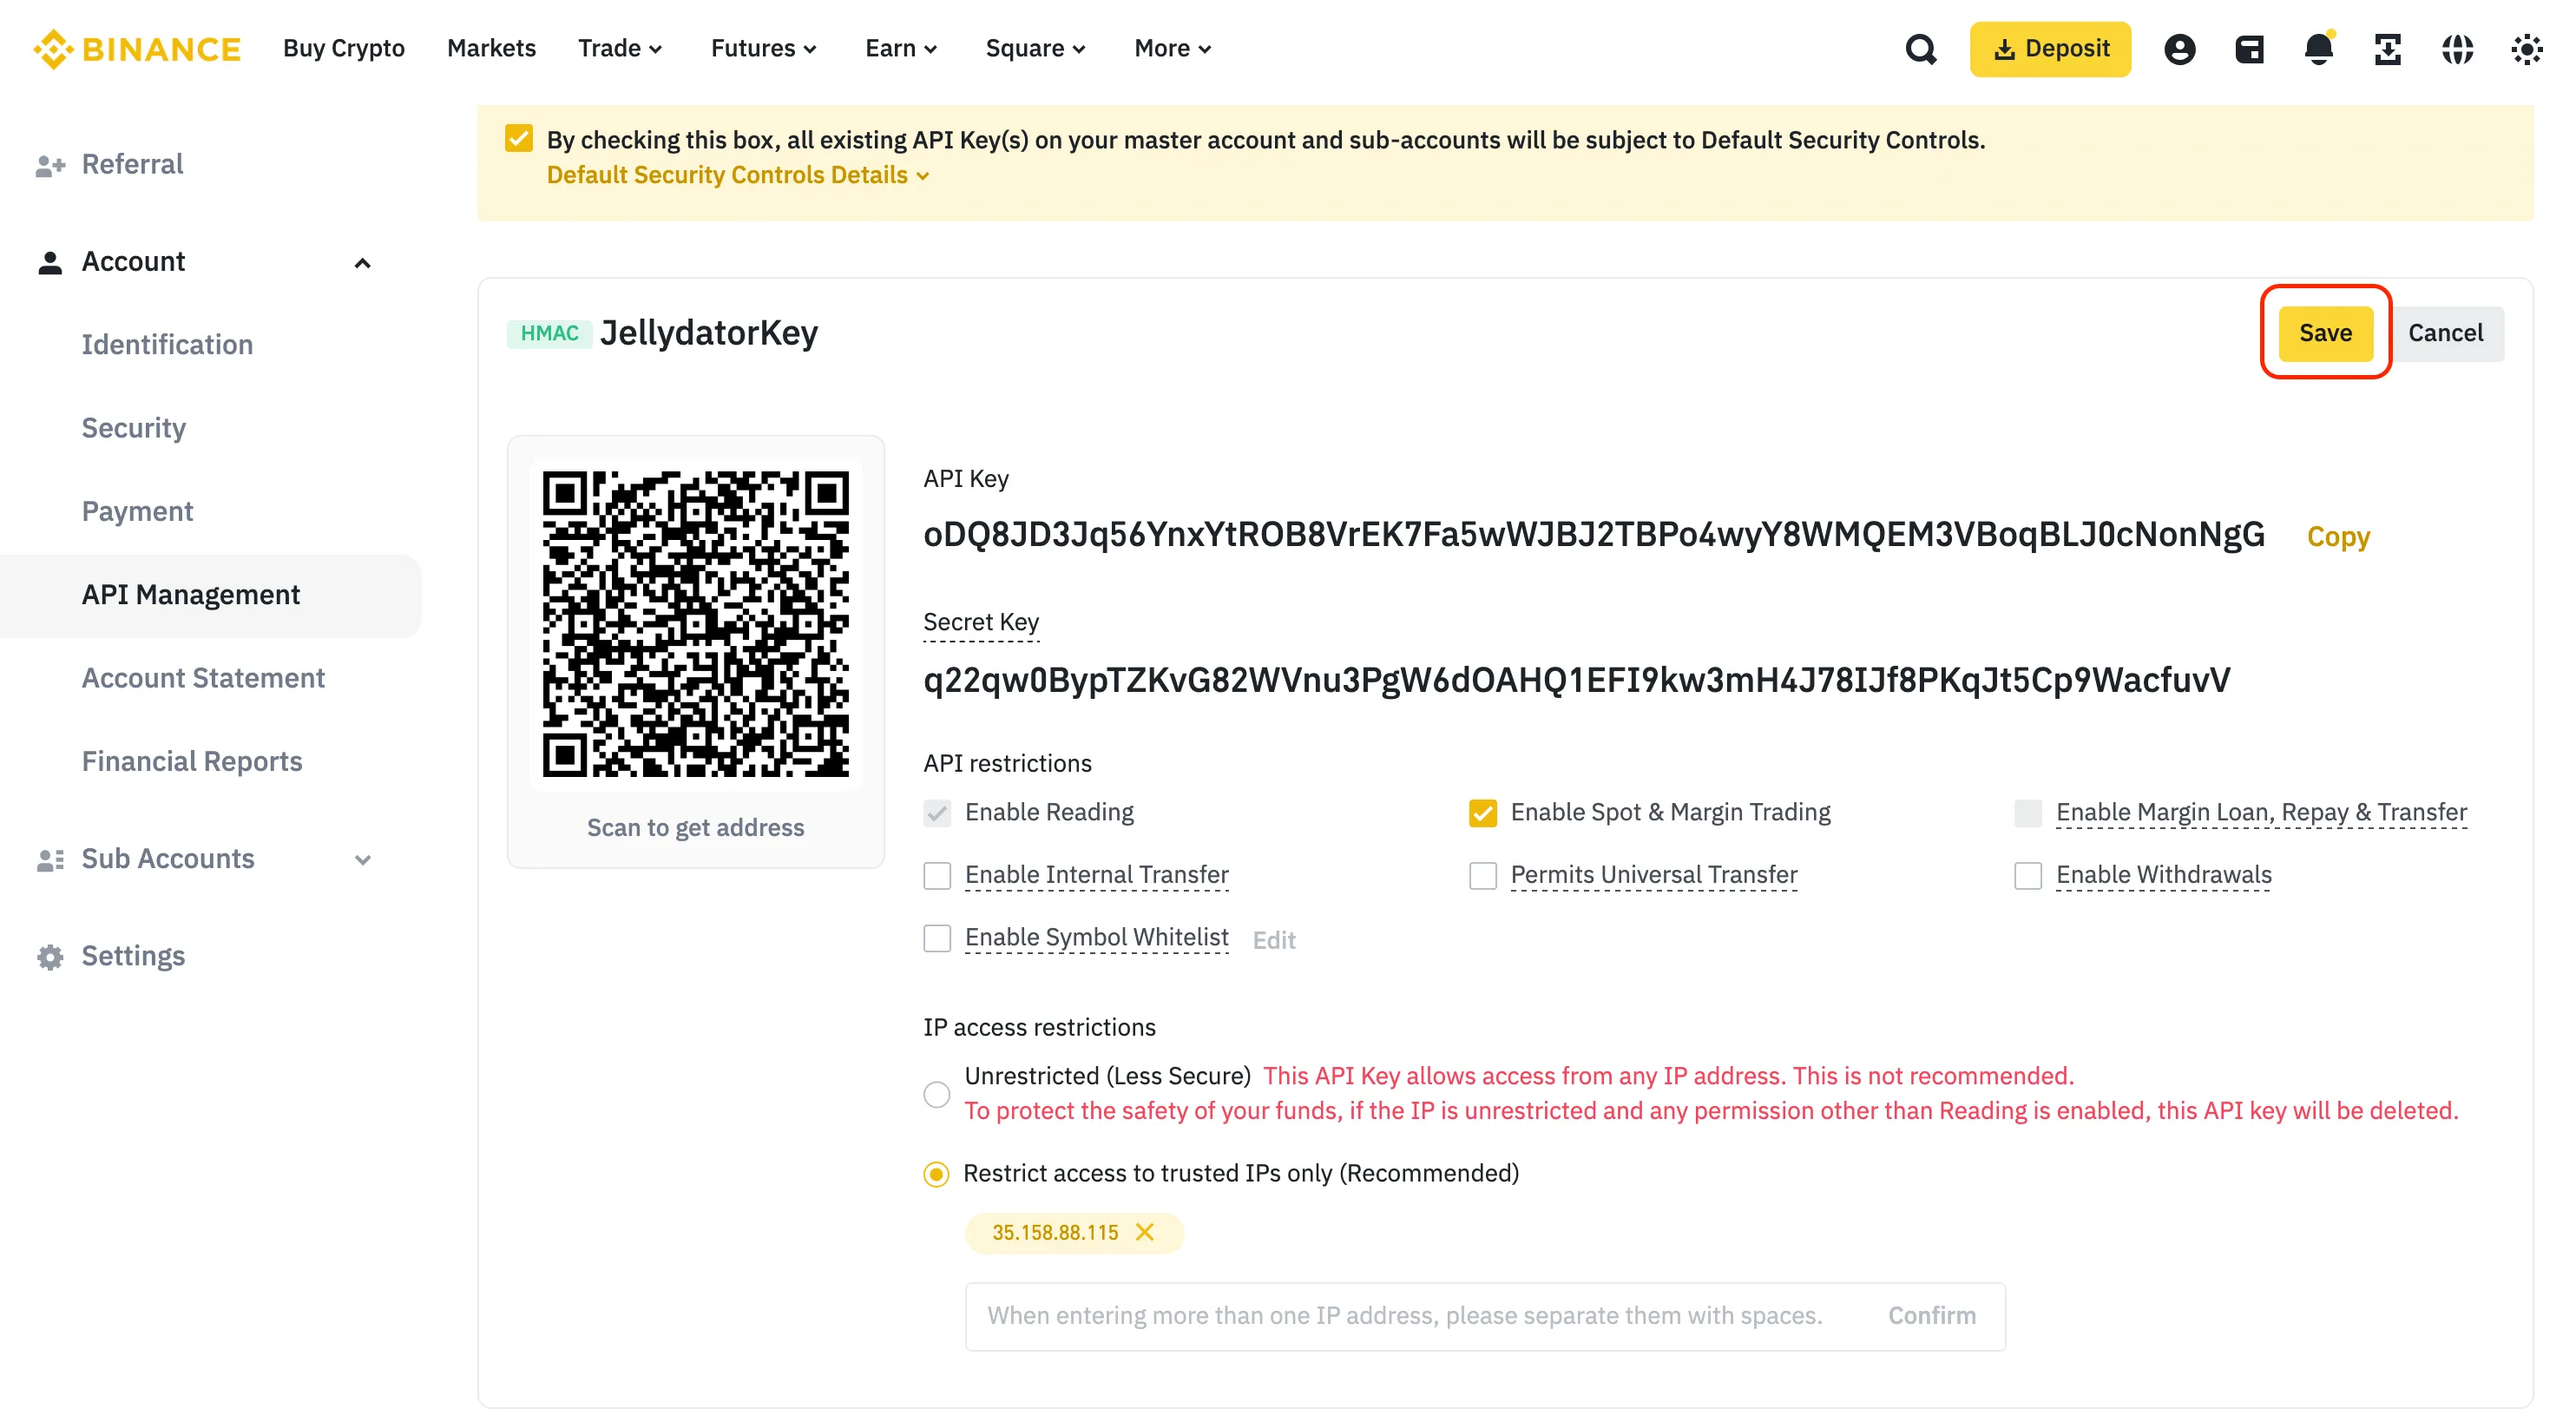
Click “Save” to finalize your changes.
Step 7: Copy and Paste Your New API Key
Copy both the “API Key” and “Secret Key” values from Binance.
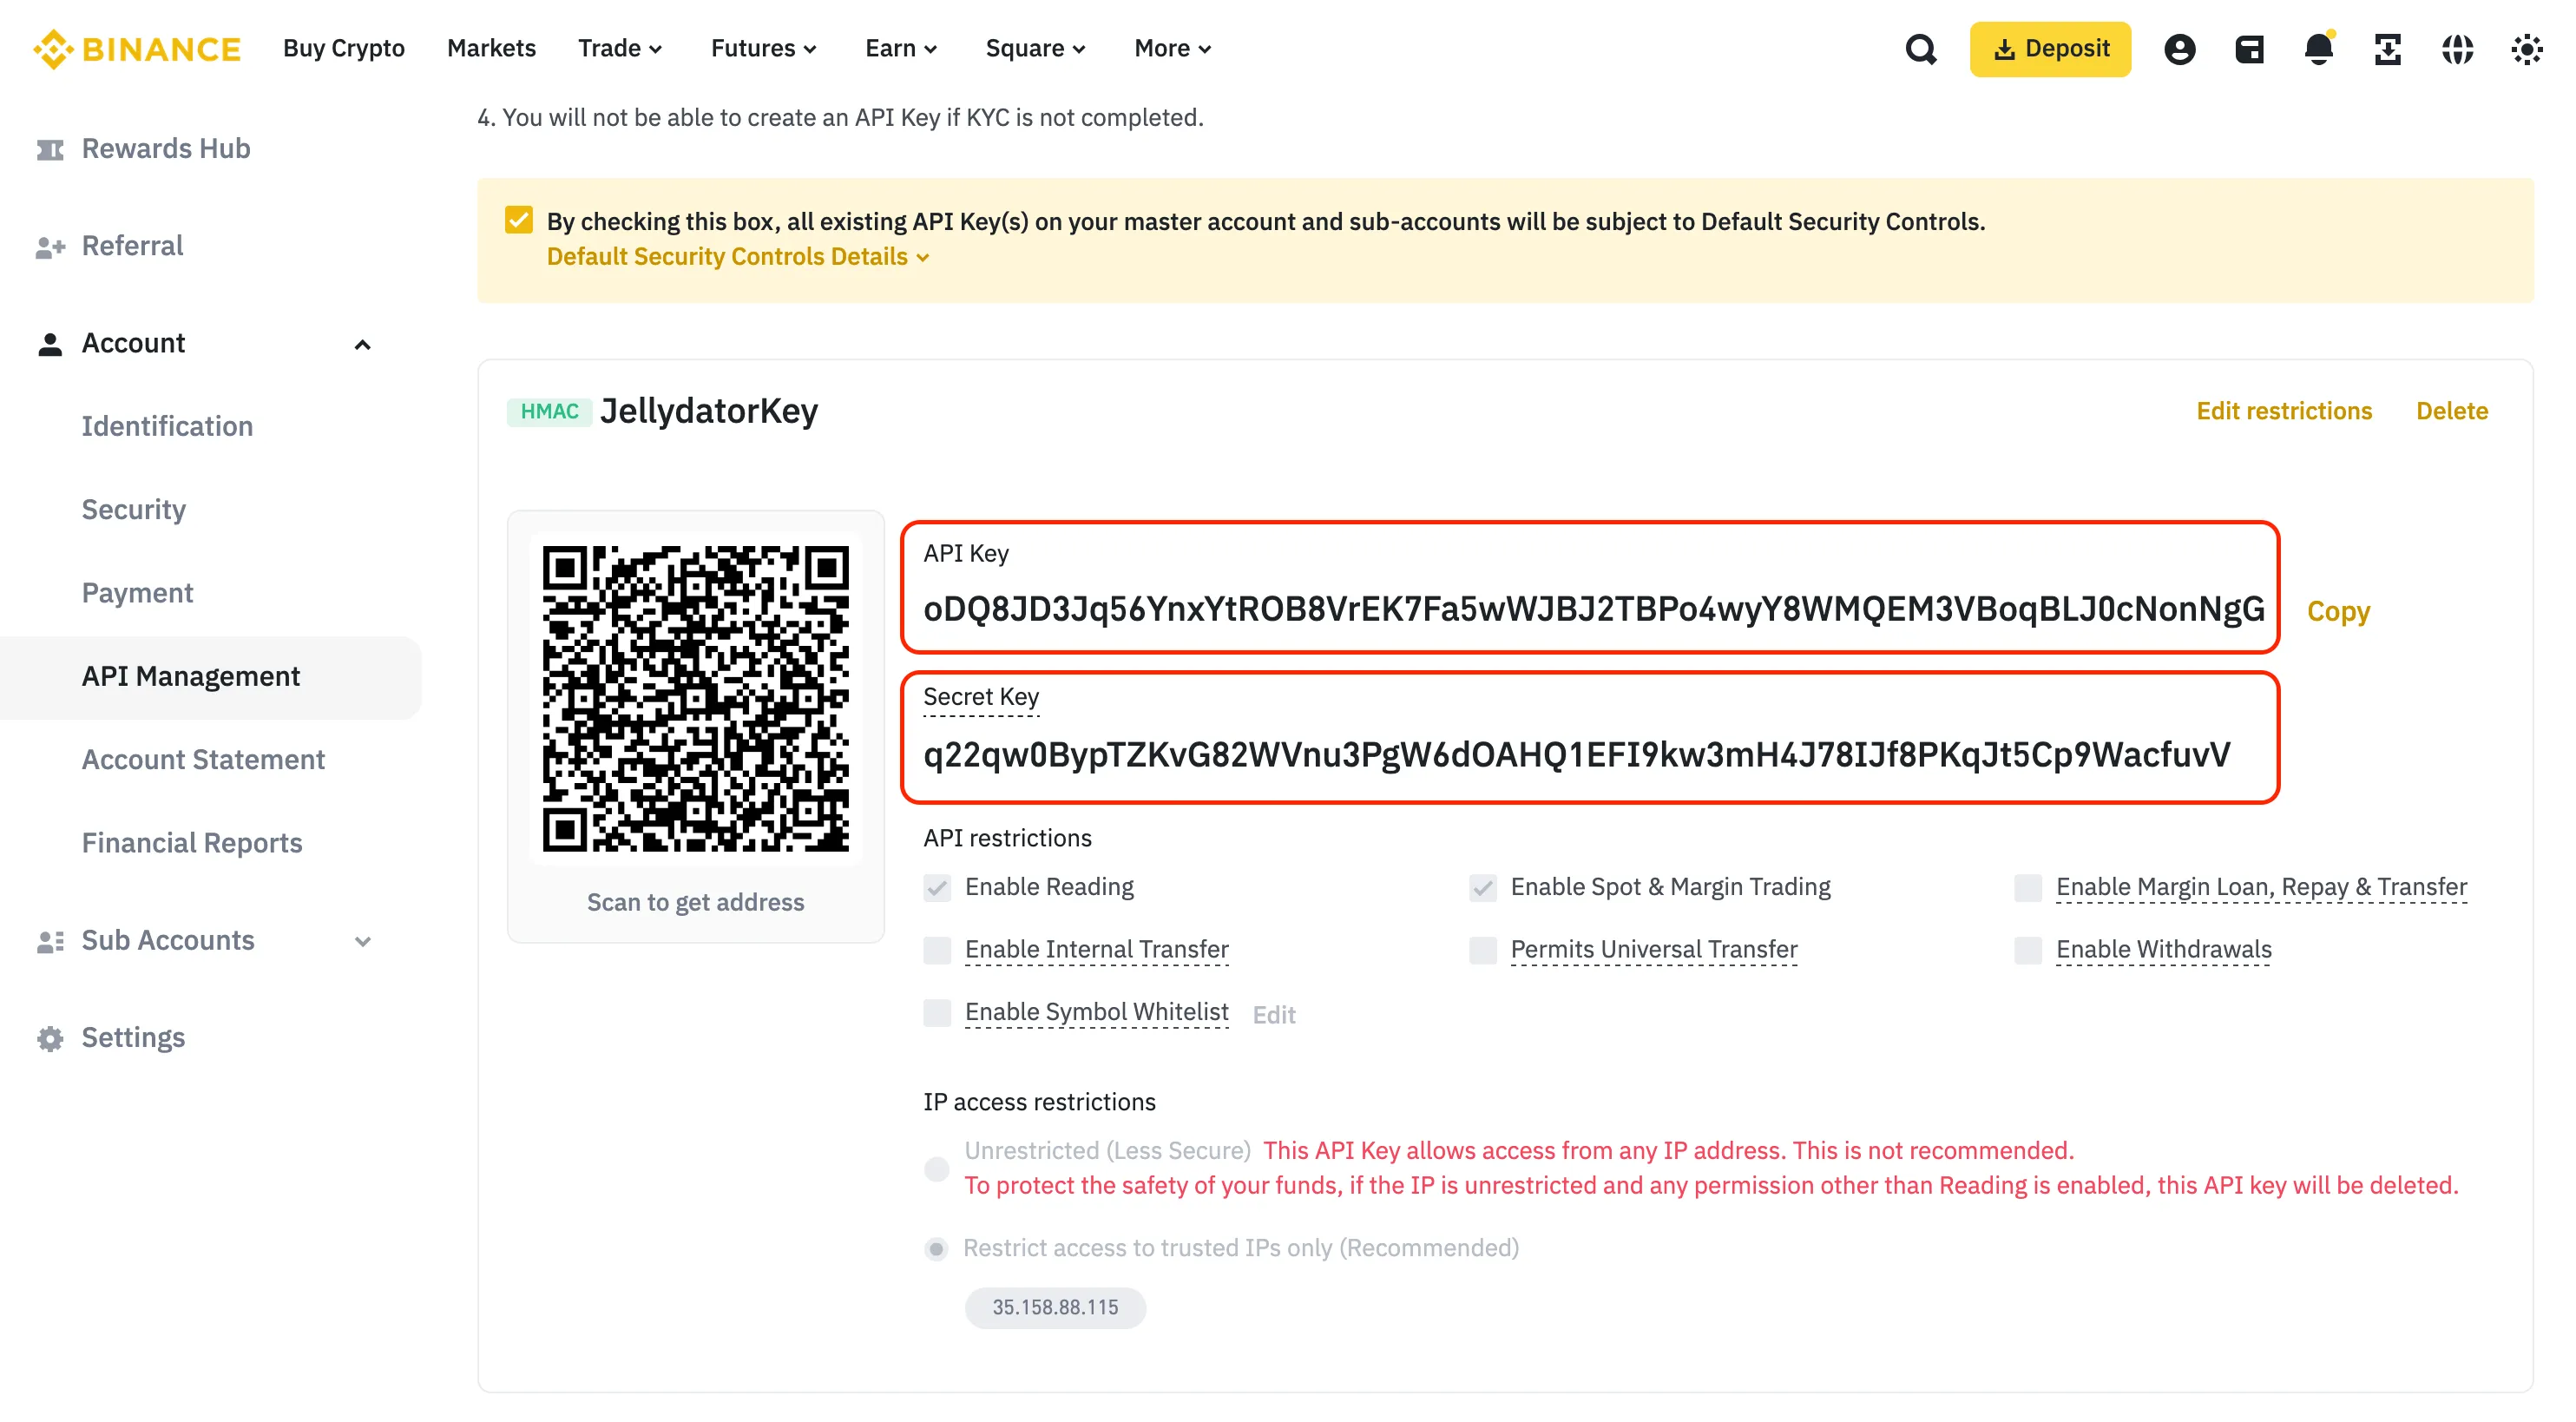
Return to Jellydator and paste these values into their respective fields on the exchange connection page.
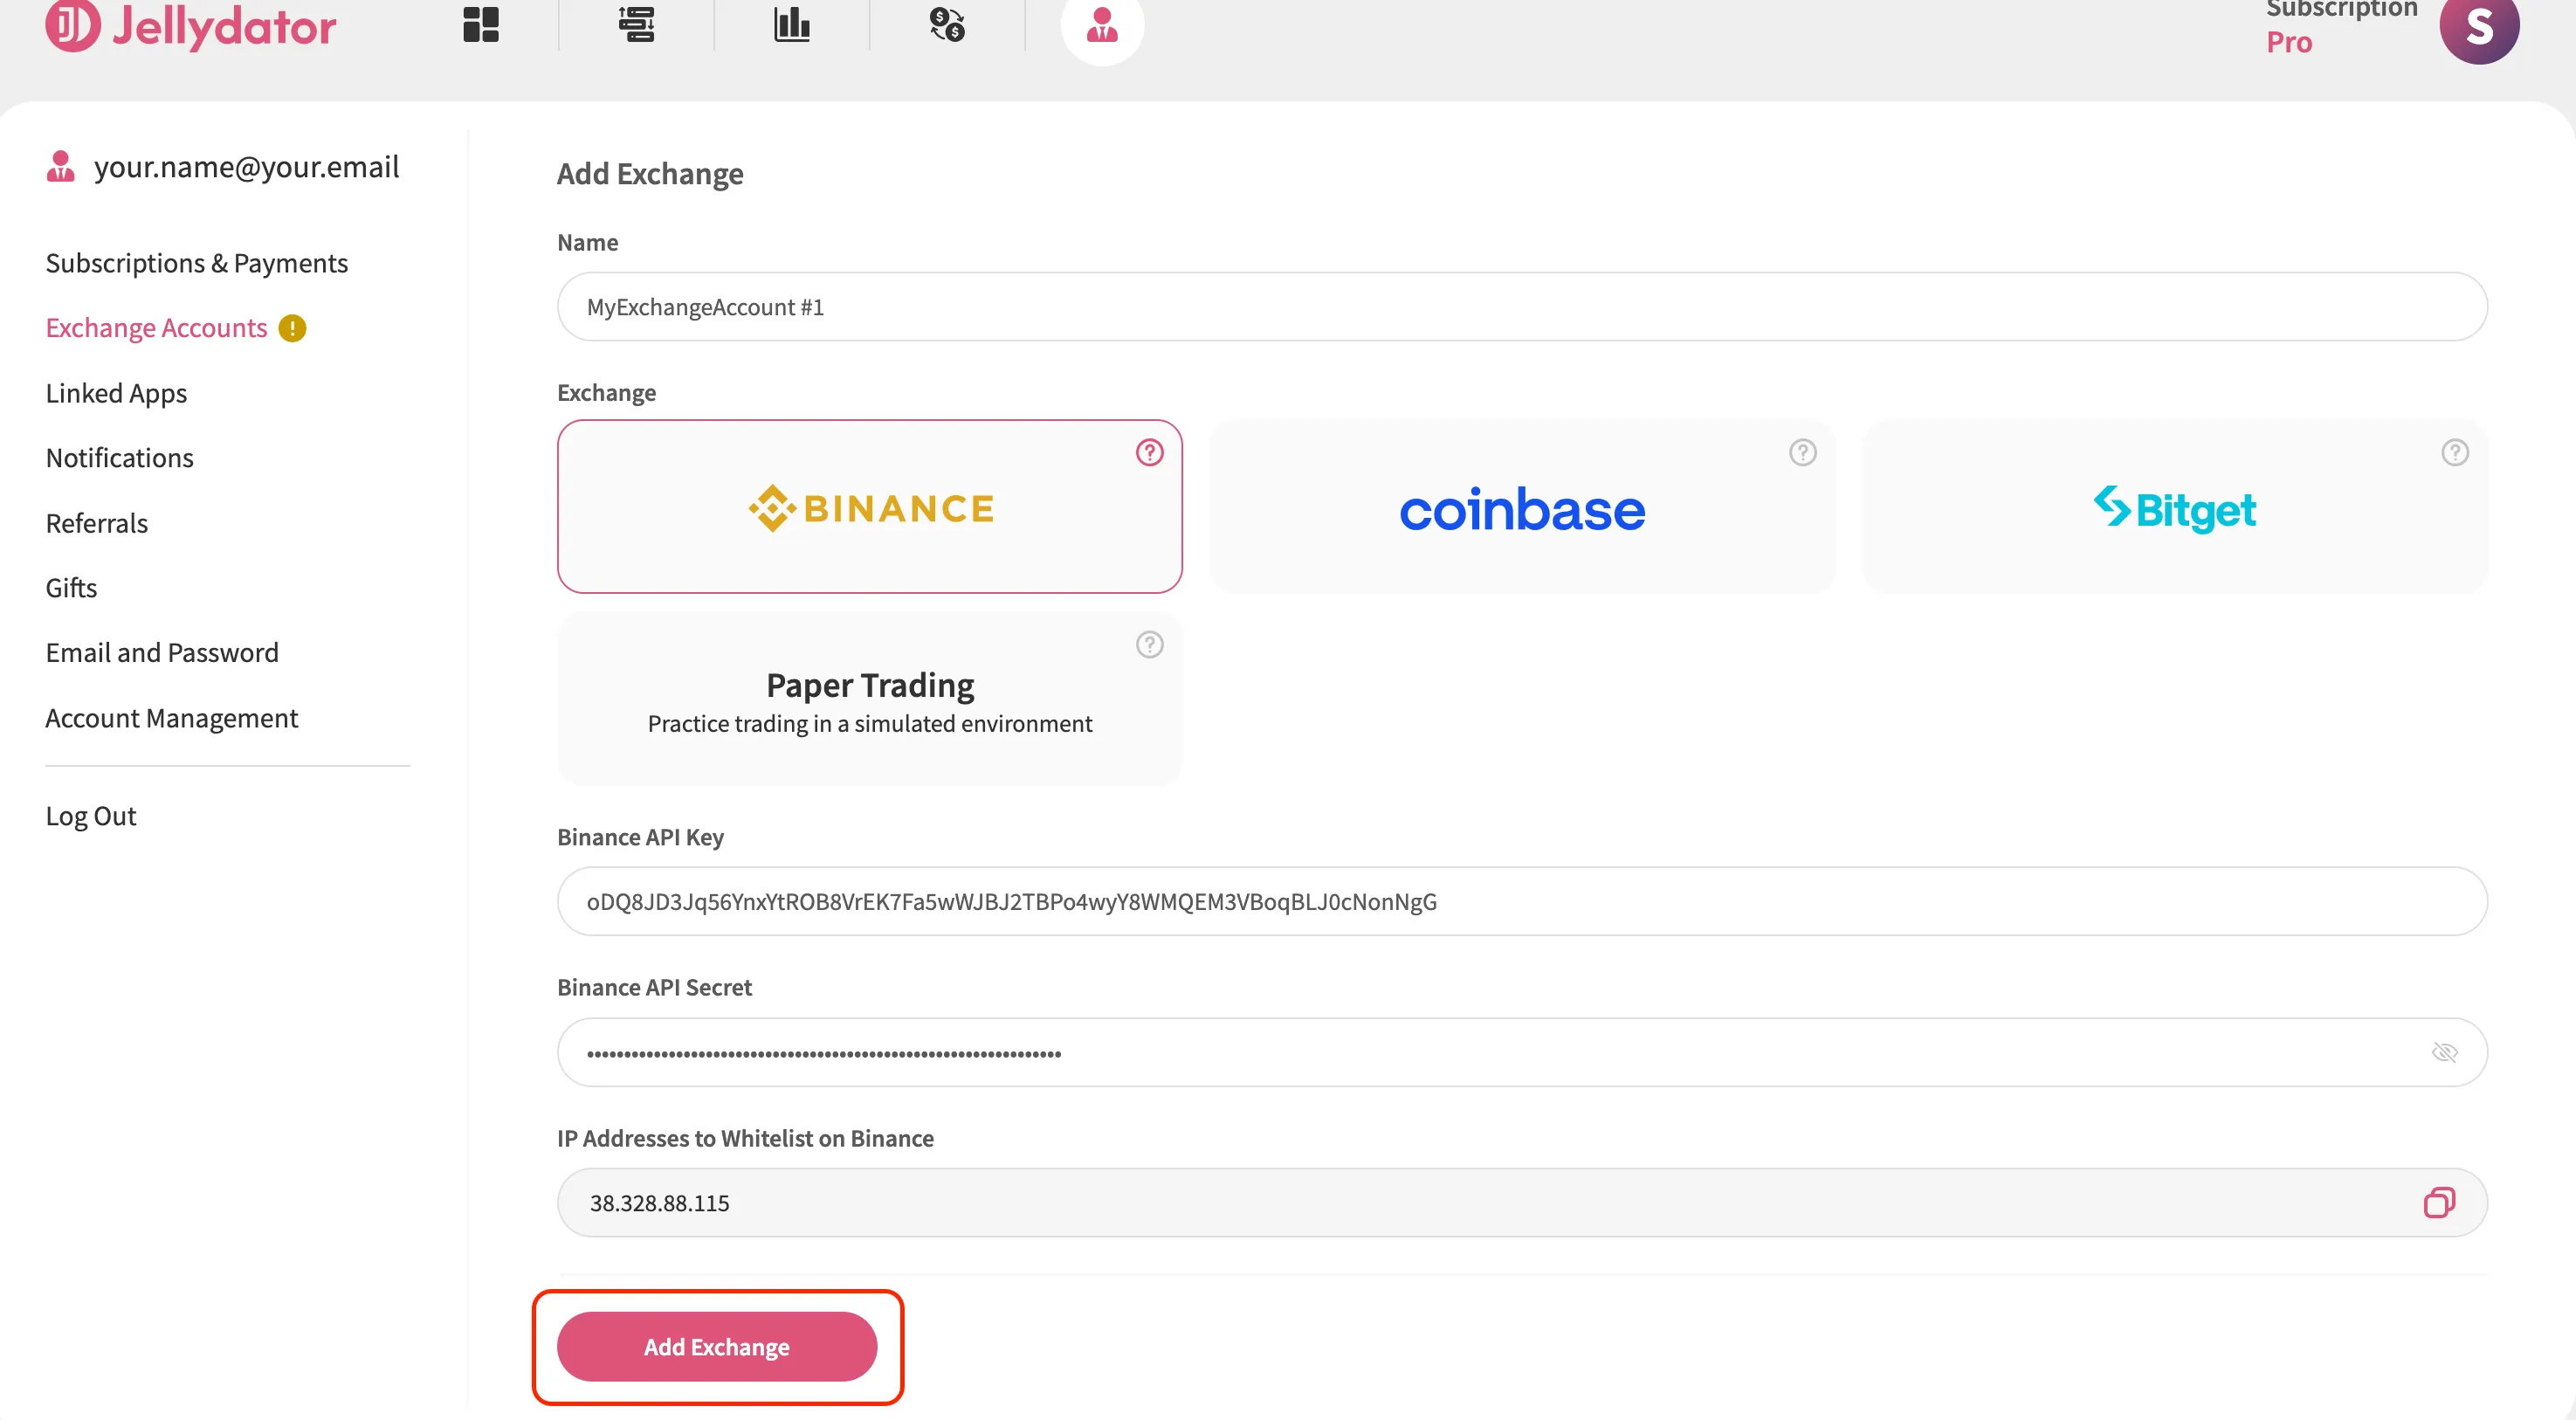
Click “Add Exchange” to complete the process.
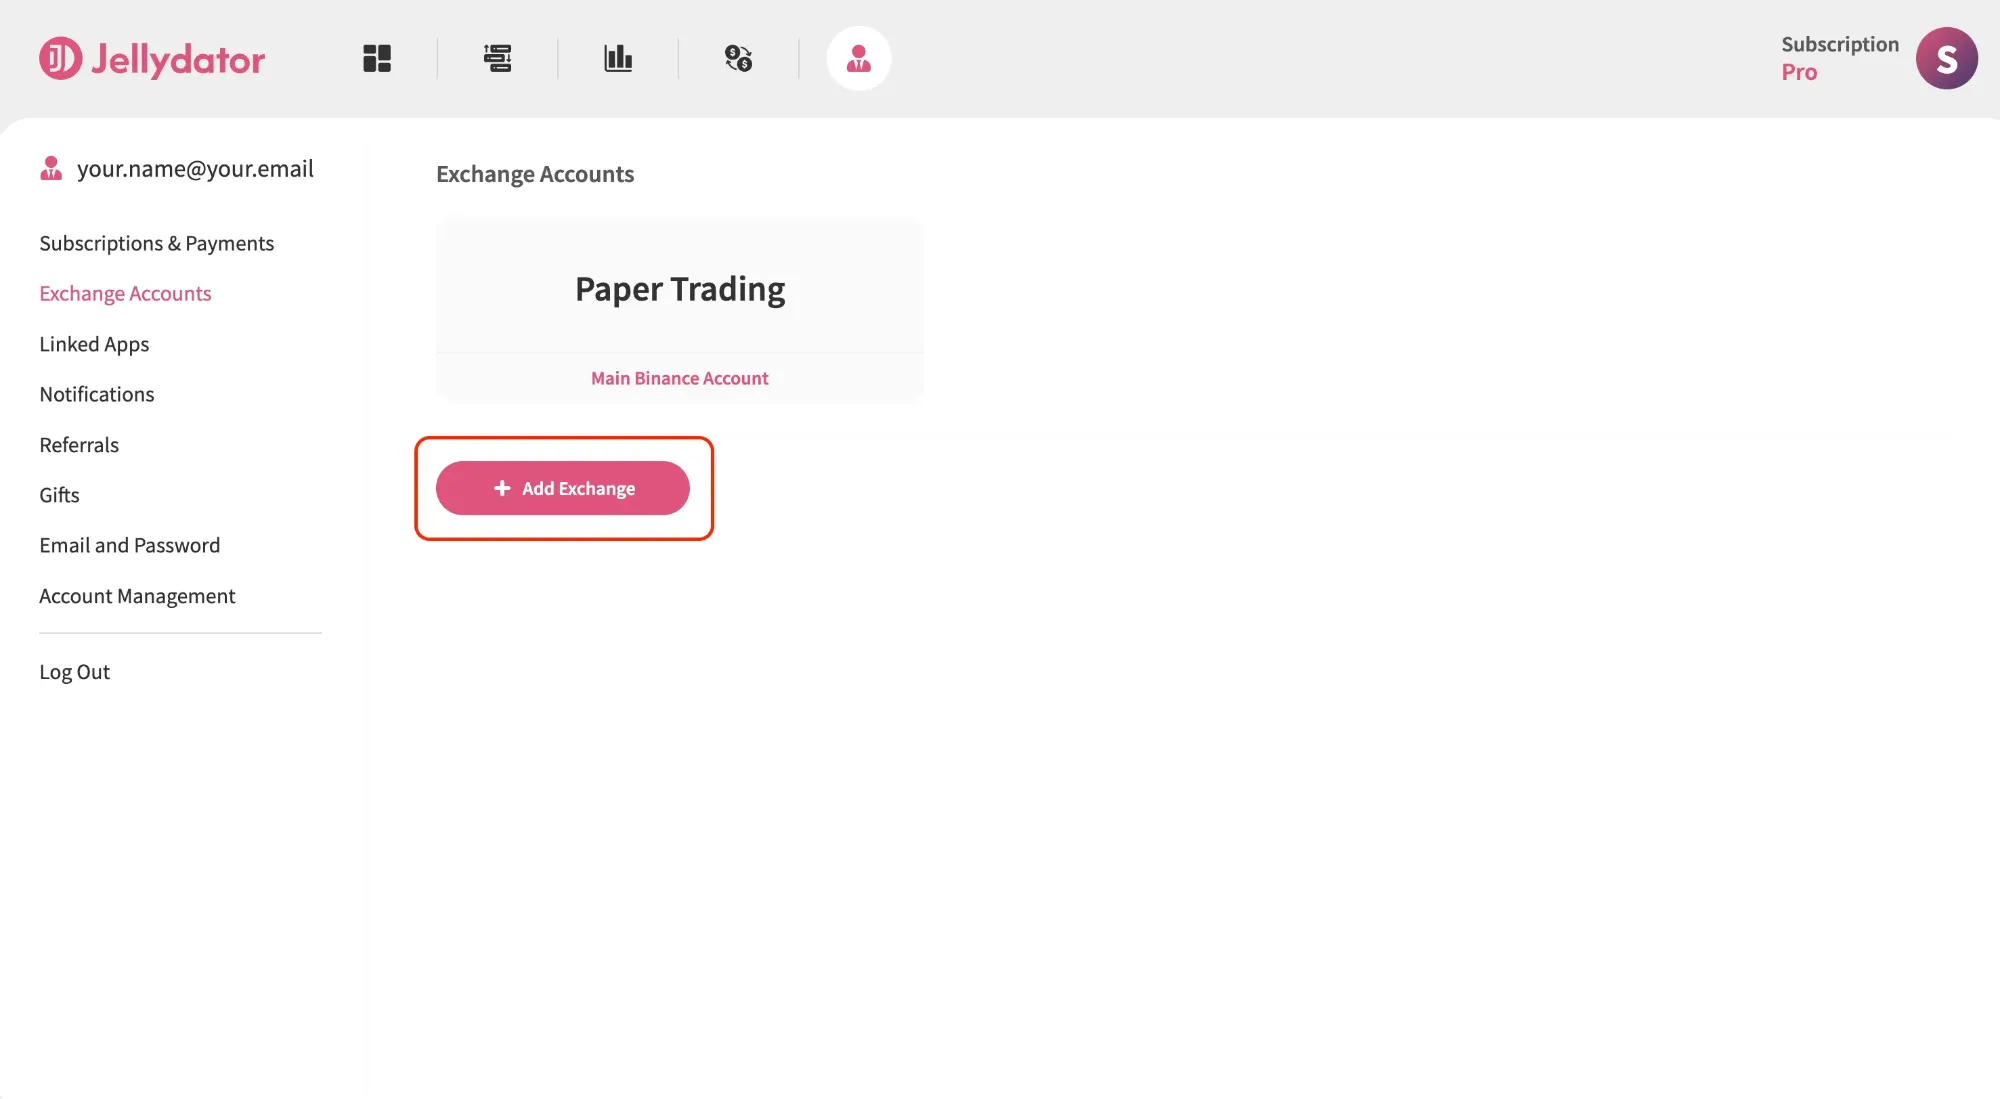
If everything is set up correctly, your Binance account will appear in Jellydator’s exchange account list. You’ll now be able to view balances, monitor asset performance, and integrate this account into your trading strategies.