

The Jellydator editor makes it simple to design automated trading strategies, but crafting a strategy that delivers consistent and profitable results requires thoughtful planning. In this article, we’ll share five practical tips to help you maximize your strategy’s effectiveness while making the most of your subscription limits.
TLDR:
- Use Date & Time step to limit strategy execution frequency and avoid hitting Jellydator or exchange limits.
- Use Paths step to create multiple outcomes within a single strategy.
- Avoid using the same asset in multiple strategies to prevent confusion and unexpected results.
- Don’t use Sell, Buy, or notification steps without preceding steps to prevent unintended actions or notifications.
- Use Asset Balance and Order Count steps to manage strategy flow, ensure sufficient funds, and avoid duplicate orders.
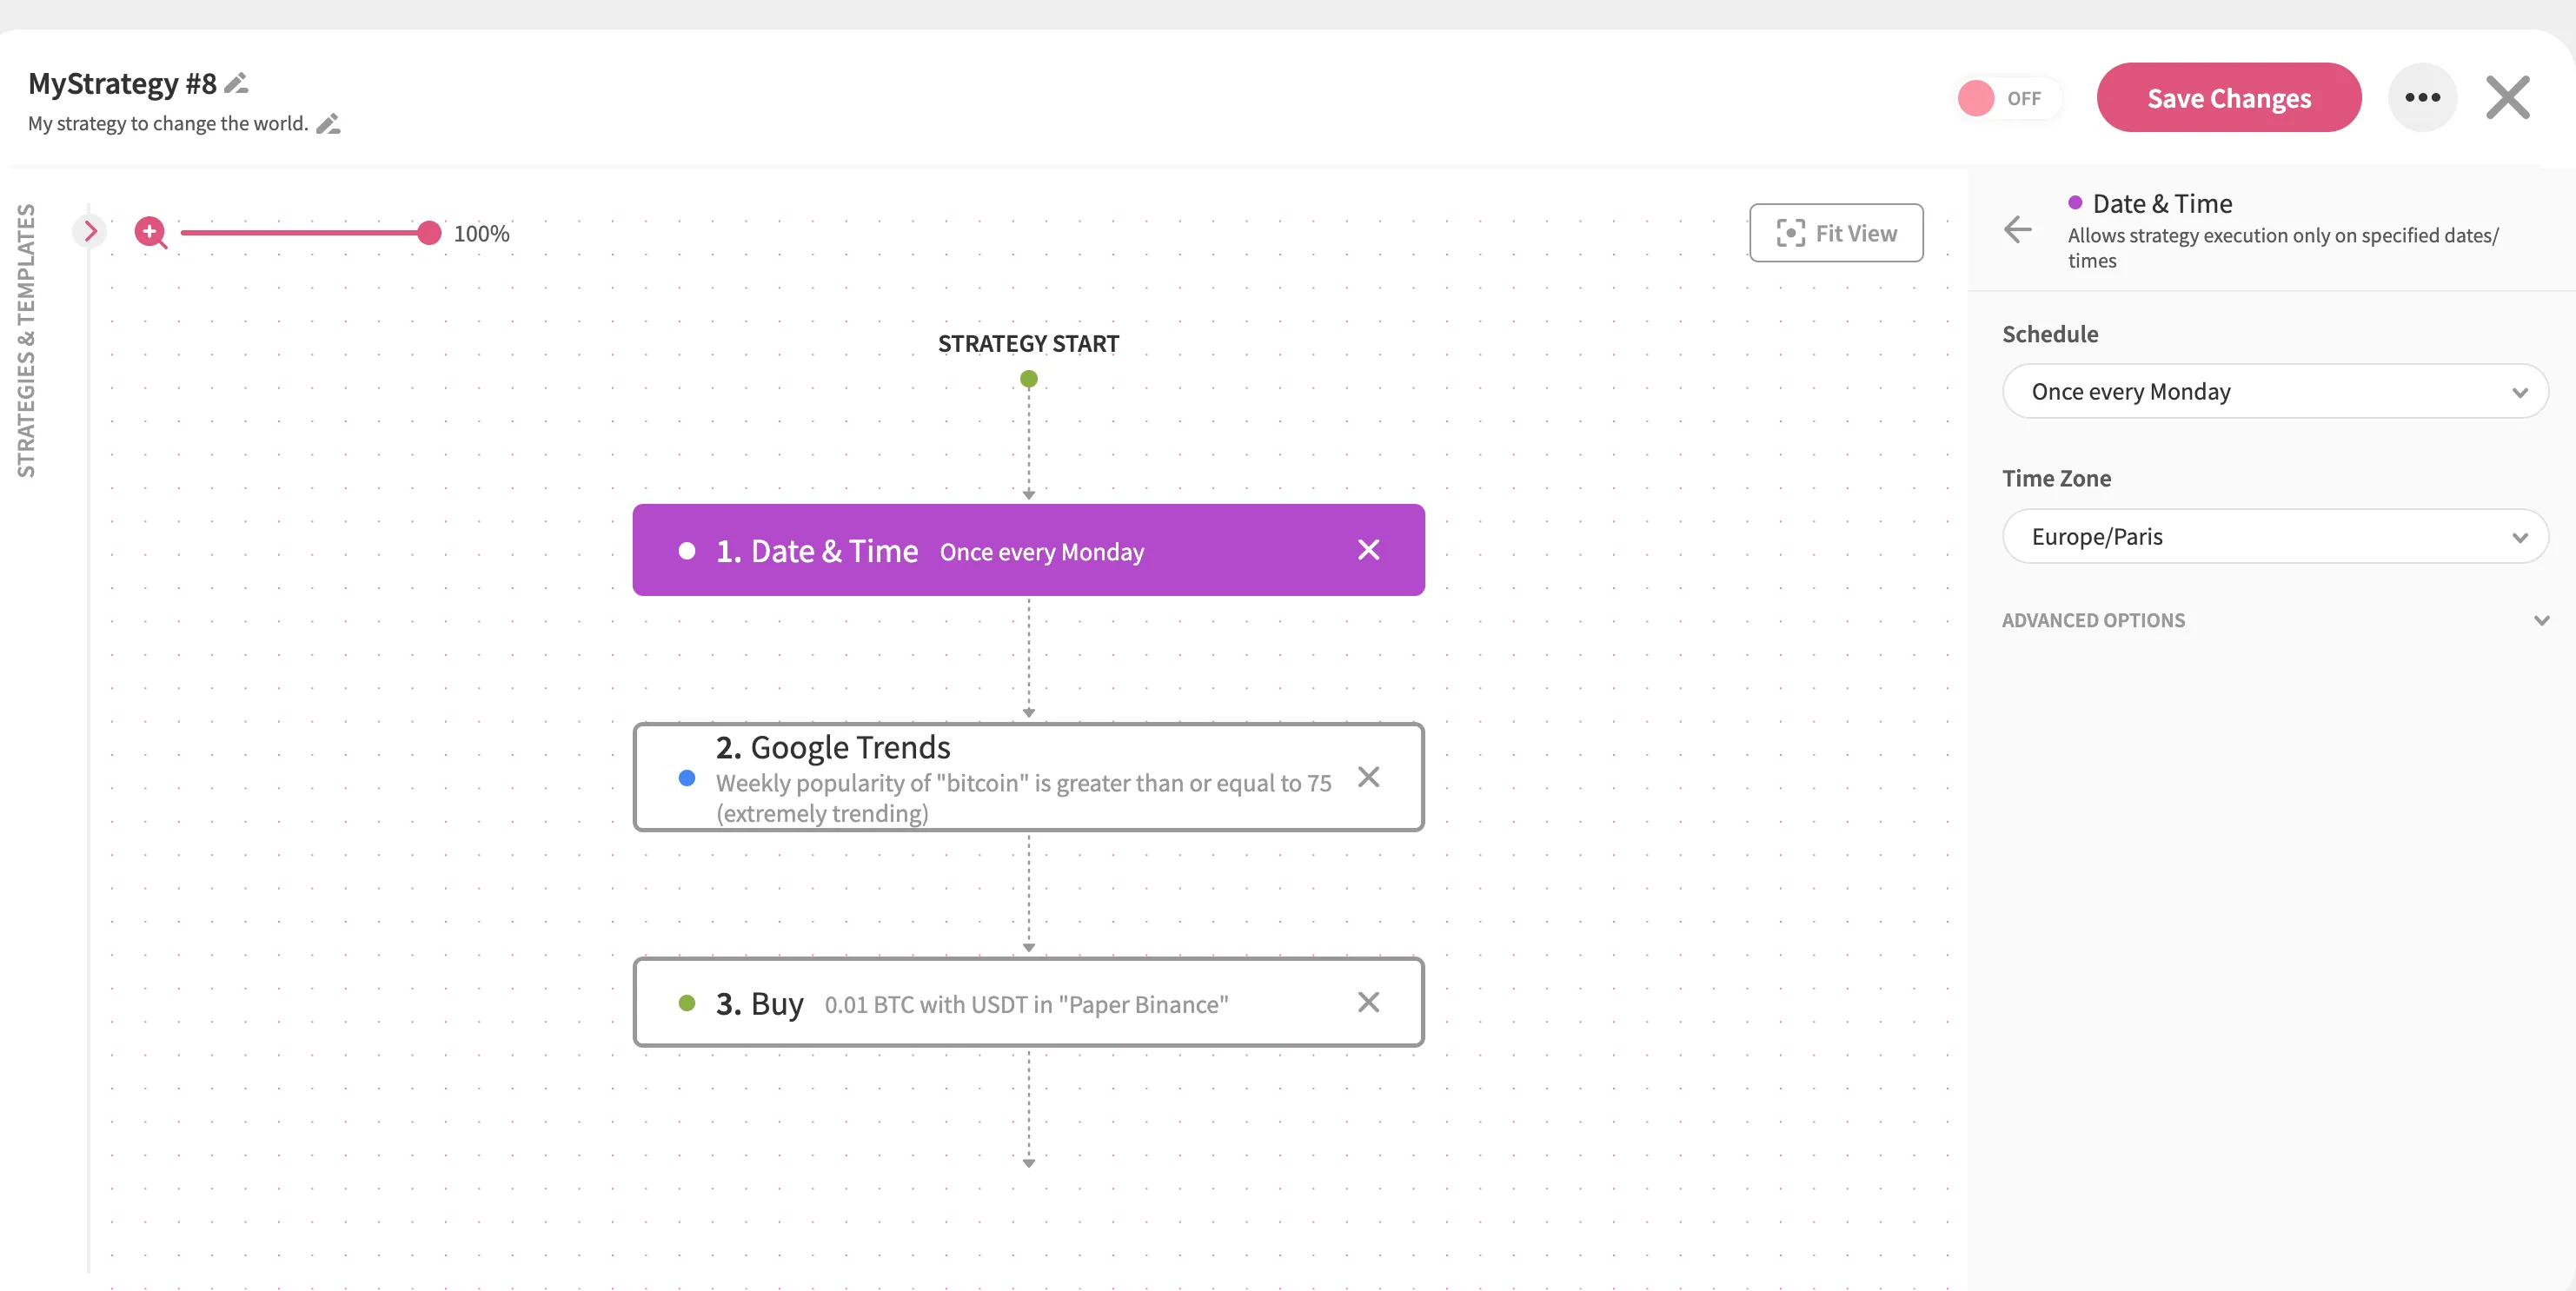
Tip 1: Use the Date & Time Step
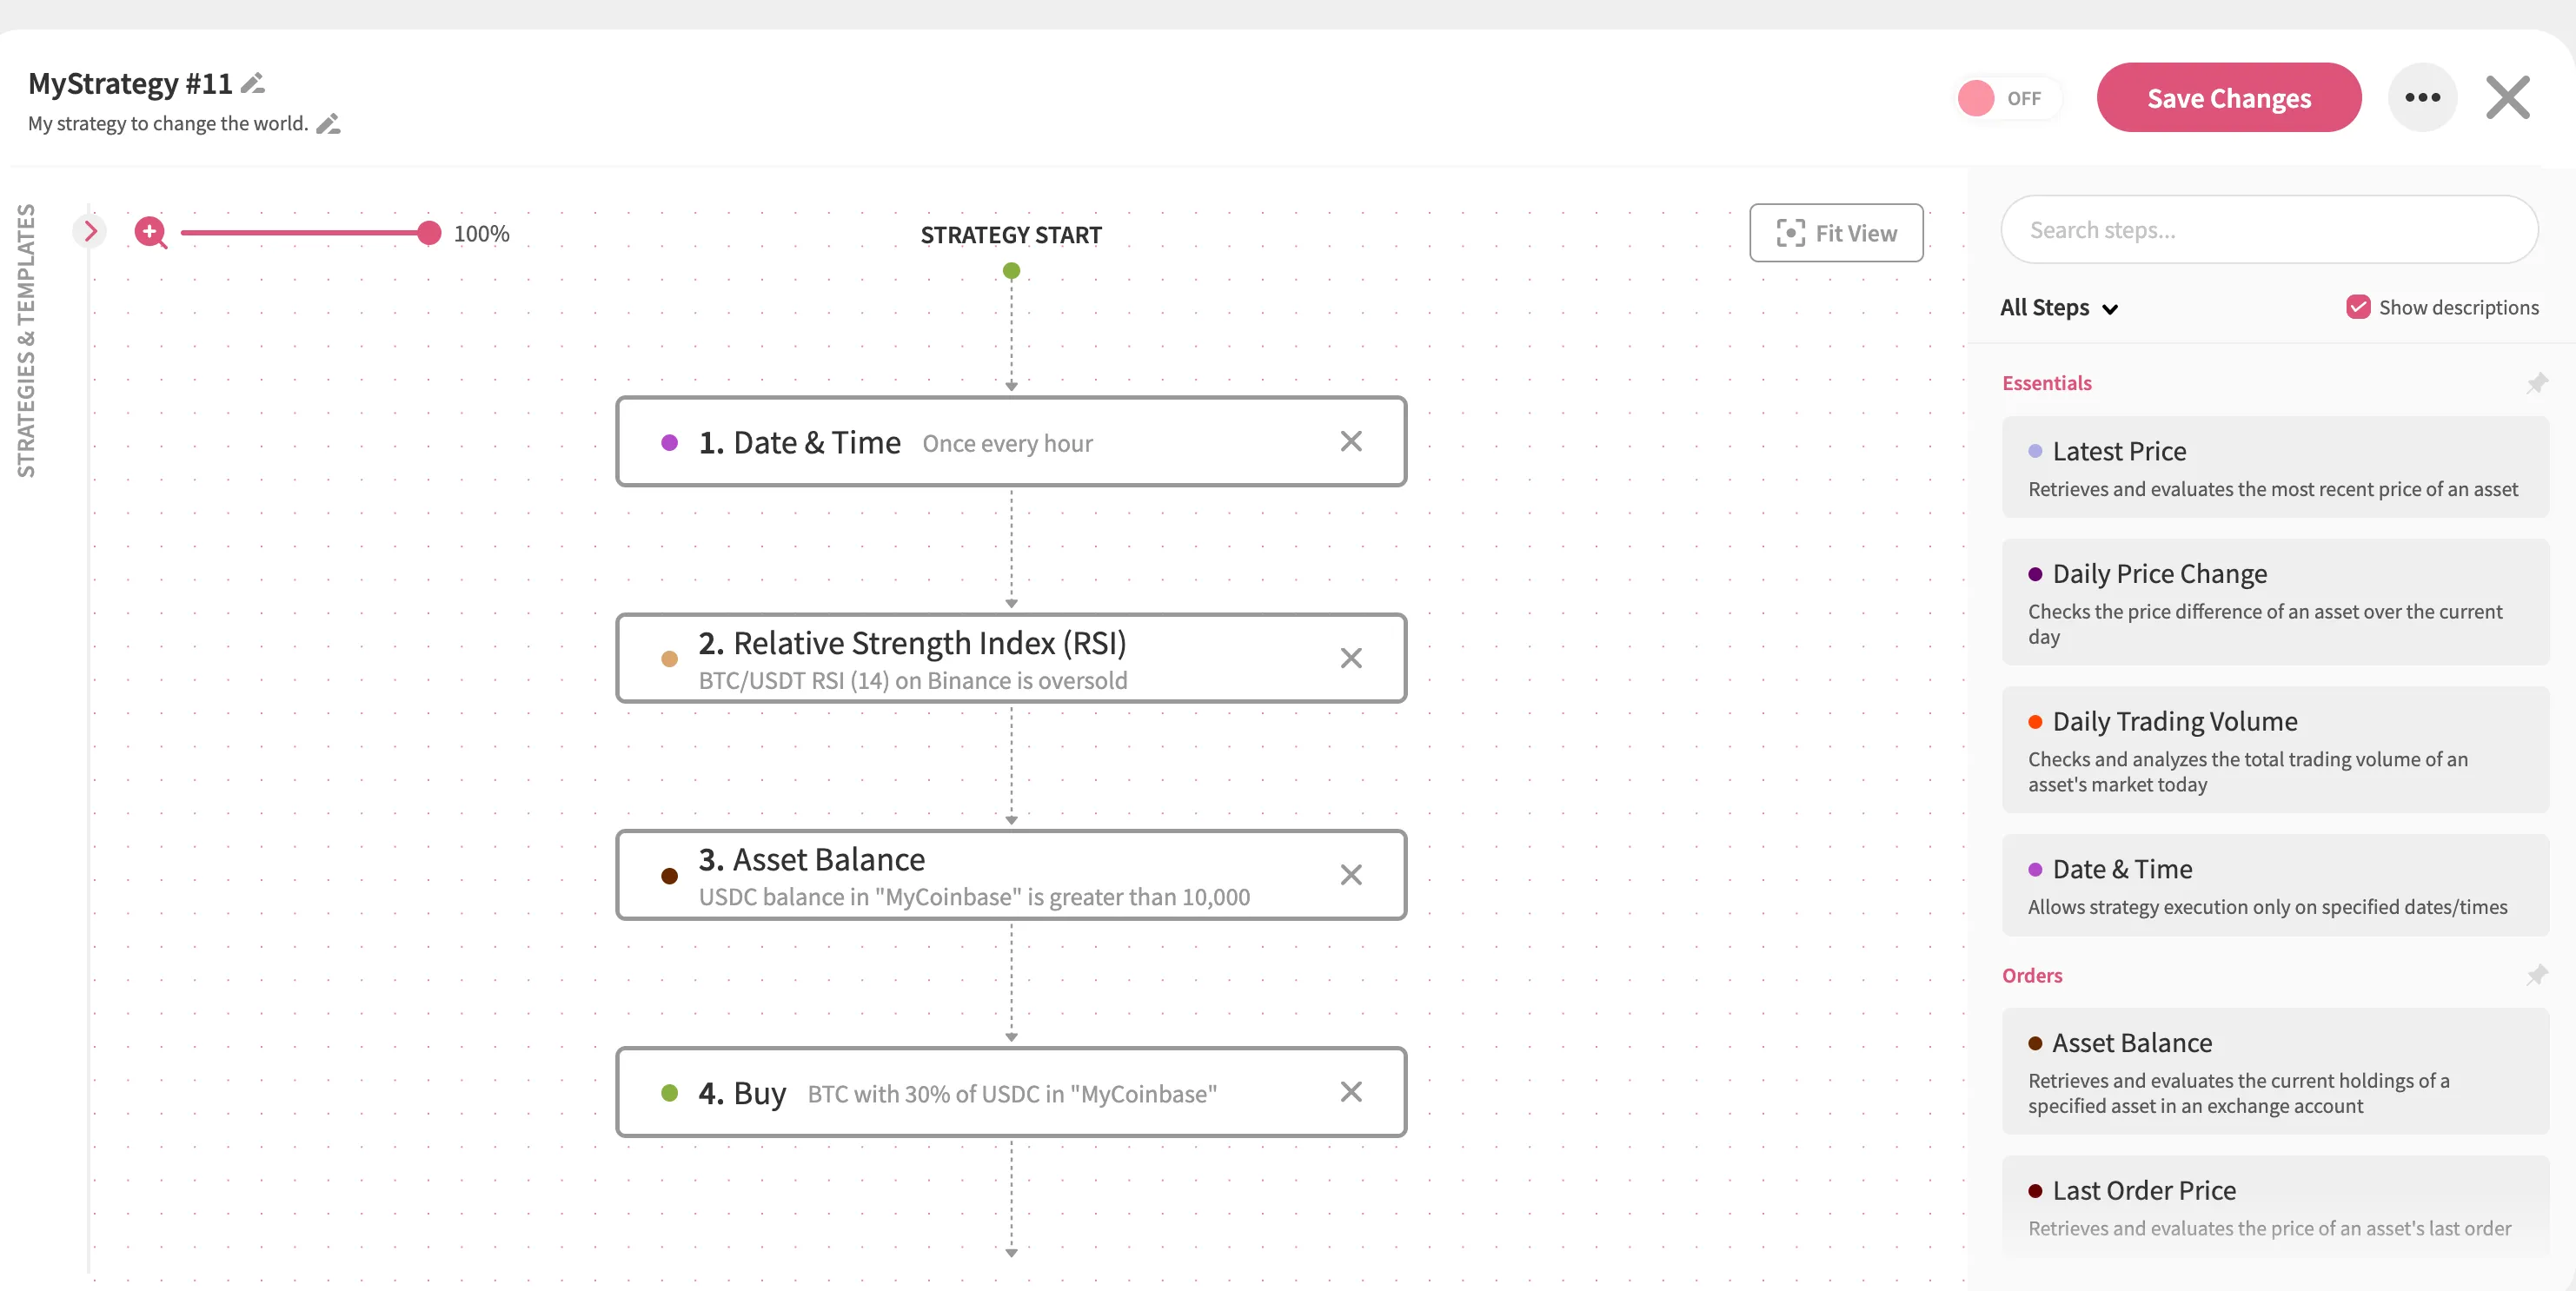
Jellydator strategies typically execute every minute, but this frequency isn’t always ideal. For instance, if the data you’re analyzing updates less often or you only want to trigger actions at specific intervals—like placing an order every Monday for a Dollar-Cost Averaging (DCA) strategy—you can adjust the execution timing using the Date & Time step.
By incorporating the Date & Time step into your strategy, you gain control over when certain parts of it run. This helps you:
- Prevent unnecessary execution and reduce noise.
- Avoid exceeding the limits of your subscription plan.
- Minimize spamming your exchange with frequent actions.
Tip 2: Use the Paths Step
To create multiple outcomes based on shared preceding steps within a single strategy, the Paths step is an invaluable tool. This feature lets your strategy branch into multiple paths, each with its own unique conditions and results.
For example, suppose both of your buying and selling strategies rely on the same Google Trends condition to ensure no funds are used unless “bitcoin” is trending. With Paths, you can set this common condition once and then split into two branches: one for buying and another for selling.
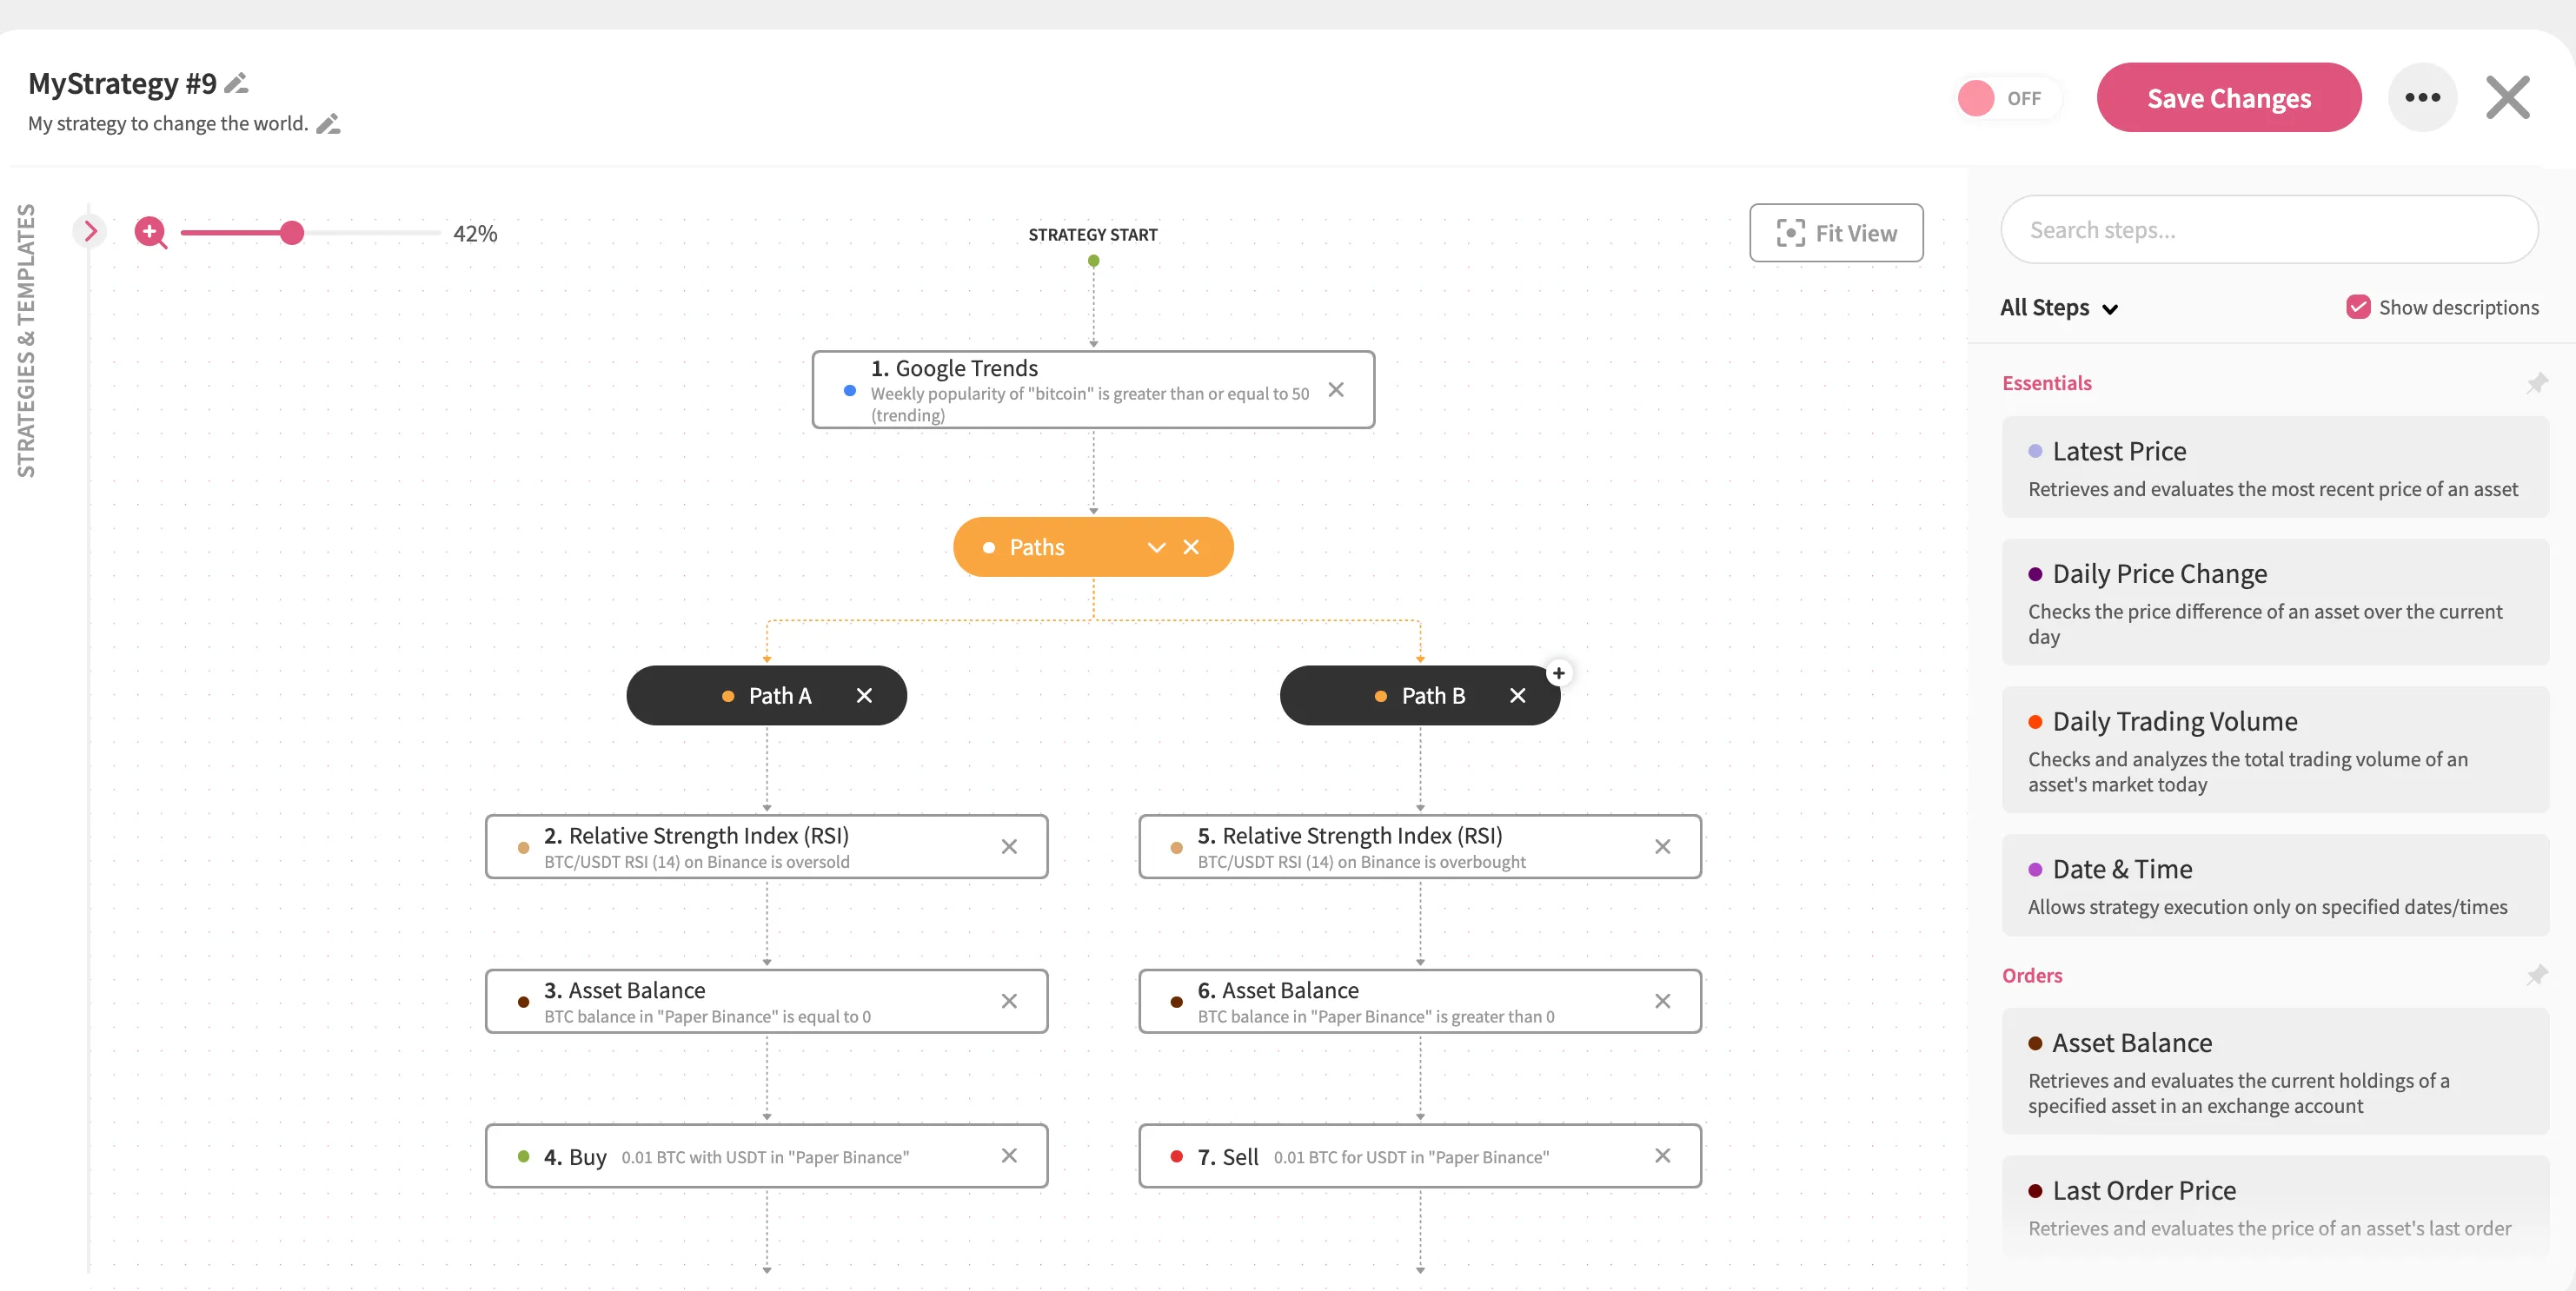
Here’s why Paths is so useful:
- Shared conditions only need to be defined once, reducing repetition.
- Each path can have distinct logic tailored to specific scenarios.
- Combining multiple strategies into one and organizing it into branches makes it easier to understand and manage.
To read more about the Paths step, click here.
Tip 3: Avoid Using the Same Asset in Multiple Strategies
While there are exceptions, trading the same asset across multiple strategies can lead to conflicts and unpredictable outcomes. For instance, one strategy might purchase an asset and hold it until specific sell conditions are met. However, another strategy targeting the same asset could intervene during this holding period and sell it prematurely. This overlap can leave you confused, wondering if the first strategy was misconfigured.
To avoid such issues, it’s best to consolidate all—or at least most—of the logic for a specific asset into a single strategy. This approach offers several benefits:
- Ensures strategies don’t interfere with each other’s operations.
- Makes it easier to monitor and evaluate your strategy’s performance.
- Reduces confusion by keeping your trading strategies organized.
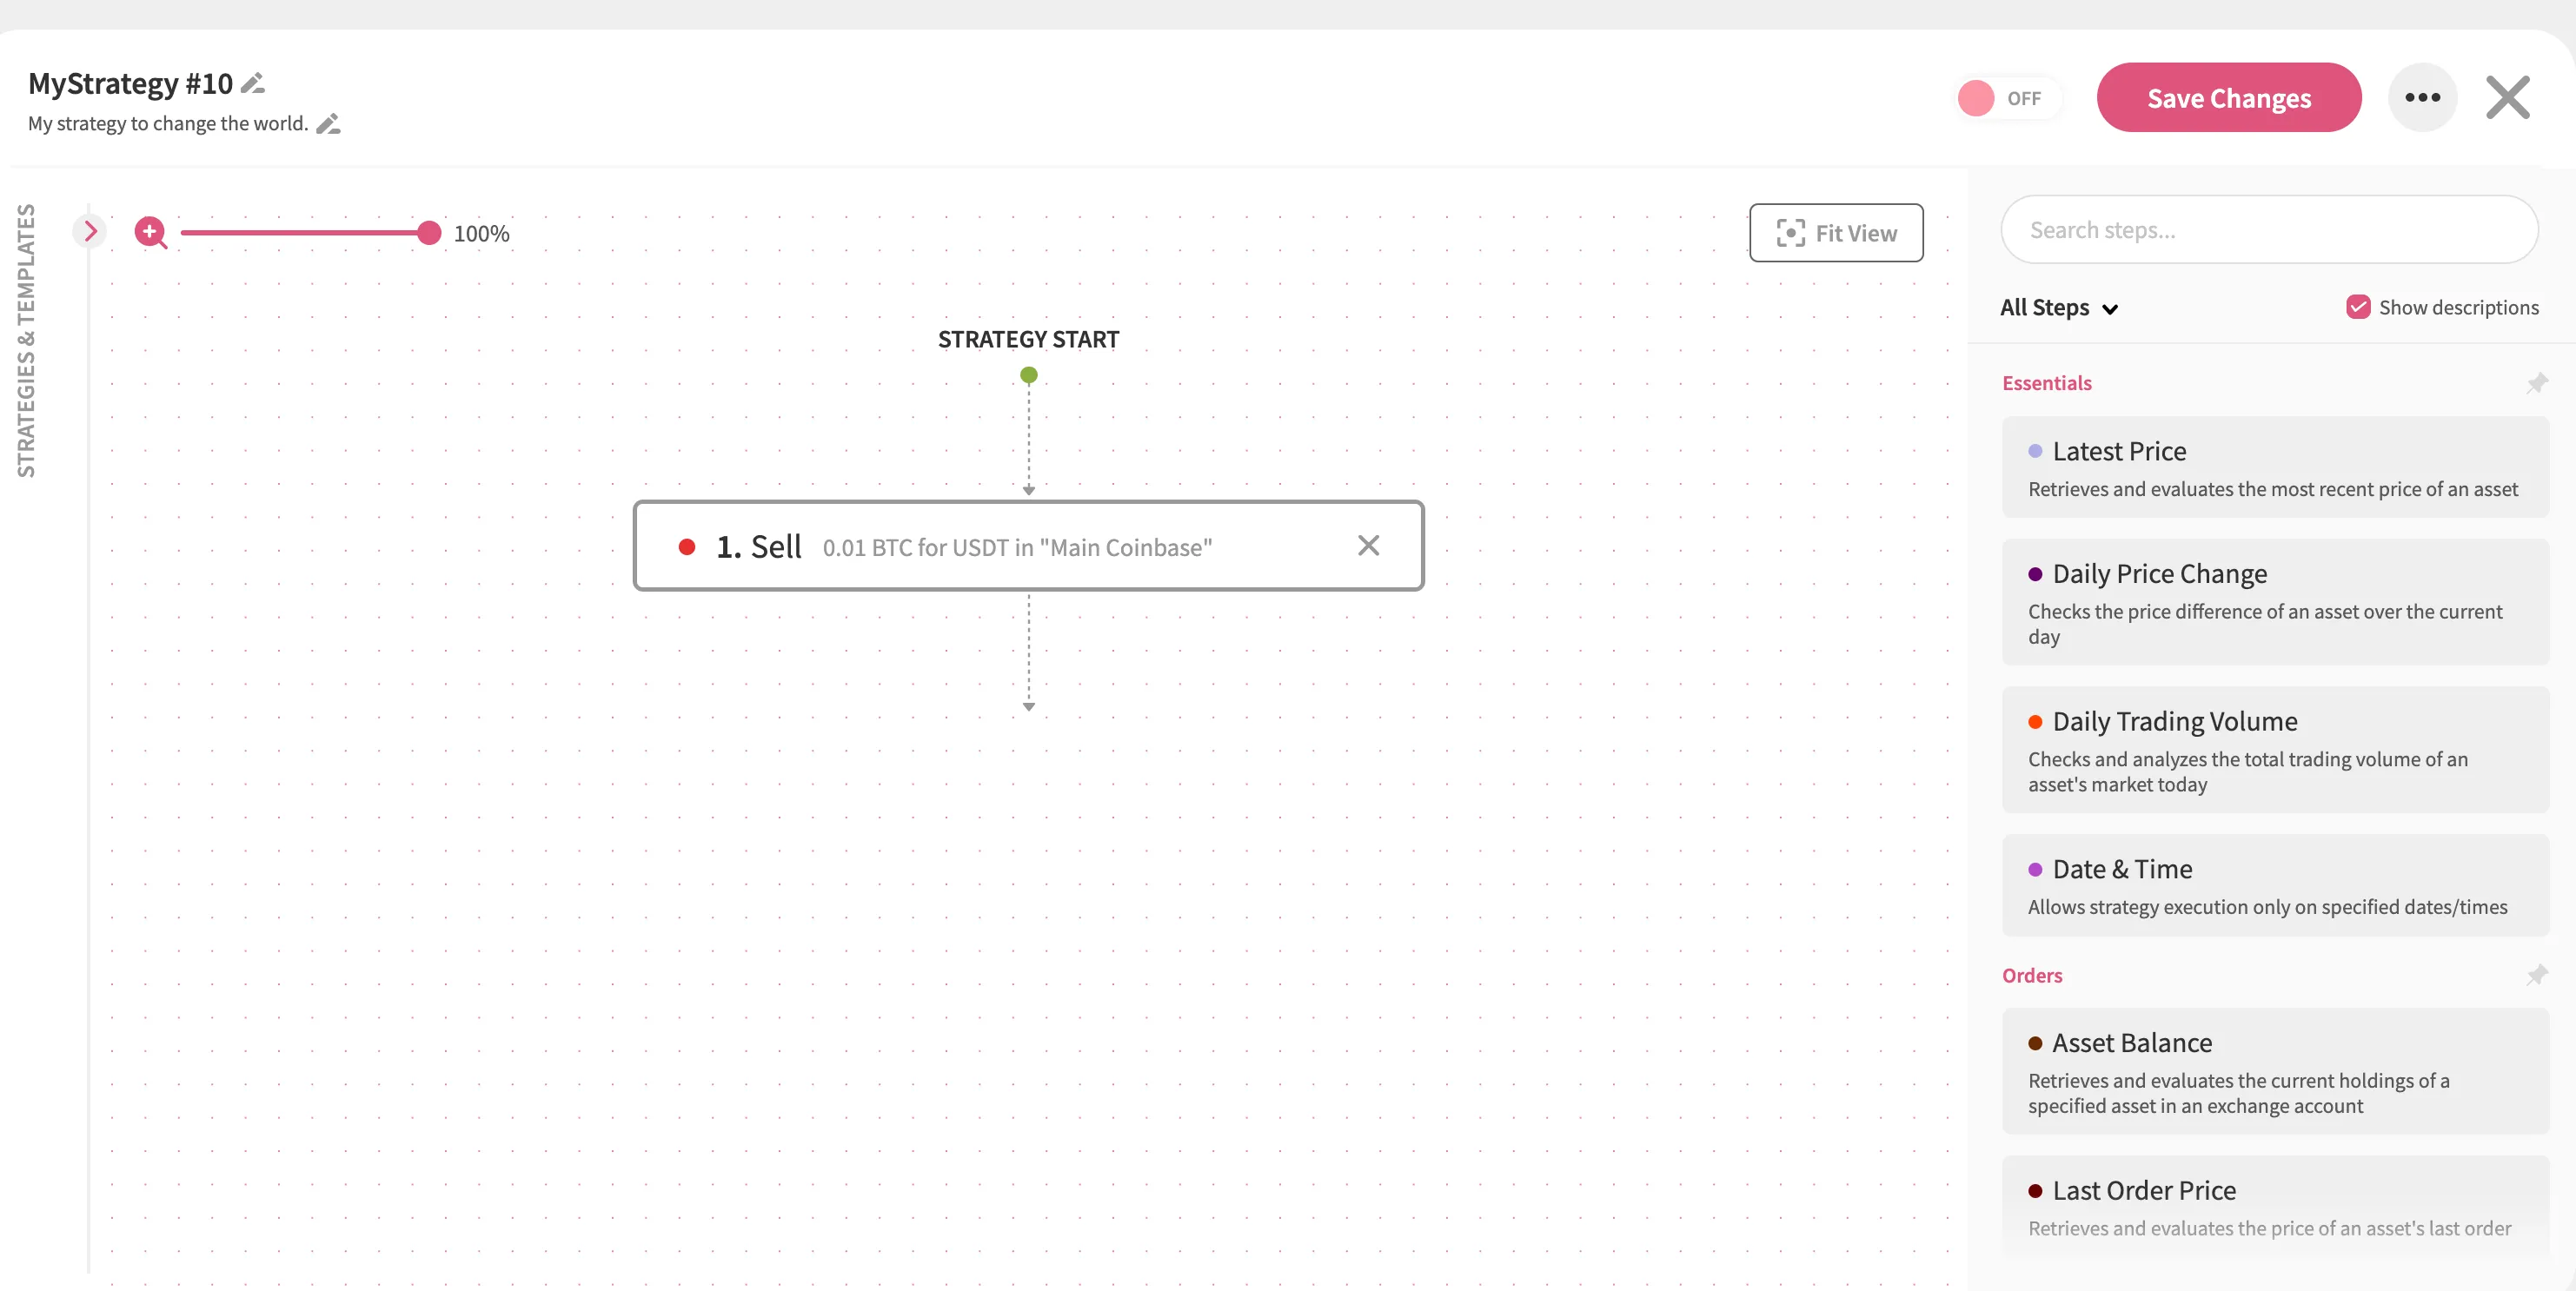
Tip 4: Avoid Using Sell/Buy/Notification Steps Without Any Other Steps Before Them
As Jellydator strategies execute every minute, all steps within them—unless restricted by other steps—will also run every minute. If your strategy consists solely of a Sell, Buy, or notification step, it will keep executing continuously, potentially draining your balance or hitting the limits of your Jellydator subscription plan.
For example, a strategy with only a Sell step will sell assets repeatedly without pause:
To prevent this, always include preceding steps that act as safeguards before the outcome step:
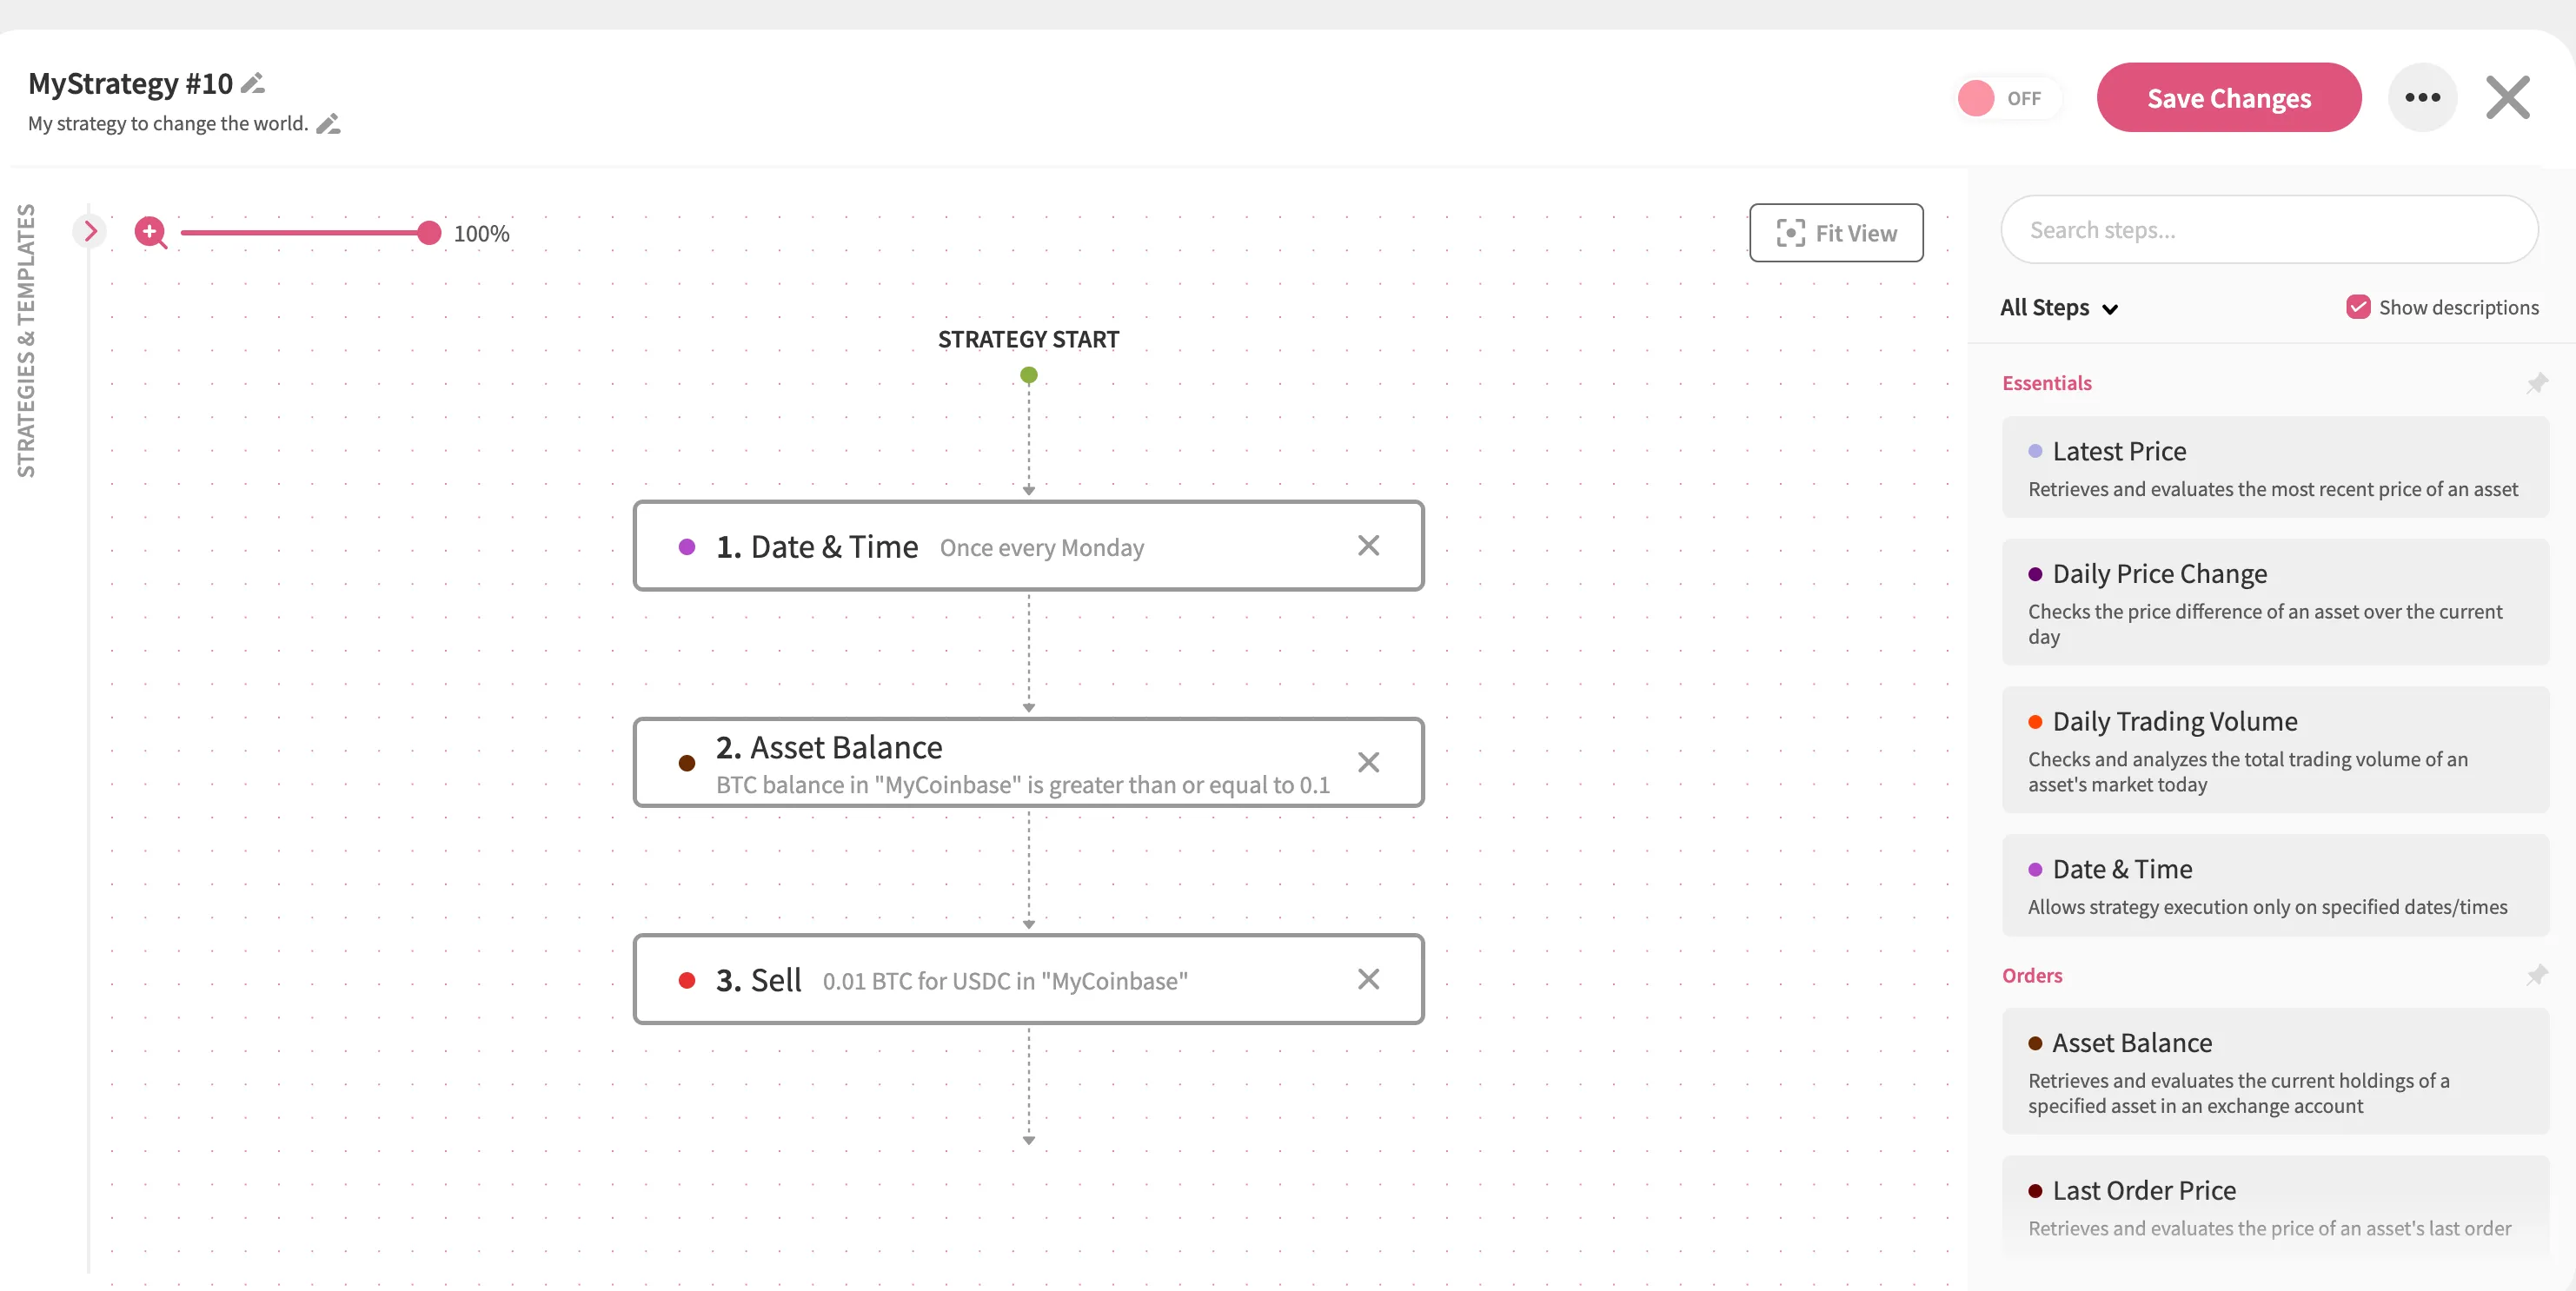
Tip 5: Use Asset Balance and Order Count Steps Before Placing an Order
Before placing an order, it’s always wise to check if you have the necessary funds using the Asset Balance step. While your strategy won’t break without this step, you’ll encounter error messages on the results page if there aren’t enough funds for the order. Including this step helps you manage your strategy’s execution flow and avoid such errors altogether.
Additionally, it’s often not ideal to place an order if a previous one executed by the same strategy has already been filled within a recent timeframe—such as the last day, week, or month. To prevent this, use the Order Count step. This step blocks your strategy from proceeding if an order has already been placed within your specified time period.
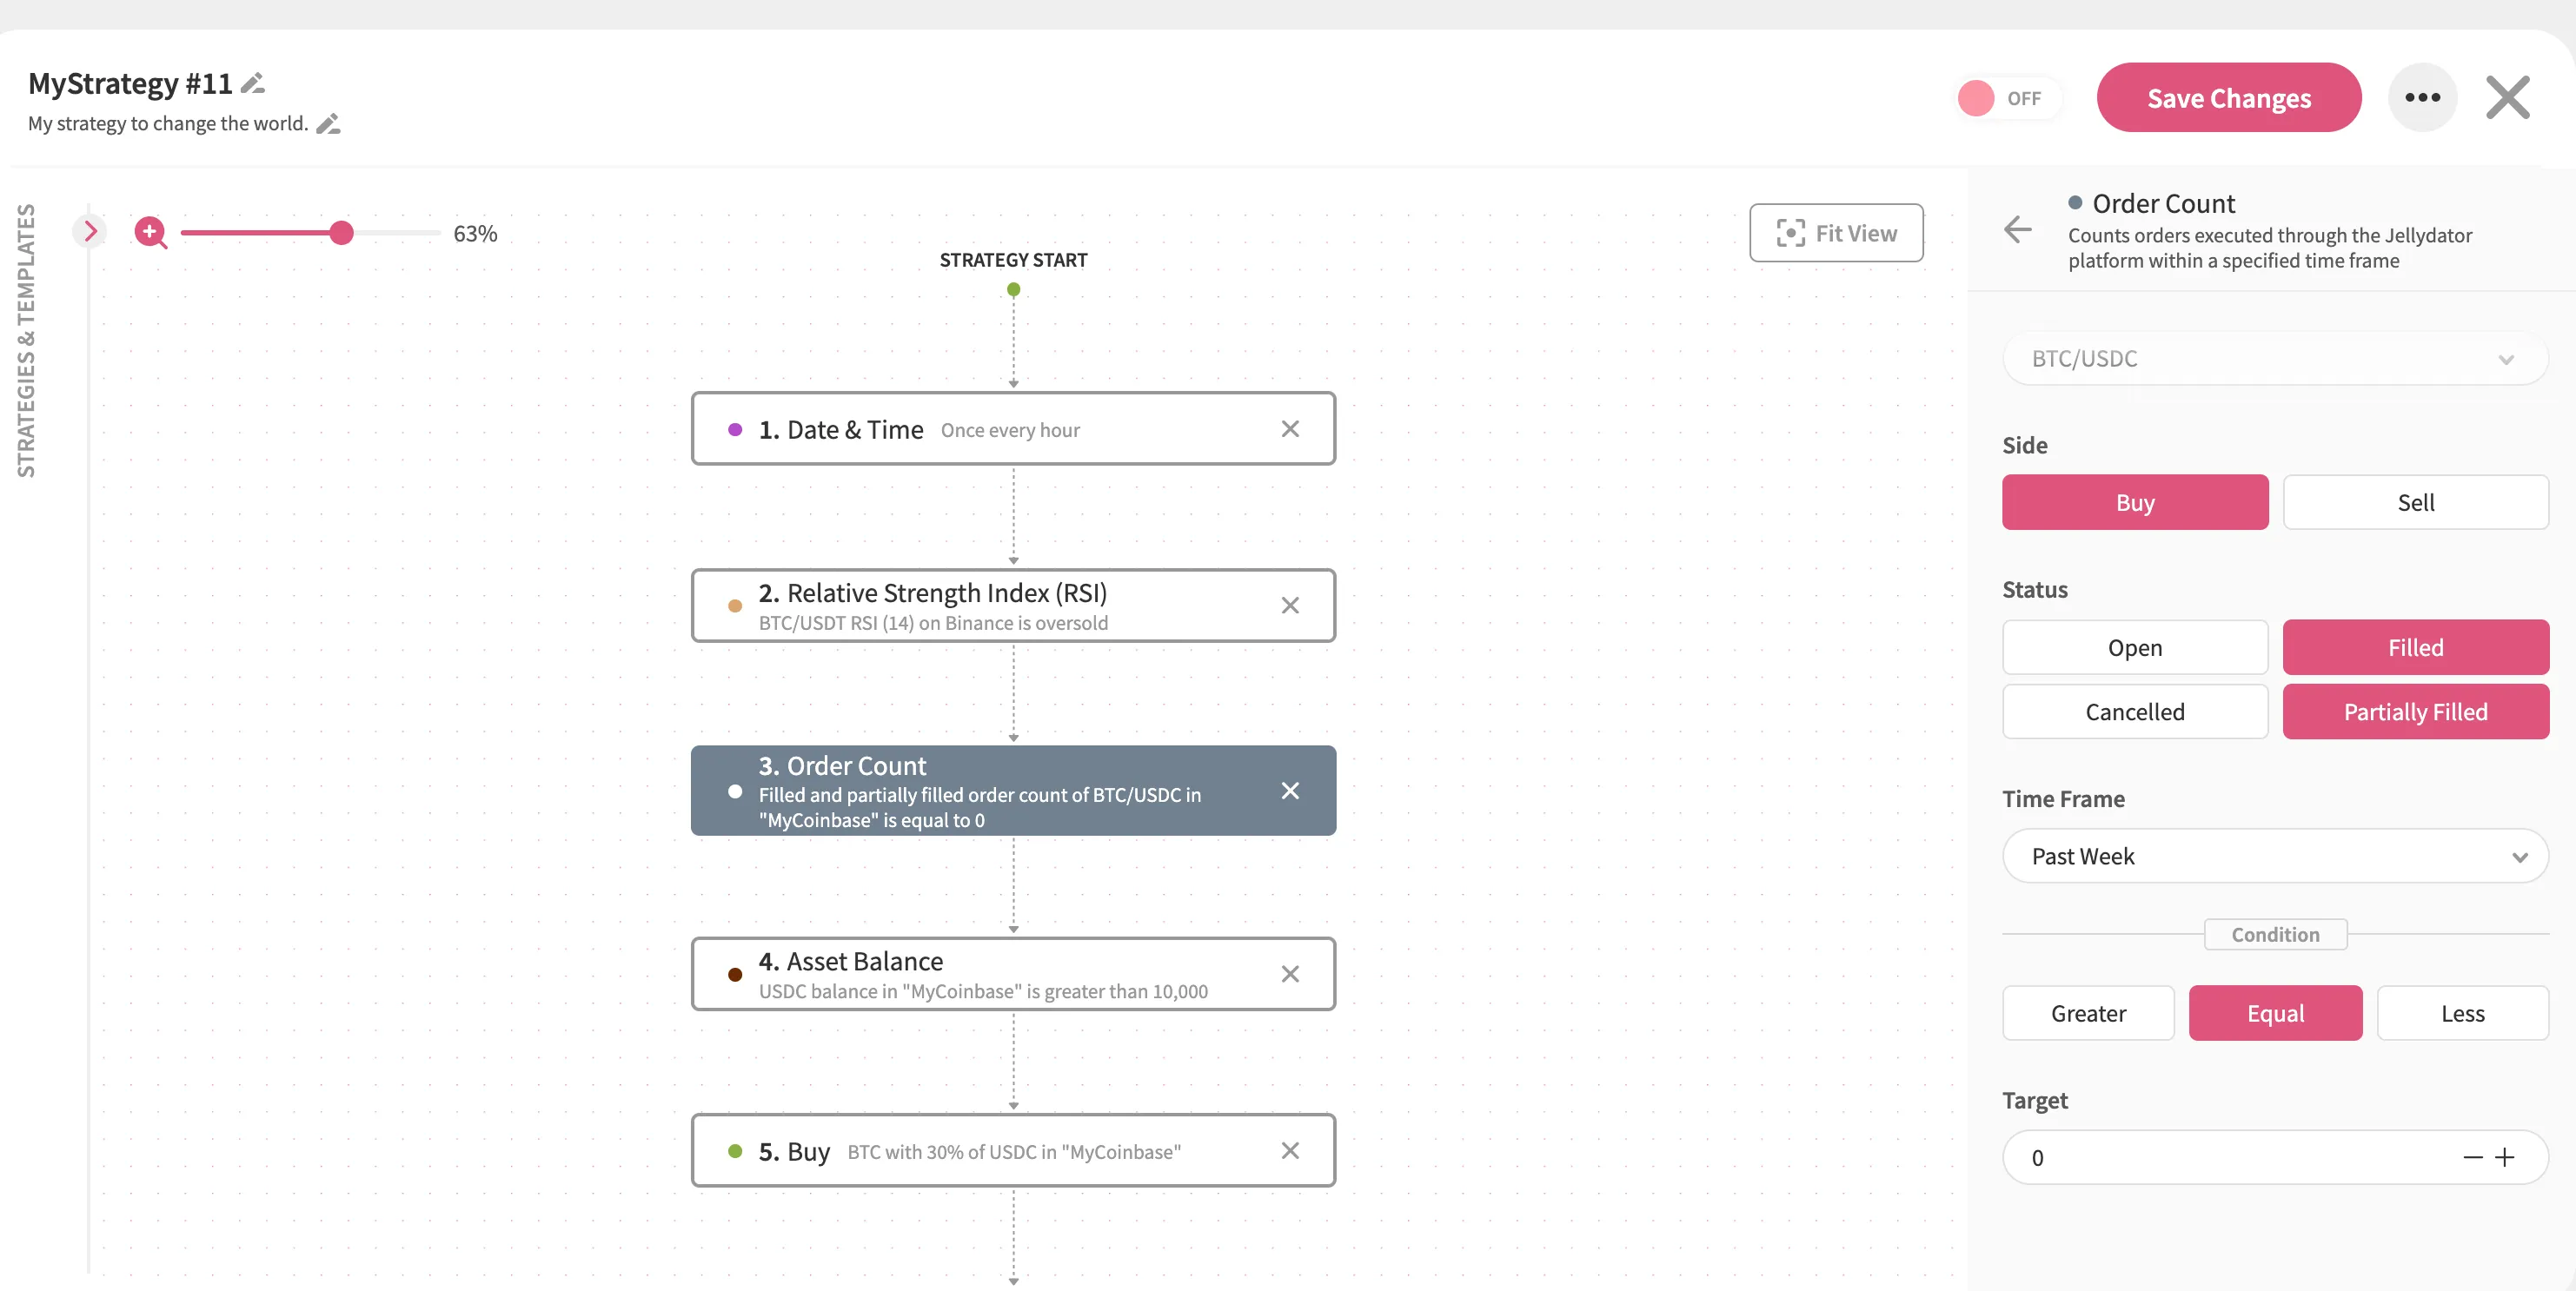
By combining Asset Balance and Order Count steps, you can ensure your strategy runs smoothly and avoids unnecessary errors or redundant orders.
Conclusion
While there are countless ways to fine-tune your strategies, these tips address some of the most common challenges you might face. Think of them as general guidelines to help you build more effective and efficient strategies. That said, there may be advanced scenarios where these tips don’t apply, and it’s perfectly fine to adapt them to suit your unique needs. Ultimately, the best approach depends on you—your goals, your strategies, and how you manage your exchange accounts. With thoughtful planning and a bit of experimentation, you’ll be well on your way to creating strategies that work for you.